Timer
The Timer component allows you to manage time interactively in your PandaSuite projects. It is particularly useful for triggering actions at specific moments, controlling animations, or creating time-based dynamic interactions.
This component is invisible in the interface but operates in the background to orchestrate events.
Use Cases
The Timer component can be used in various scenarios, such as:
- Creating a countdown for a quiz or game
- Triggering actions when the user is inactive
- Synchronizing with other components, such as a scrolling area
If you want to start an animation after a delay or automatically display an element after a few seconds, you can use the Delay property associated with the action. No need to use a Timer component for this.
Setting Up the Component
Insert the Timer Component
- Go to the Components section in PandaSuite.
- Add the Timer component to your project.
Note that the Timer is a system component that has no visible representation on the screen. It is accessible from the Objects list at the bottom left.
Initial Configuration
After adding the component, configure its key settings:
- Type: Choose between Normal and Inactivity.
- In Normal mode, the timer operates based on the specified duration and starts counting down or progressing as soon as it is activated or triggered.
- In Inactivity mode, the timer detects the absence of user interaction and resets with each activity. This allows you to trigger an action on user inactivity.
- Auto-play: Automatically starts when the screen or component containing the timer is displayed.
- Loop: Automatically restarts after each cycle.
- Duration: Total countdown duration.
Component Features
Trigger Events
The Timer component allows you to trigger actions based on time. Here are the main trigger events:
- Start playing
- Pause
- Stop playing
- End playing
- Time: If a marker is defined
💡 If multiple repetitions are enabled, the Stop playing trigger event will only occur at the end of all repetitions.
Interactive Actions
Here are the actions associated with this component:
- Play / Pause
- Play
- Pause
- Stop
- Forward
- Rewind
- Restart from the beginning
If a marker is defined:
- Change time
- Next time
- Previous time
- Random time
Advanced Interactions
Synchronizing with Other Components
The Timer can be synchronized with other components for complex interactions. For example, to scroll an area horizontally in sync with a Timer:
- Add a Scrolling Area component and set it up.
- Insert a Timer with a duration of 4 seconds and enable auto-play.
- Add a Synchronization component and select both components.
- Synchronize the Timer’s time with the “x” position of the Scrolling Area.
Using Markers
Markers allow you to execute actions at specific times:
- Create a marker at 4 seconds.
- Go to Actions.
- Add an action triggered by the marker.
- Select the desired action (e.g., open a pop-up).
You can also generate these markers from a data source. Create one marker, choose Enable source, set its Source, then bind Time to a numeric field expressed in seconds. For the full workflow, see Markers.
Practical Examples
Display the Timer
- Add a Timer and choose its maximum duration.
- Insert a text block.
- Use data binding to link the Timer value to the text. The value is expressed in seconds.
- To display the time in the correct format, use the Format Date function. This function requires a value expressed in milliseconds:
-
Multiply the time value by 1000 to convert it to milliseconds.
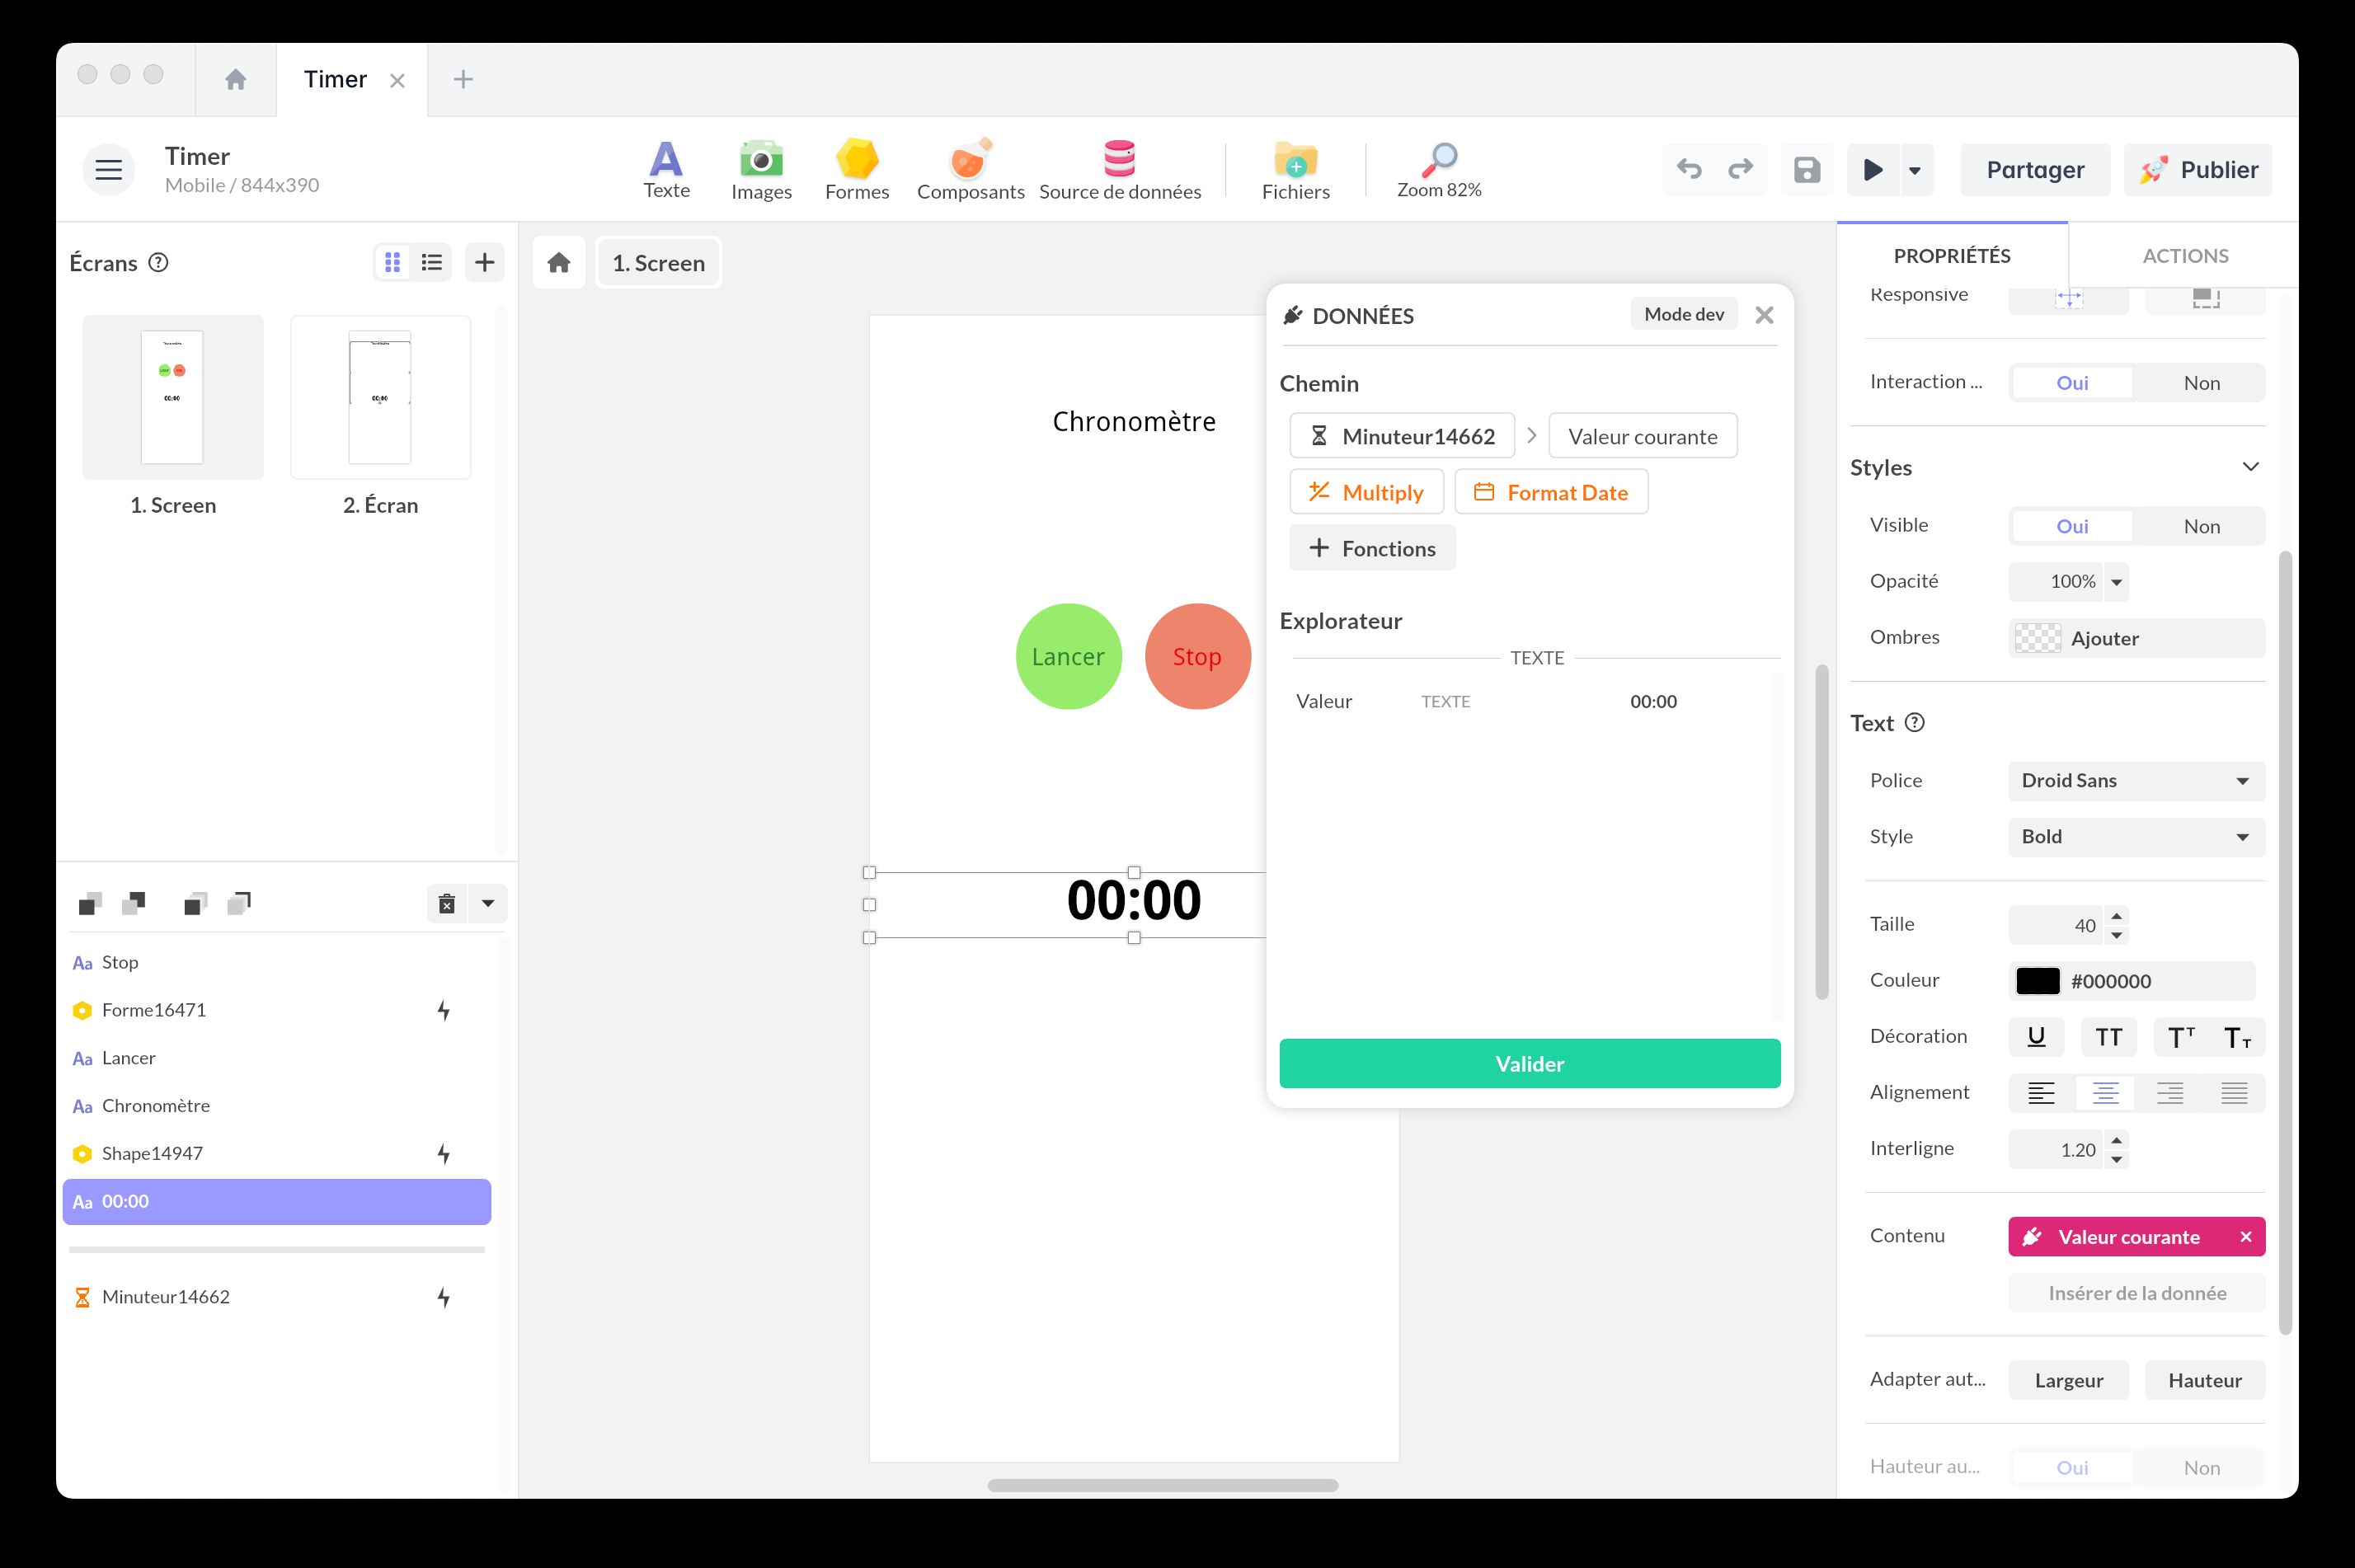
-
Then, to format it as MM:SS, select Custom and use the universal format codes mm:ss.
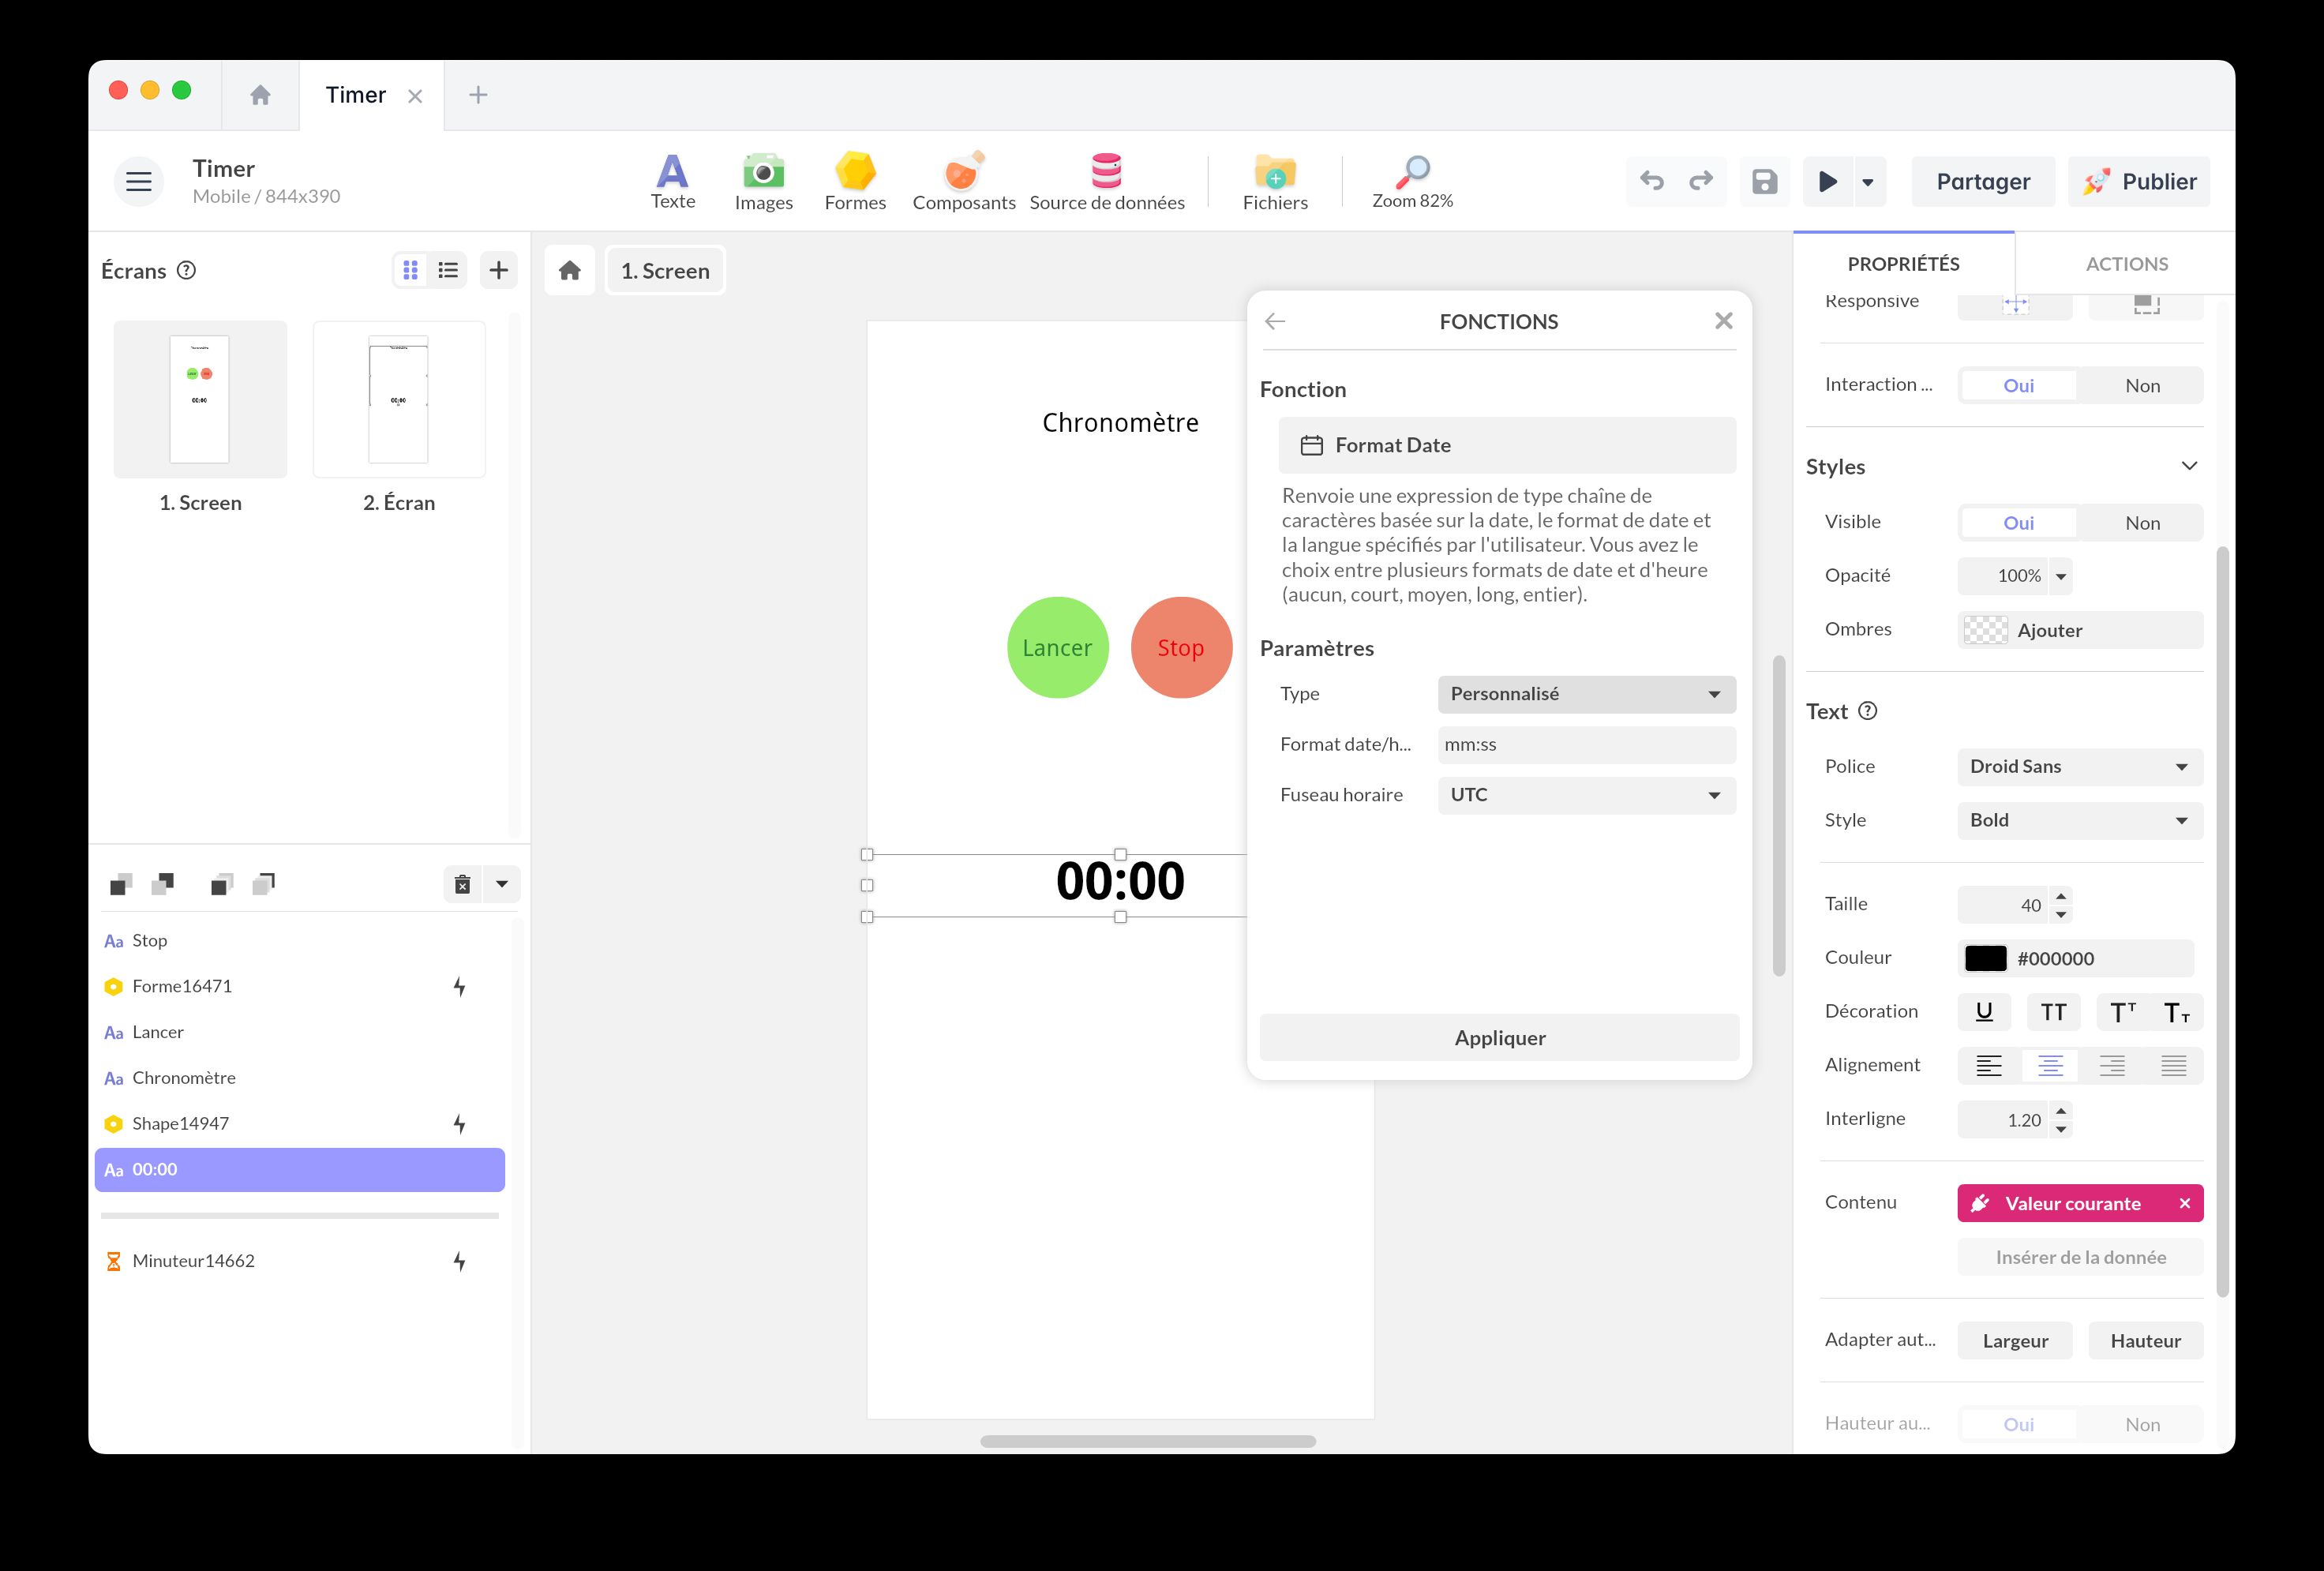
- For the Time Zone, select UTC, the global reference time that is not affected by time zones.
Stopwatch and countdown
Add this template to your account in just a few clicks. Edit and customize it freely.
→ Add this template to your accountDisplay a Countdown
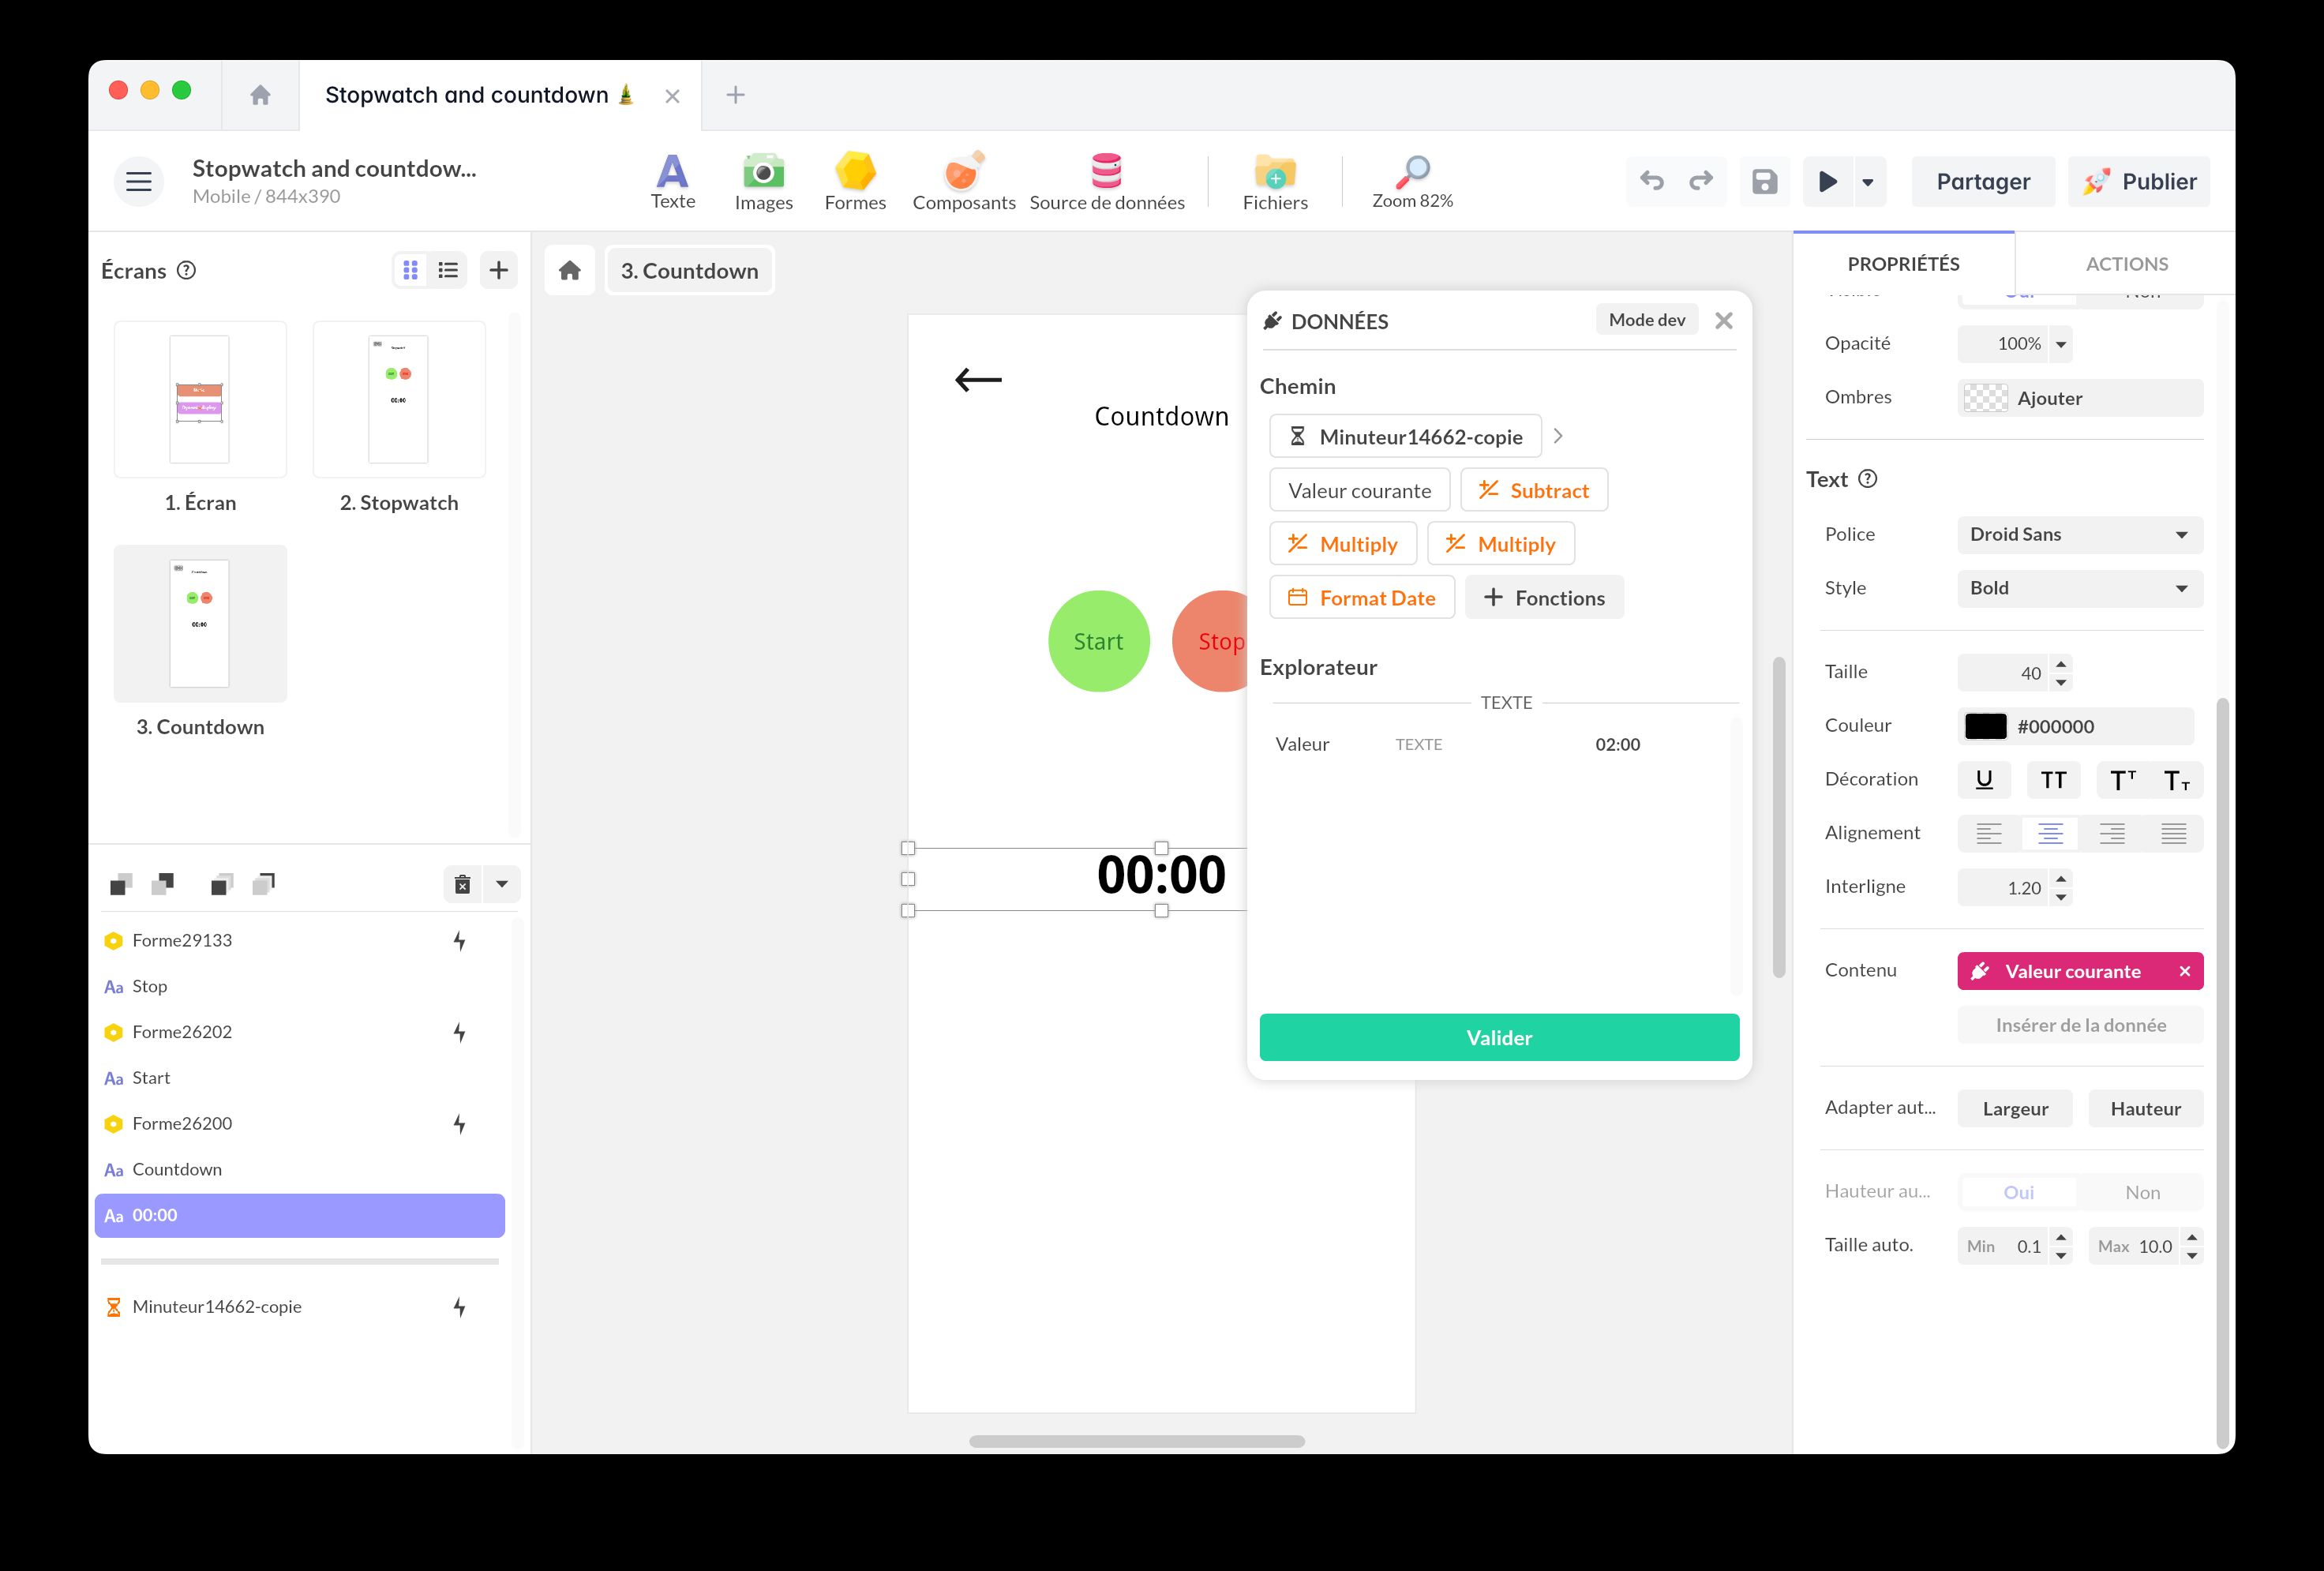
To display the timer as a countdown, the process is similar to displaying the timer, but with different functions and calculations:
- Add a Timer and choose its duration.
- Insert a text block.
- Use data binding to link the Timer value to the text. The value is expressed in seconds.
- To display the time in countdown mode:
- Apply the Subtract function and enter the total timer duration (in seconds).
- Use the Multiply function to multiply by -1 to reverse the values.
- Use the Format Date function. Multiply the time value by 1000 to convert it to milliseconds.
- Then, to format it as MM:SS, select Custom and use the universal format codes mm:ss.
- For the Time Zone, select UTC, the global reference time that is not affected by time zones.
Stopwatch and countdown
Add this template to your account in just a few clicks. Edit and customize it freely.
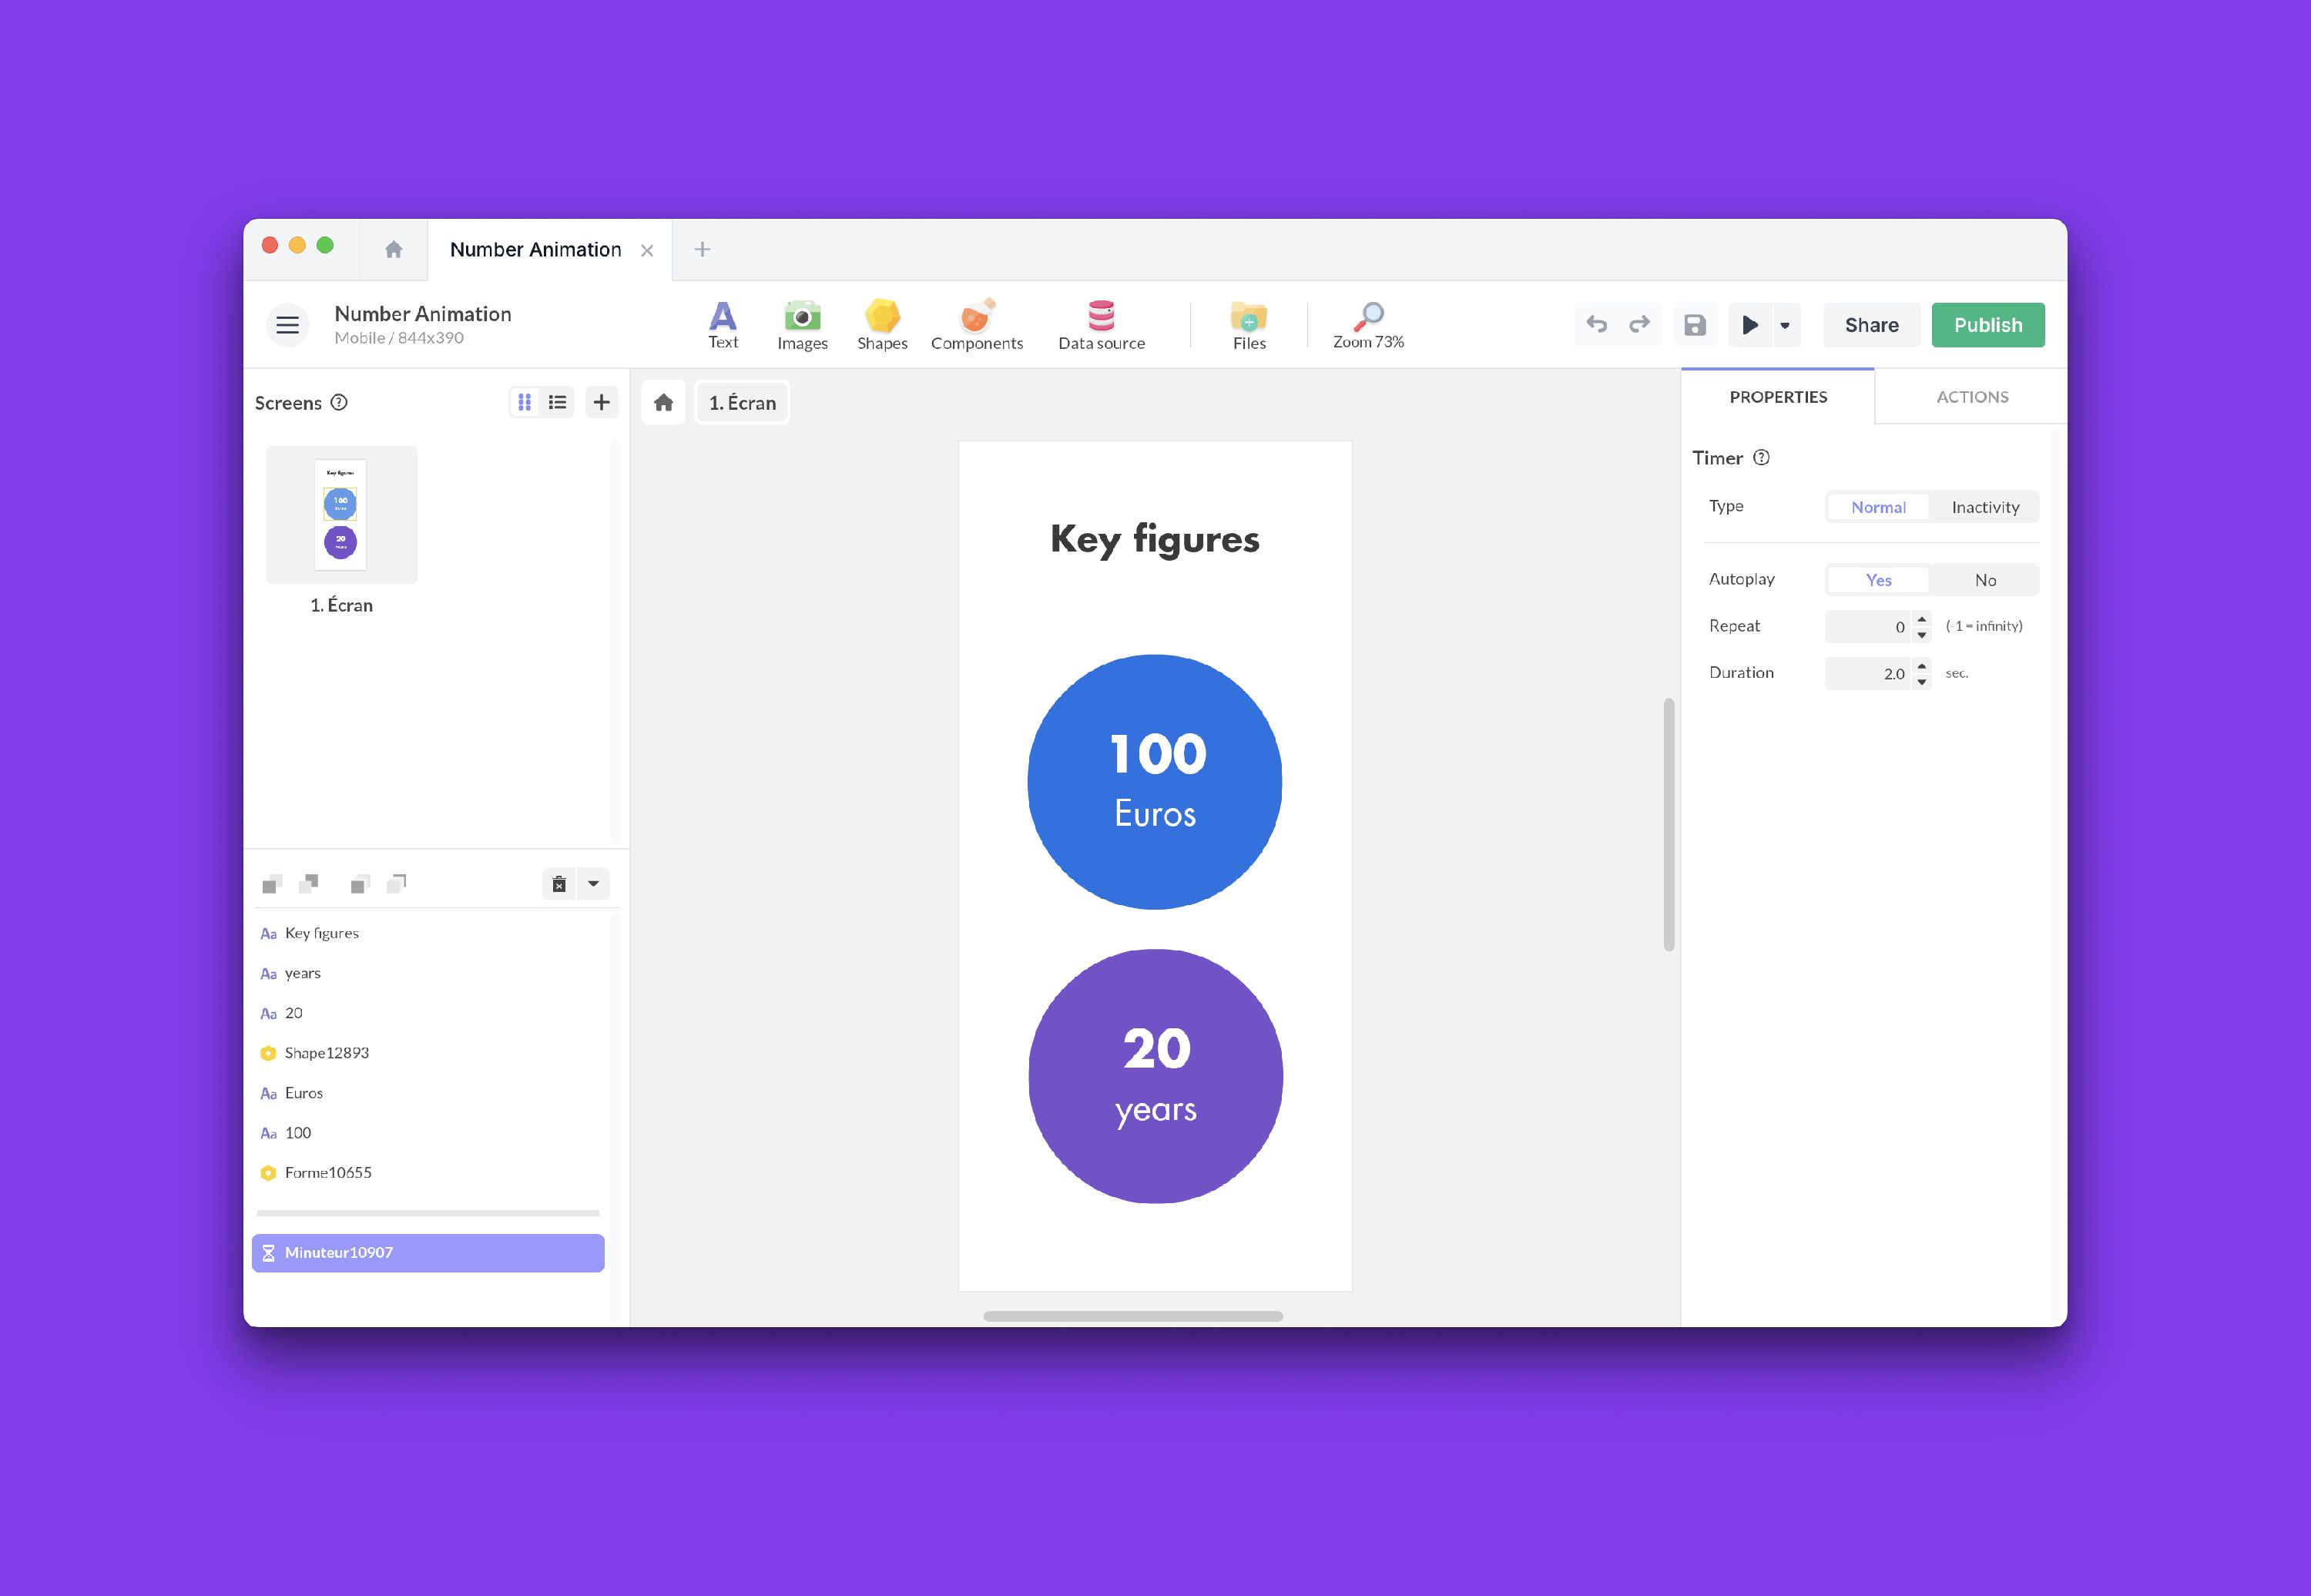
→ Add this template to your accountAnimate a Counter
Learn how to create custom animations for numerical data, such as an animated counter in interactive infographics.
Number Counter Animation
Add this template to your account in just a few clicks. Edit and customize it freely.
→ Add this template to your accountTrigger an Action on Inactivity
Read the dedicated article to learn more: