GPS & Geo-fencing
The GPS & Geo-Fencing component allows you to track a user’s GPS location in real time and trigger actions based on defined geographical areas. This component is ideal for creating location-based applications such as audio guides, interactive tours, or games based on the user’s position.
💡 This feature works entirely offline: your users do not need an Internet connection during their journey.
Use Cases
Here are some use cases for the GPS & Geo-Fencing component:
- Geolocated Audio Guides: Activate audio descriptions when the user enters a specific area.
- Interactive Tours: Guide users with specific information based on their location on a map.
- Location-Based Games: Create quests or challenges that unlock based on the user’s position.
- Indoor or Outdoor Signage Applications: Provide navigation instructions in physical spaces or events.
Setting Up the Component
Adding the Component
Insert the GPS component into your project. If you want it to be active throughout the application, make sure to insert it at the project level rather than within a single screen.
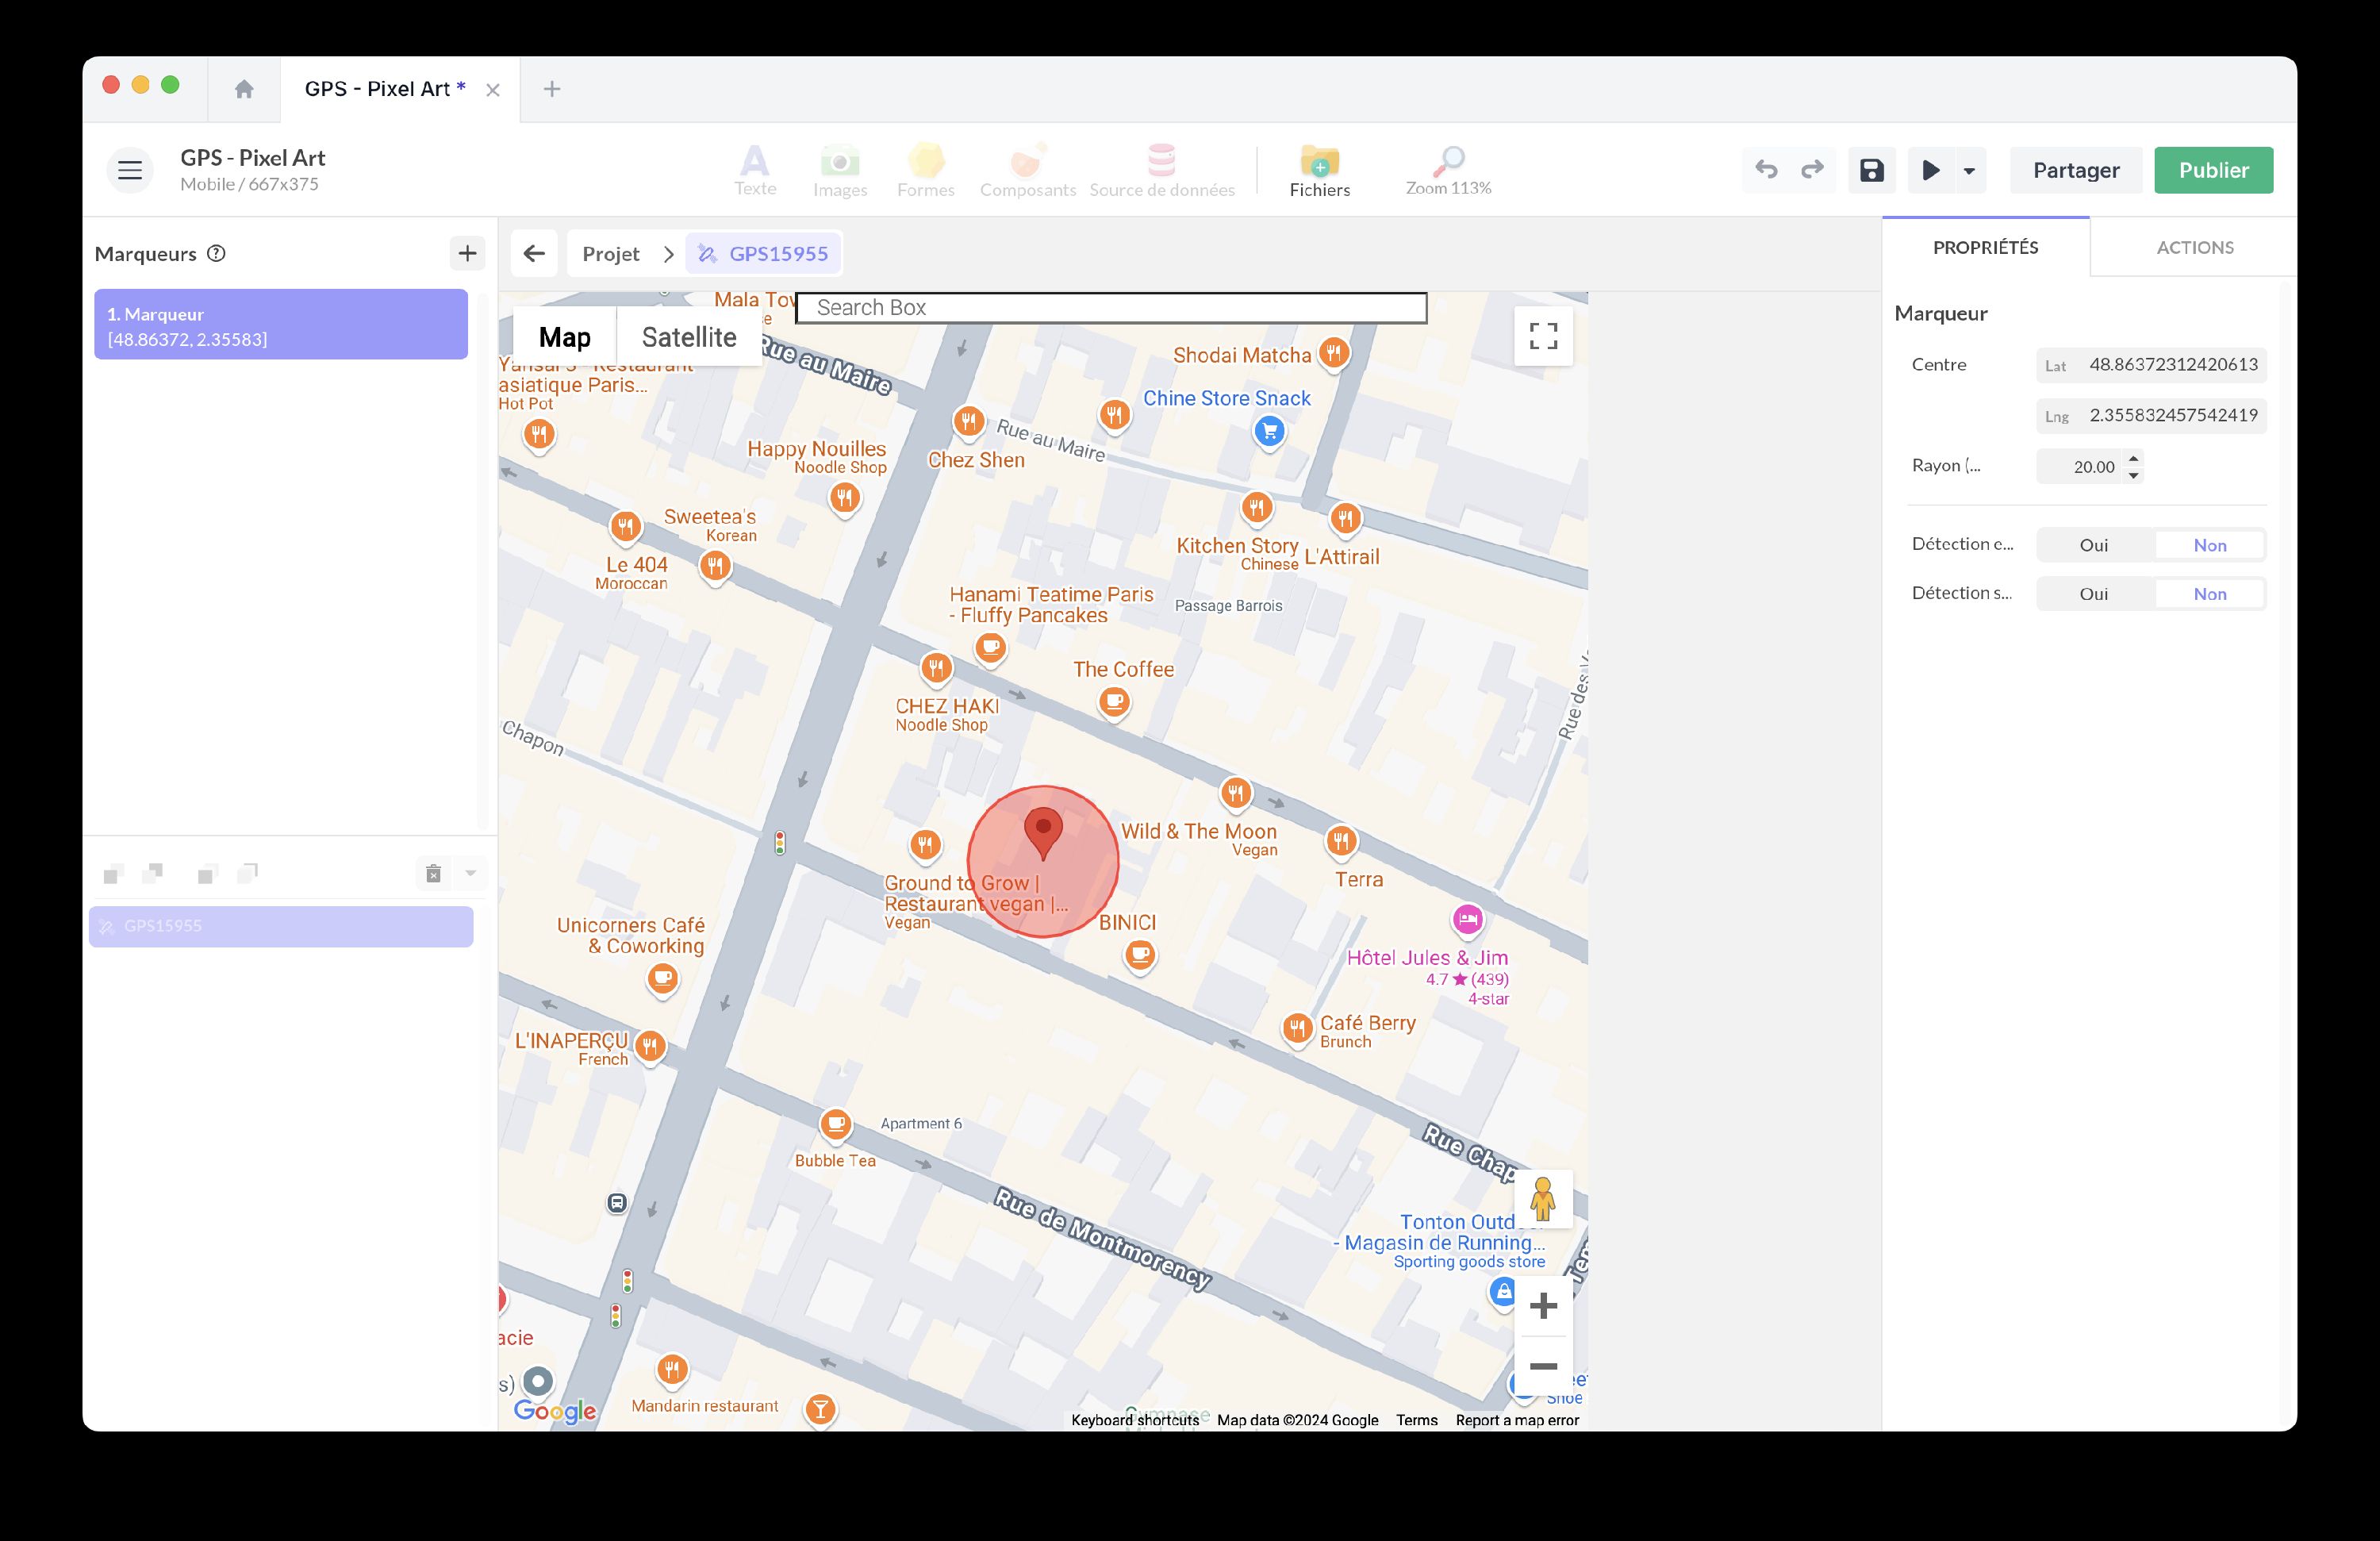
Open the GPS component from the Objects list. A Google Maps interface will appear: this is only for placing your position markers and will not be visible in your app.
💡 The GPS component is non-graphic. If you want to display a map in your app, use the Map component.
Configuring Geo-Fencing Zones
Using markers, add geographical zones by entering an address or clicking directly on the map. Name each zone to make them easier to identify in your actions. Click the + button on the left to create a marker.
Add Markers
-
Click the + button to add a marker on the map.
-
Enter an address or click directly on the map to place it.
-
Name each area to make it easier to identify them in your actions.
Configure the properties of each marker.
Here are the properties for each marker:
- GPS Coordinates of the Center (latitude, longitude)
- Radius (in meters): Set the detection distance from the center of the zone.
- Enter Zone Detection: Trigger an action when a user enters a defined zone.
- Exit Zone Detection: Trigger an action when a user leaves a specific zone.
⚠️ You must choose either Entry or Exit detection to activate your marker. You can also link the creation of your geo-fencing zones to a dynamic source via data binding.
Component Features
Trigger Events
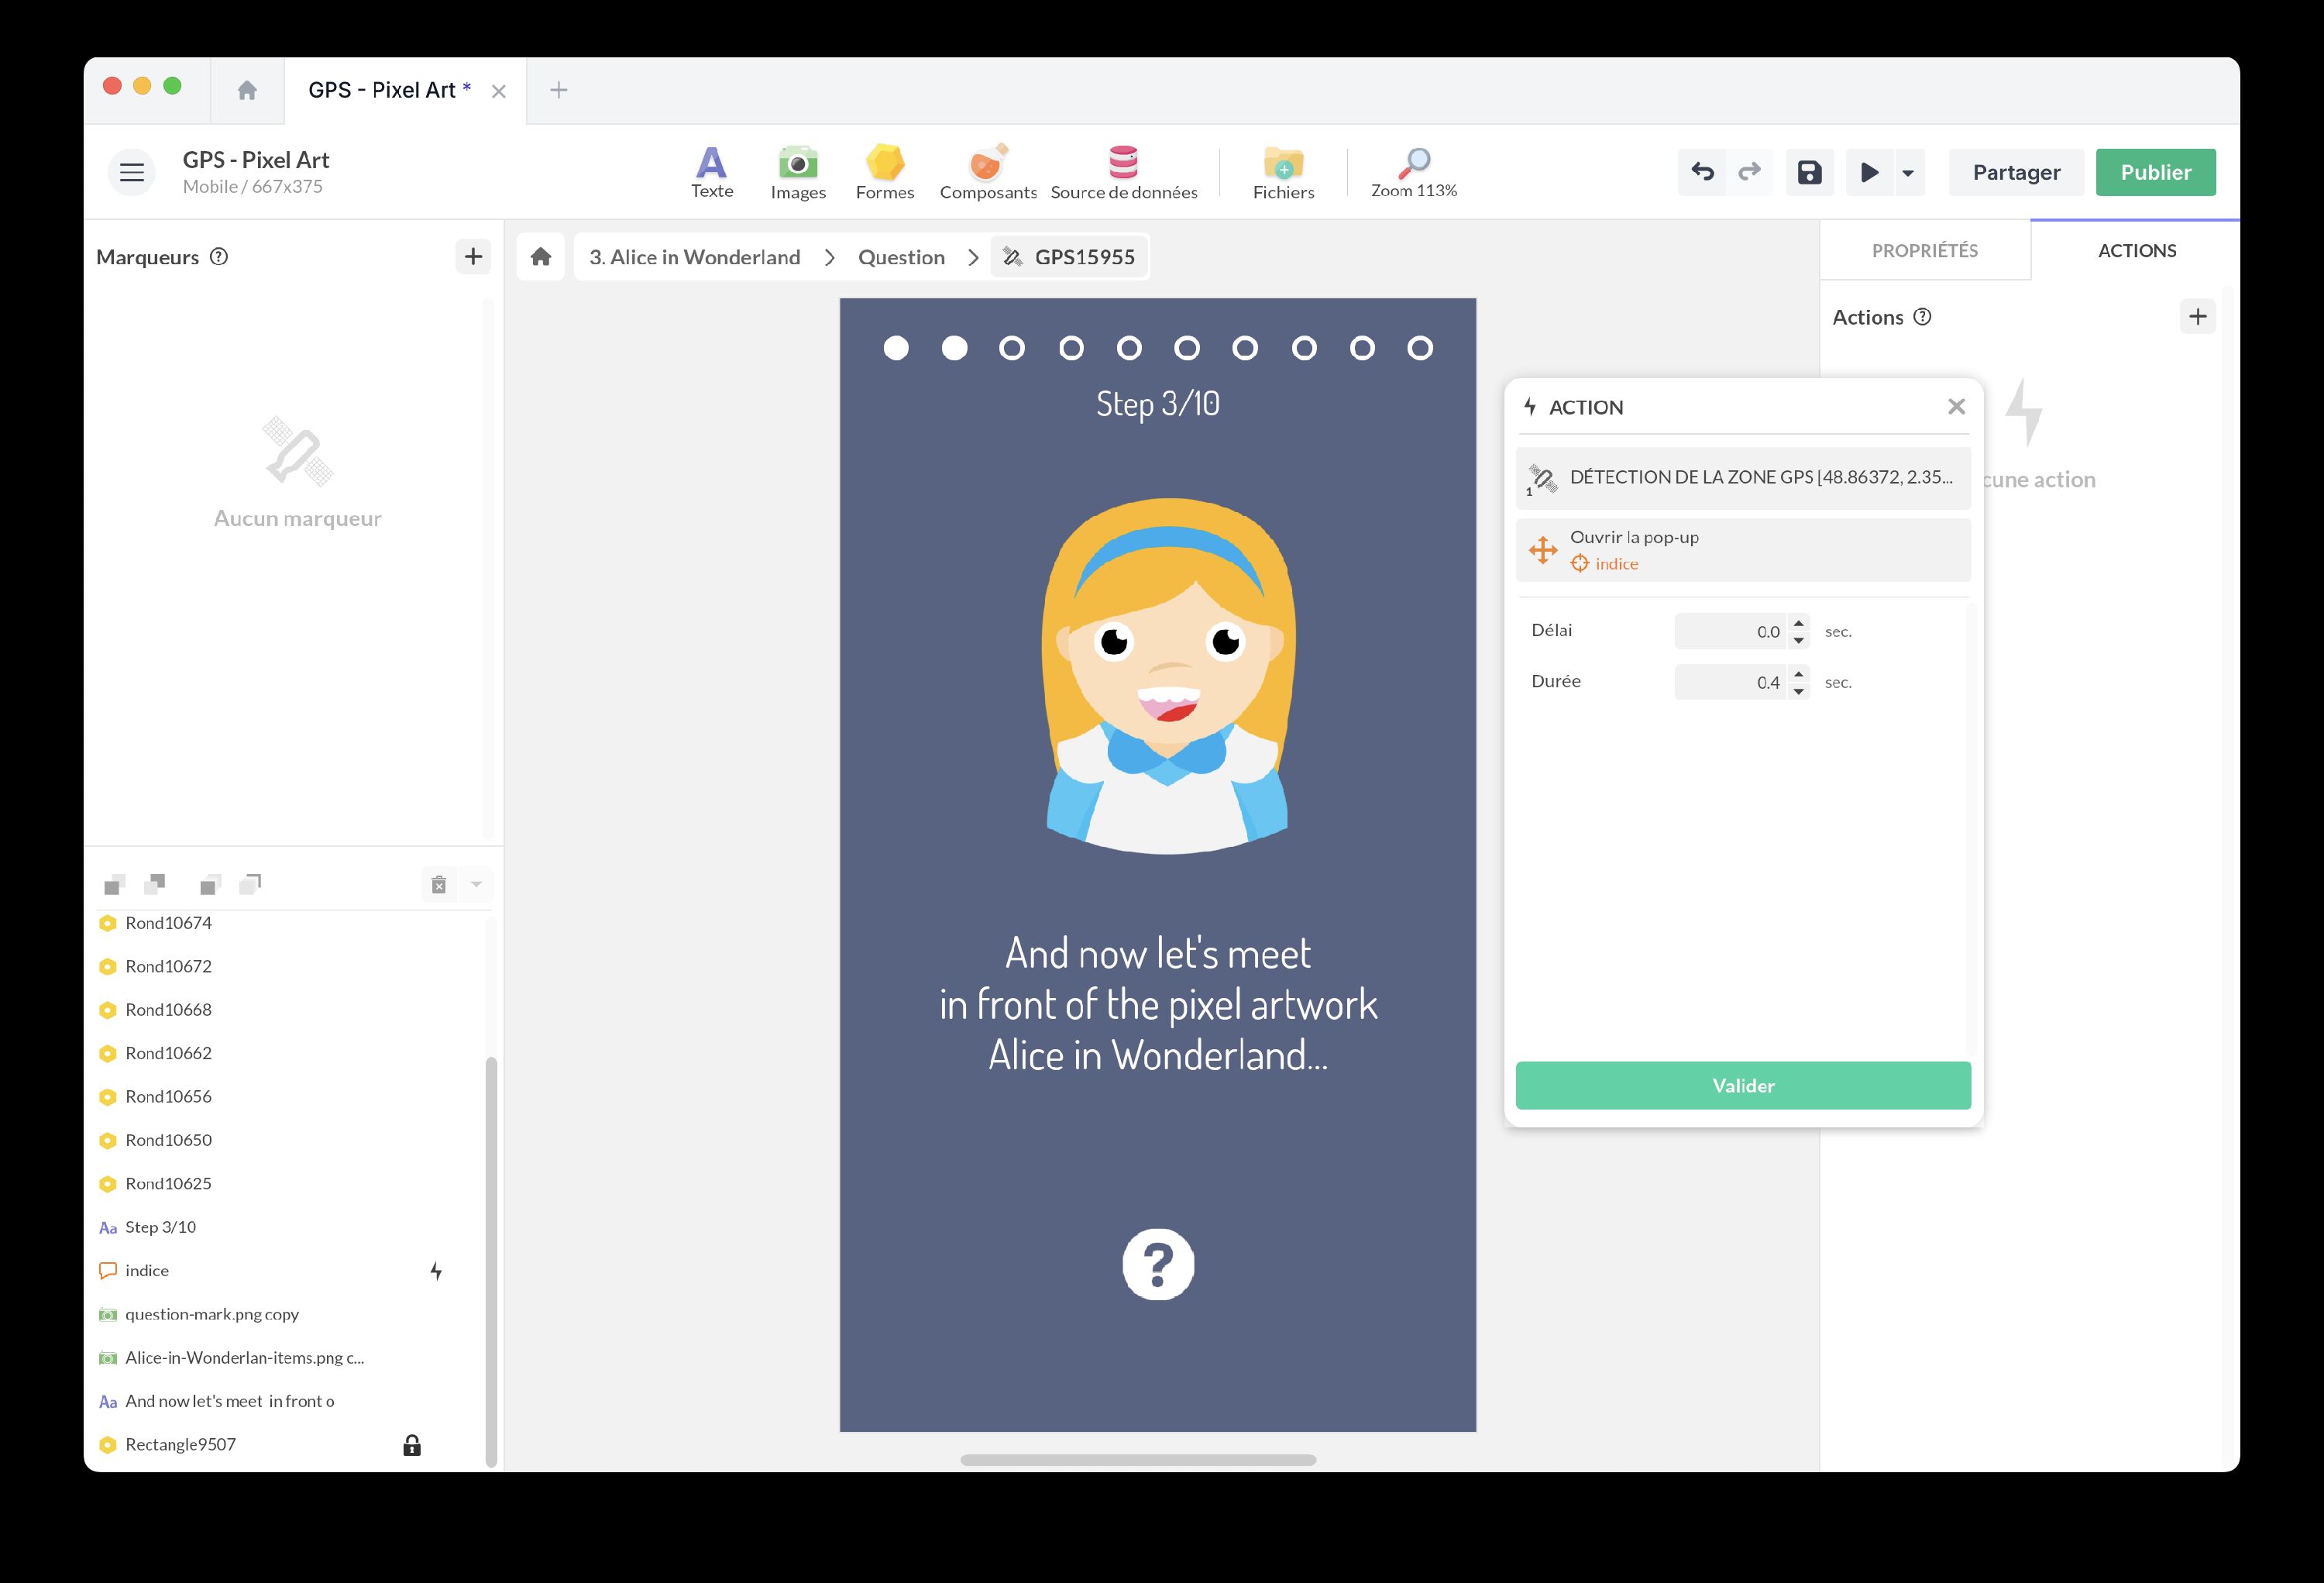
The GPS component can also act as a trigger for various actions. Available triggers include:
- Zone Detection [marker]
- Geolocation Error
Interactive Actions
There are no interactive actions associated with this component.
Interactions
Triggering Content Based on GPS Position
Imagine an urban audio tour application where each GPS zone triggers specific audio content. When a user enters an area defined by a marker, the corresponding content is automatically loaded and played.
You can do this via manually created markers or dynamically created markers.
Via Manually Created Markers
Use this method when you have a limited number of fixed GPS points (e.g., audio guide with a few specific locations, fixed tourist route).
Here are the steps:
-
Creating a Marker
- Insert the GPS component into your scene.
- Click + to add one or more markers.
- Define a detection radius if necessary.
-
Creating a Trigger Action
- Select your GPS component and use the Zone Detection trigger for each marker.
- Configure the associated action.
Via Dynamically Created Markers (Using a Dynamic Collection)
Use this approach when you want to easily add or modify GPS points without going back to the editor, or when points are generated dynamically (e.g., personalized tours, adding new POIs via a back-office).
Marseille GPS City Guide
Add this template to your account in just a few clicks. Edit and customize it freely.
→ Add this template to your account-
Creating a Marker
- Insert the GPS component into your scene.
- Click + to add one or more markers.
- Define a detection radius if necessary.
-
Add Dynamic Source
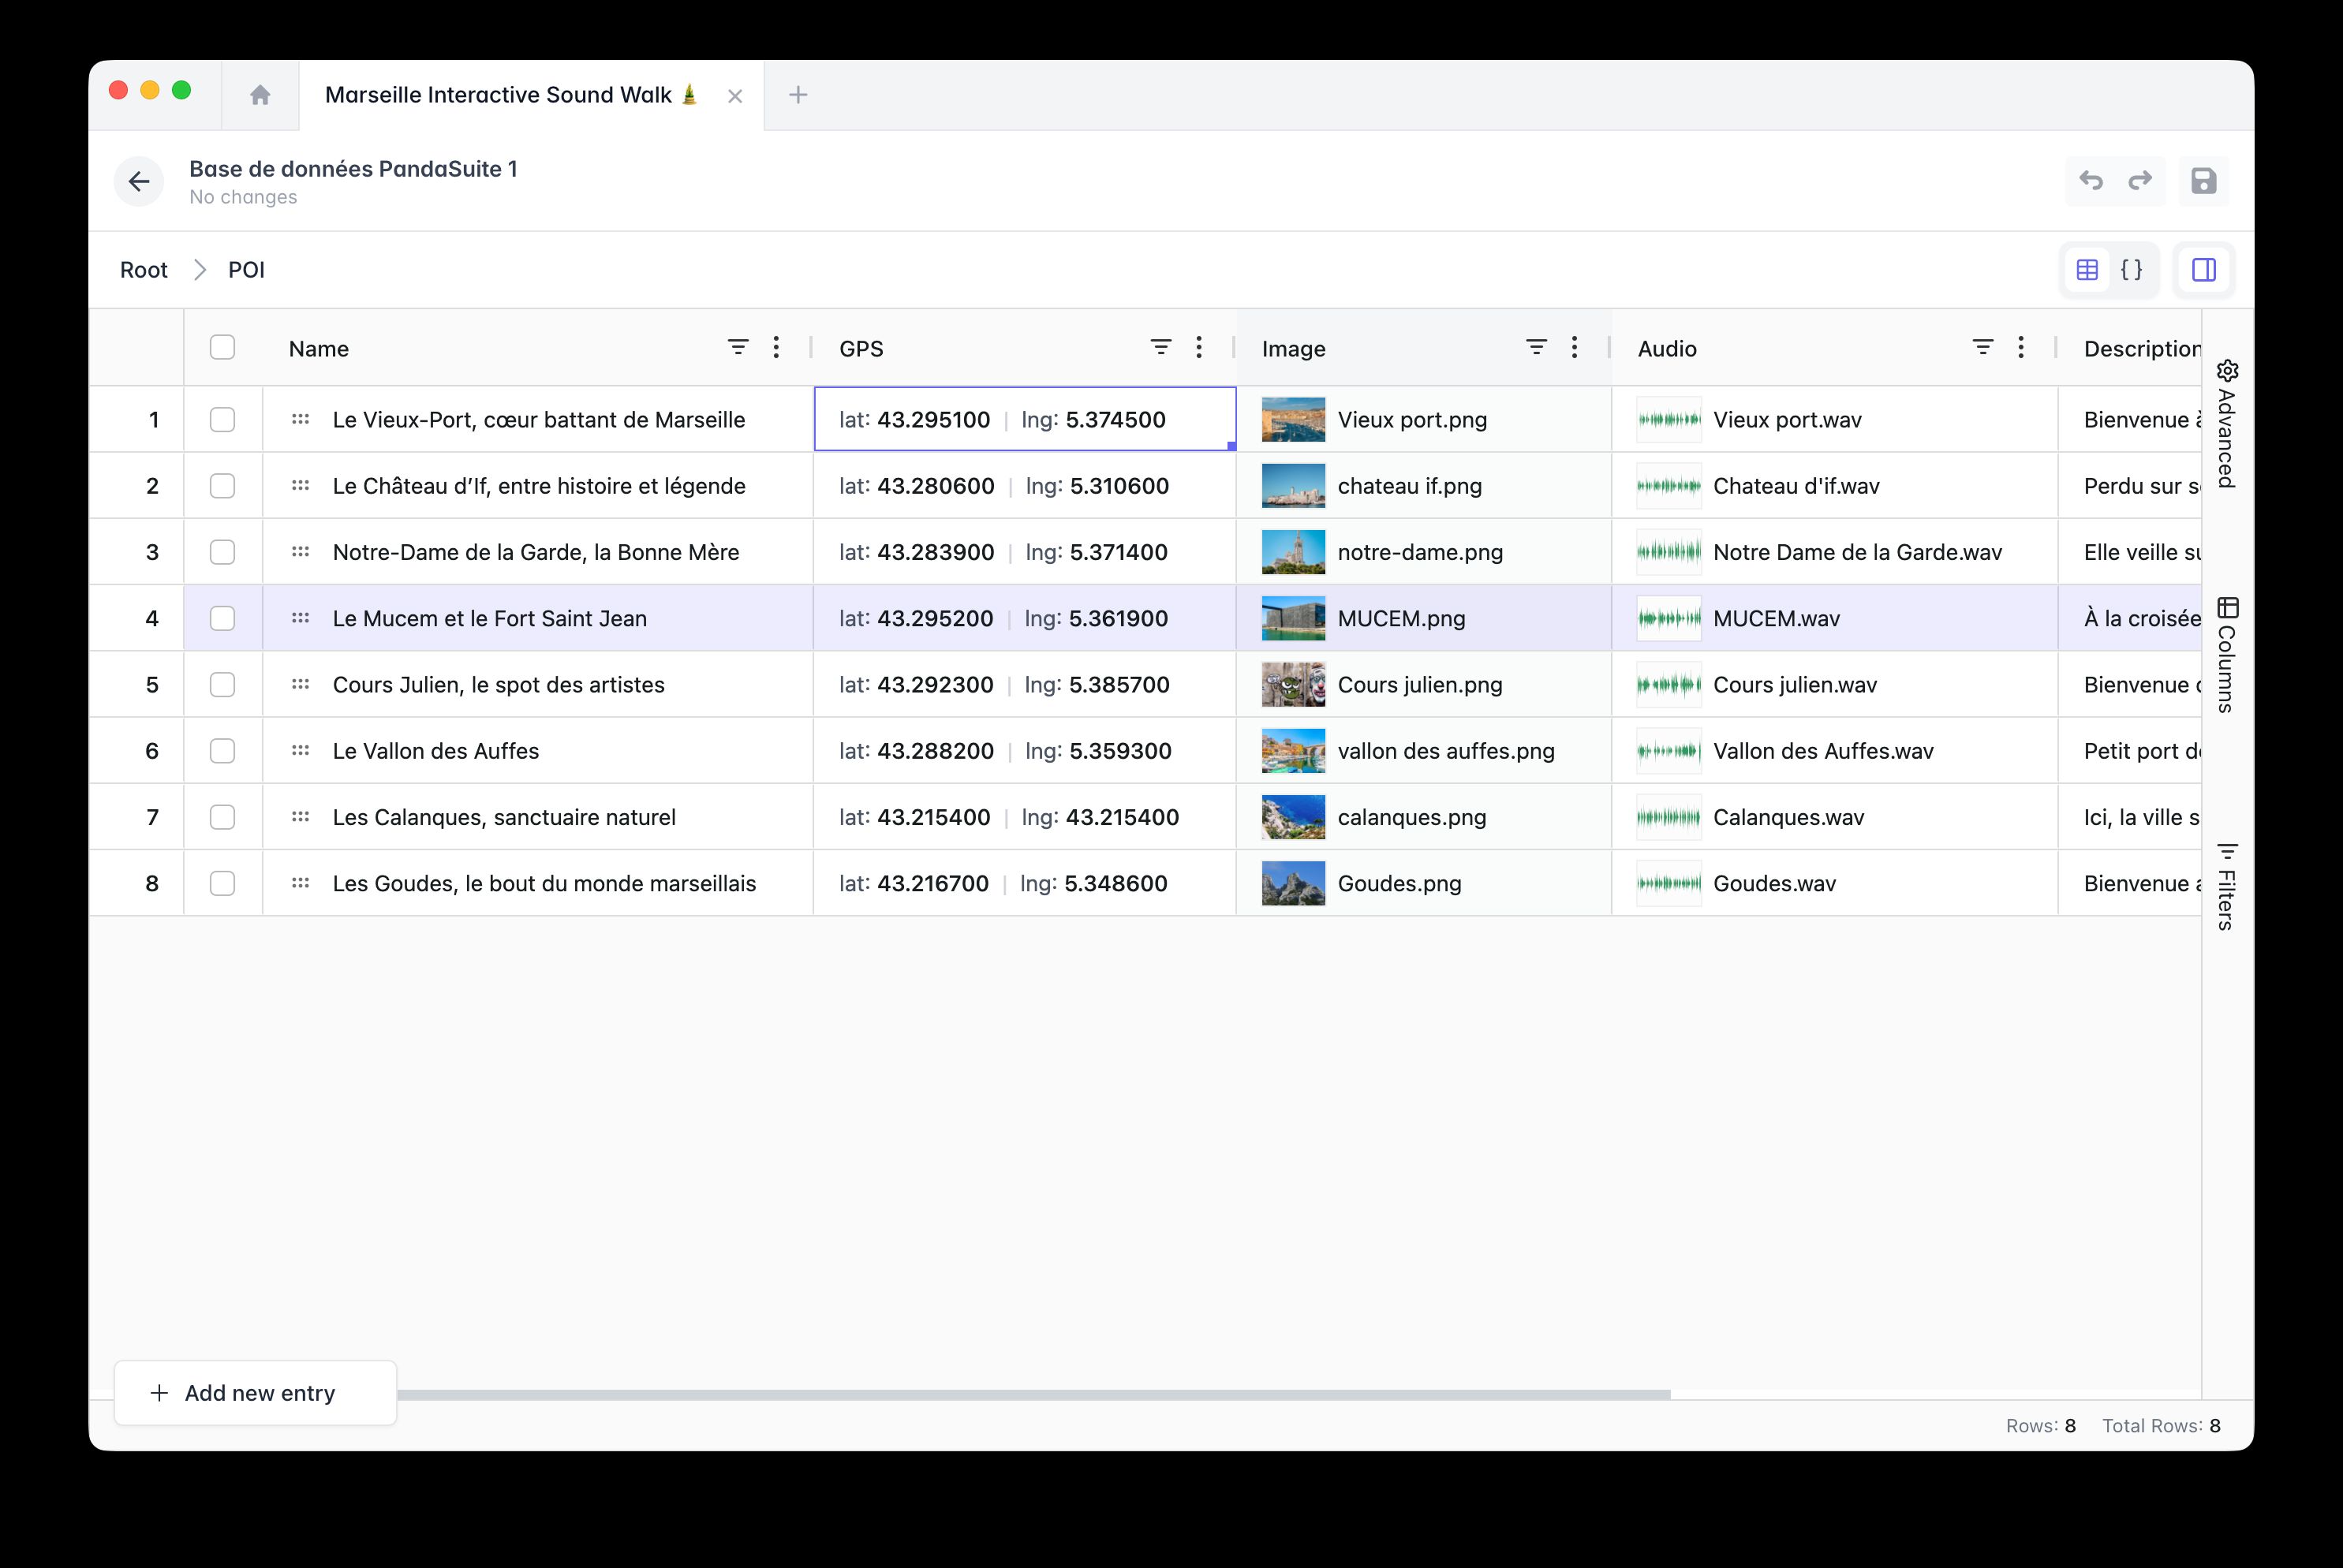
Once you have created a marker, use a collection and the databinding system to generate the other markers dynamically:
-
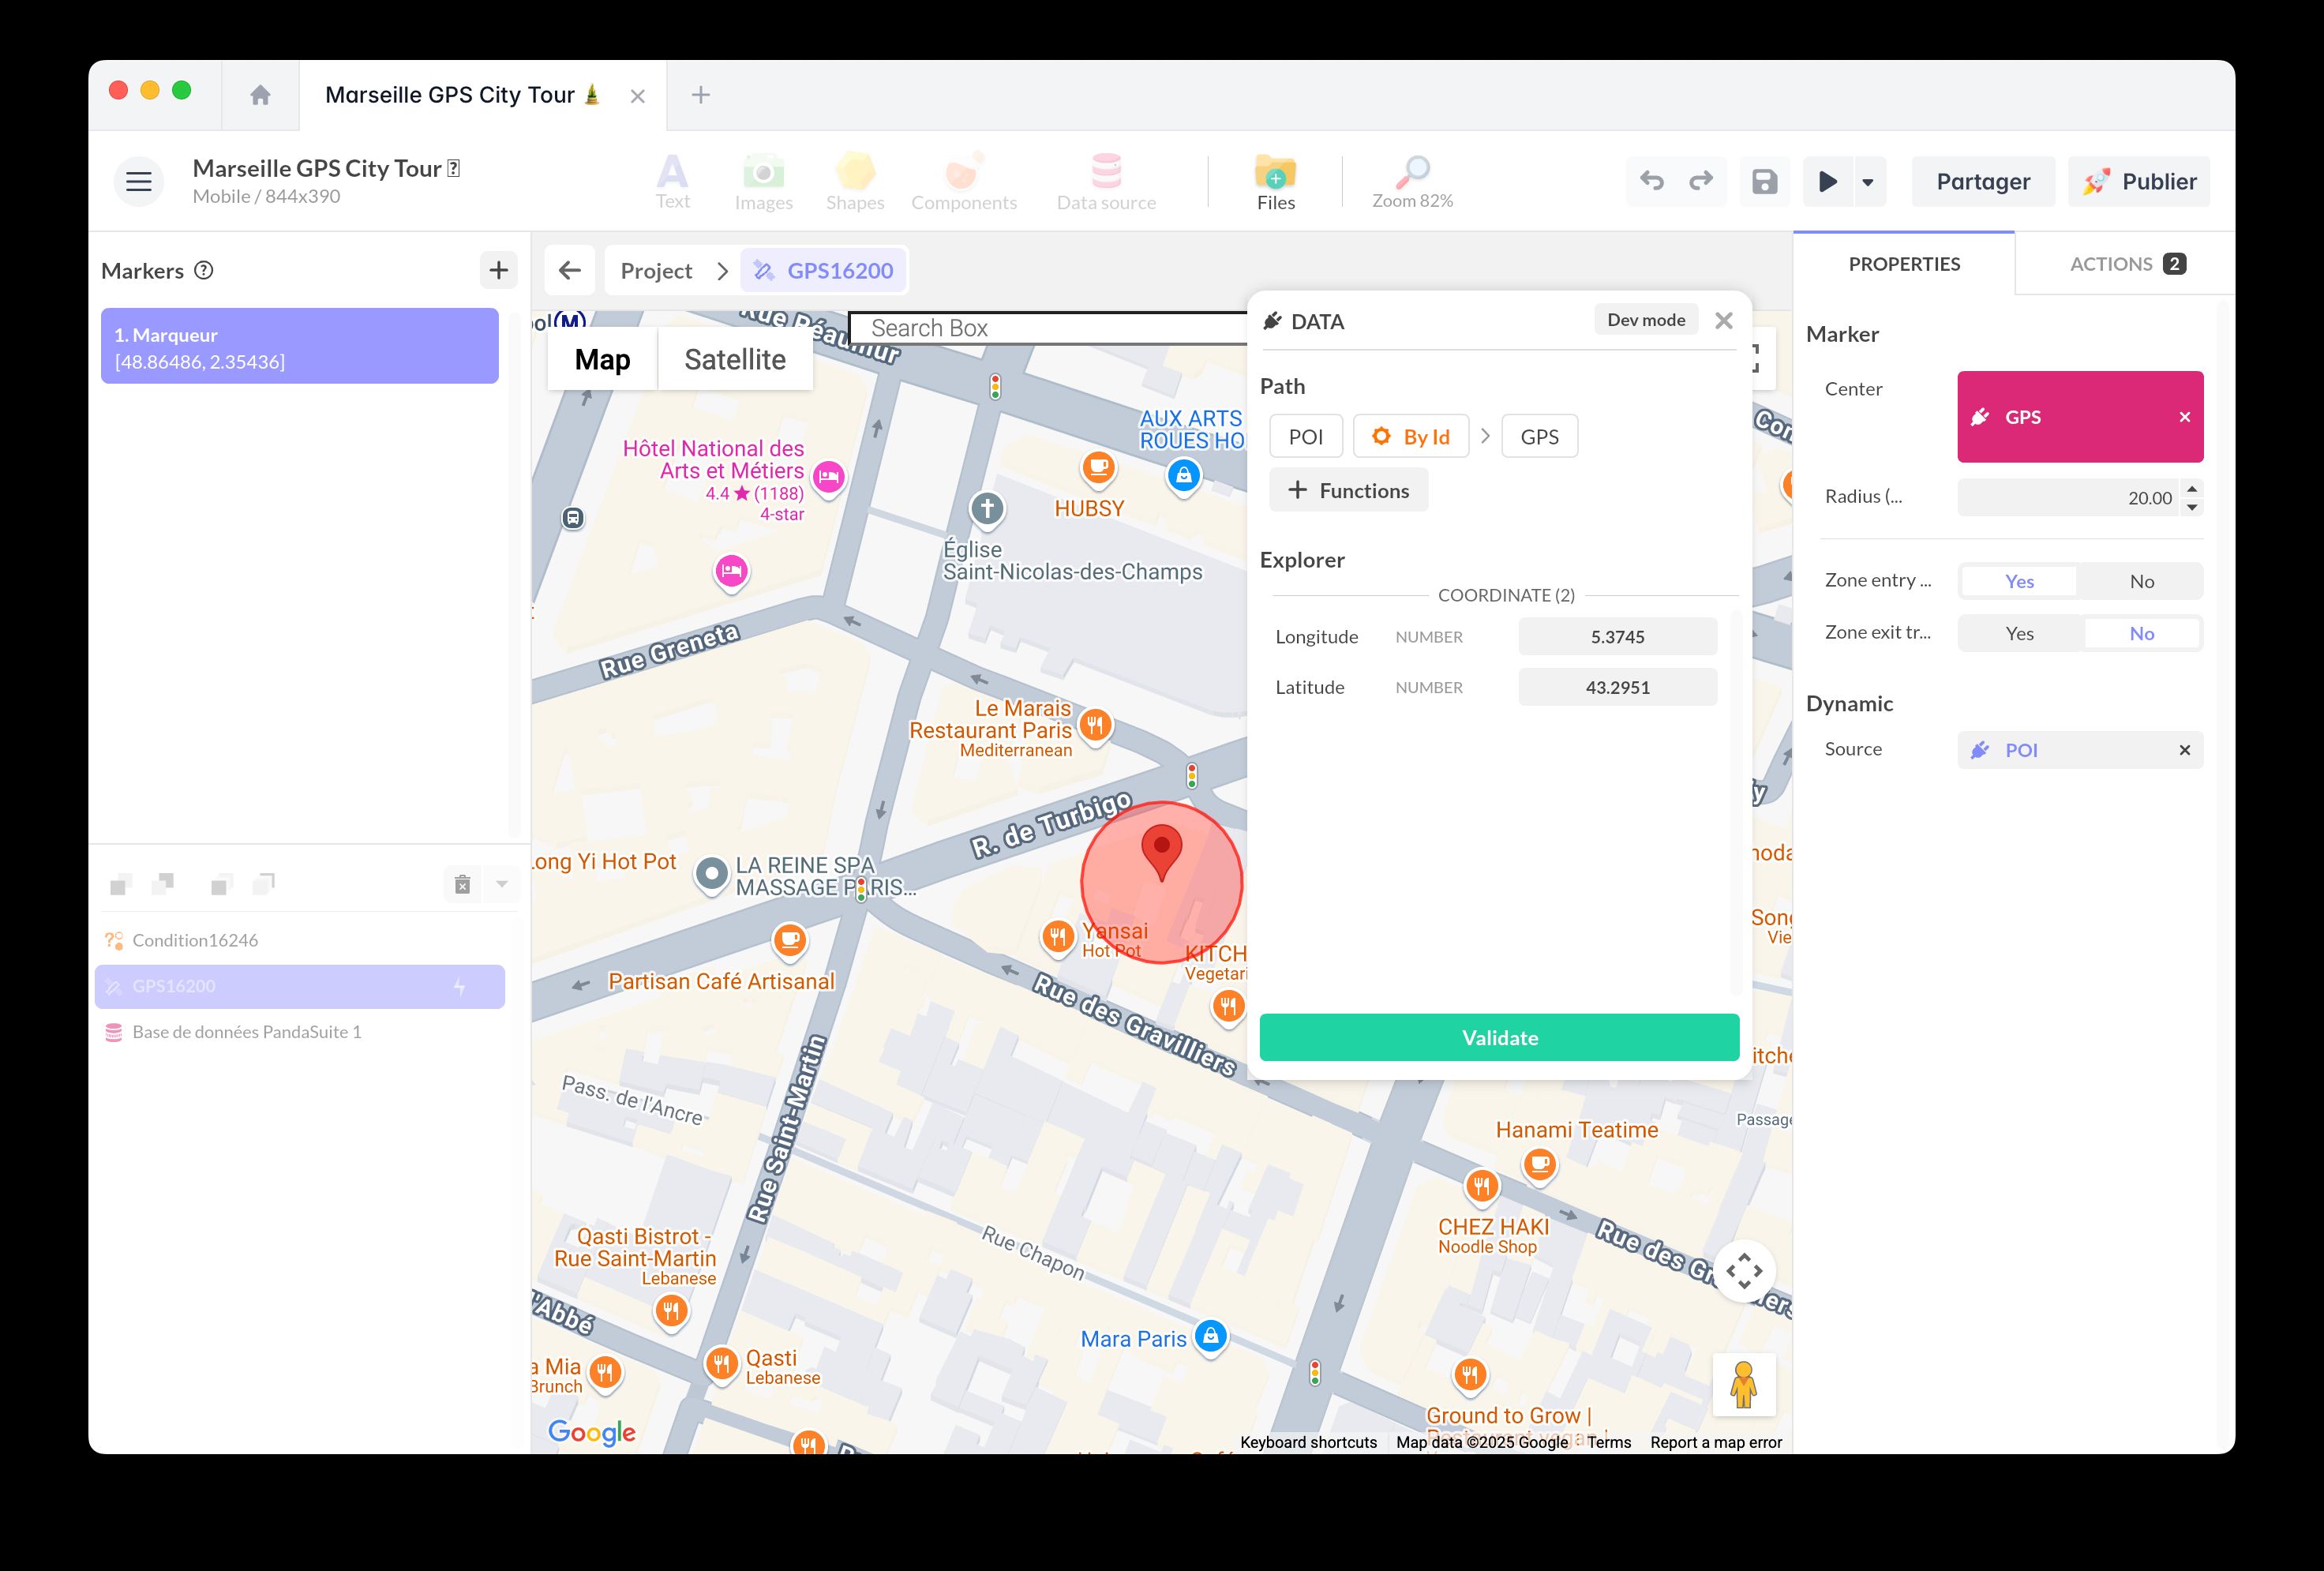
Create a collection in the Datastore that stores POIs. Add a field for each POI’s position using the Coordinate type.
-
Select your marker and activate the Dynamic Source by linking your previous collection.
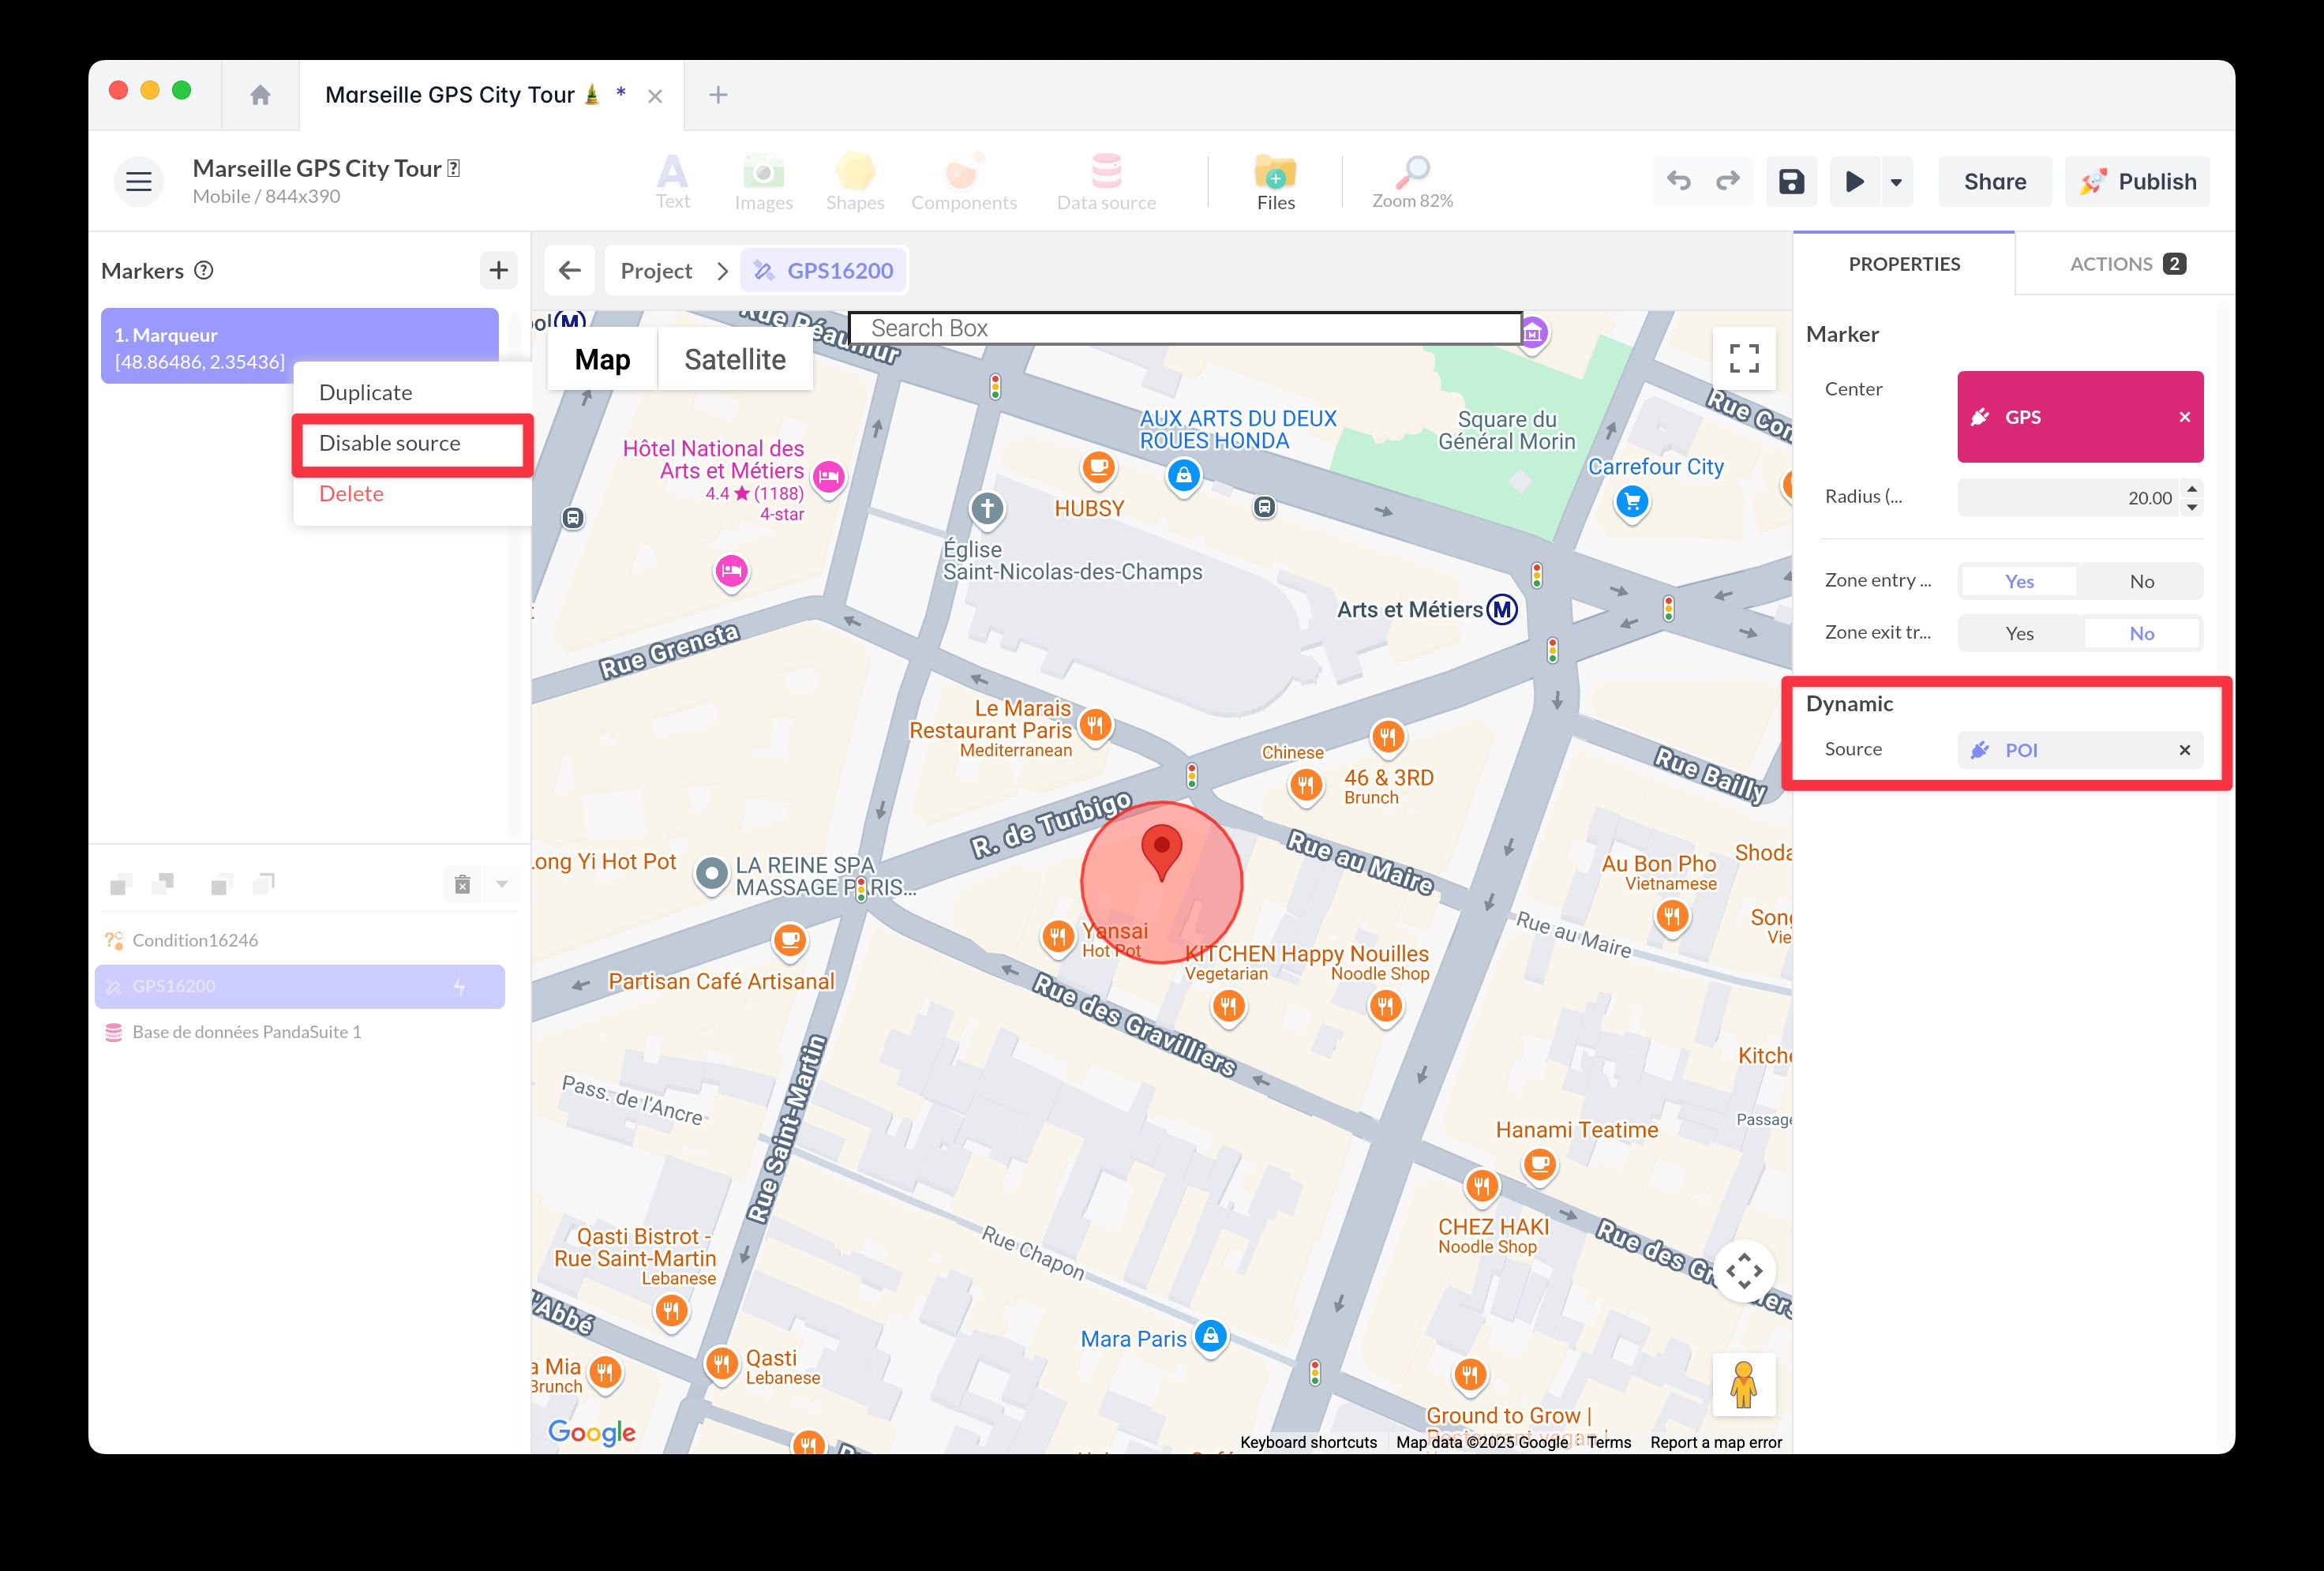
-
Add a databinding to the Center of your marker.
- Creating a Trigger Action
- Select your GPS component and use the Zone Detection trigger.
- Configure this action to update the reference of the current item.
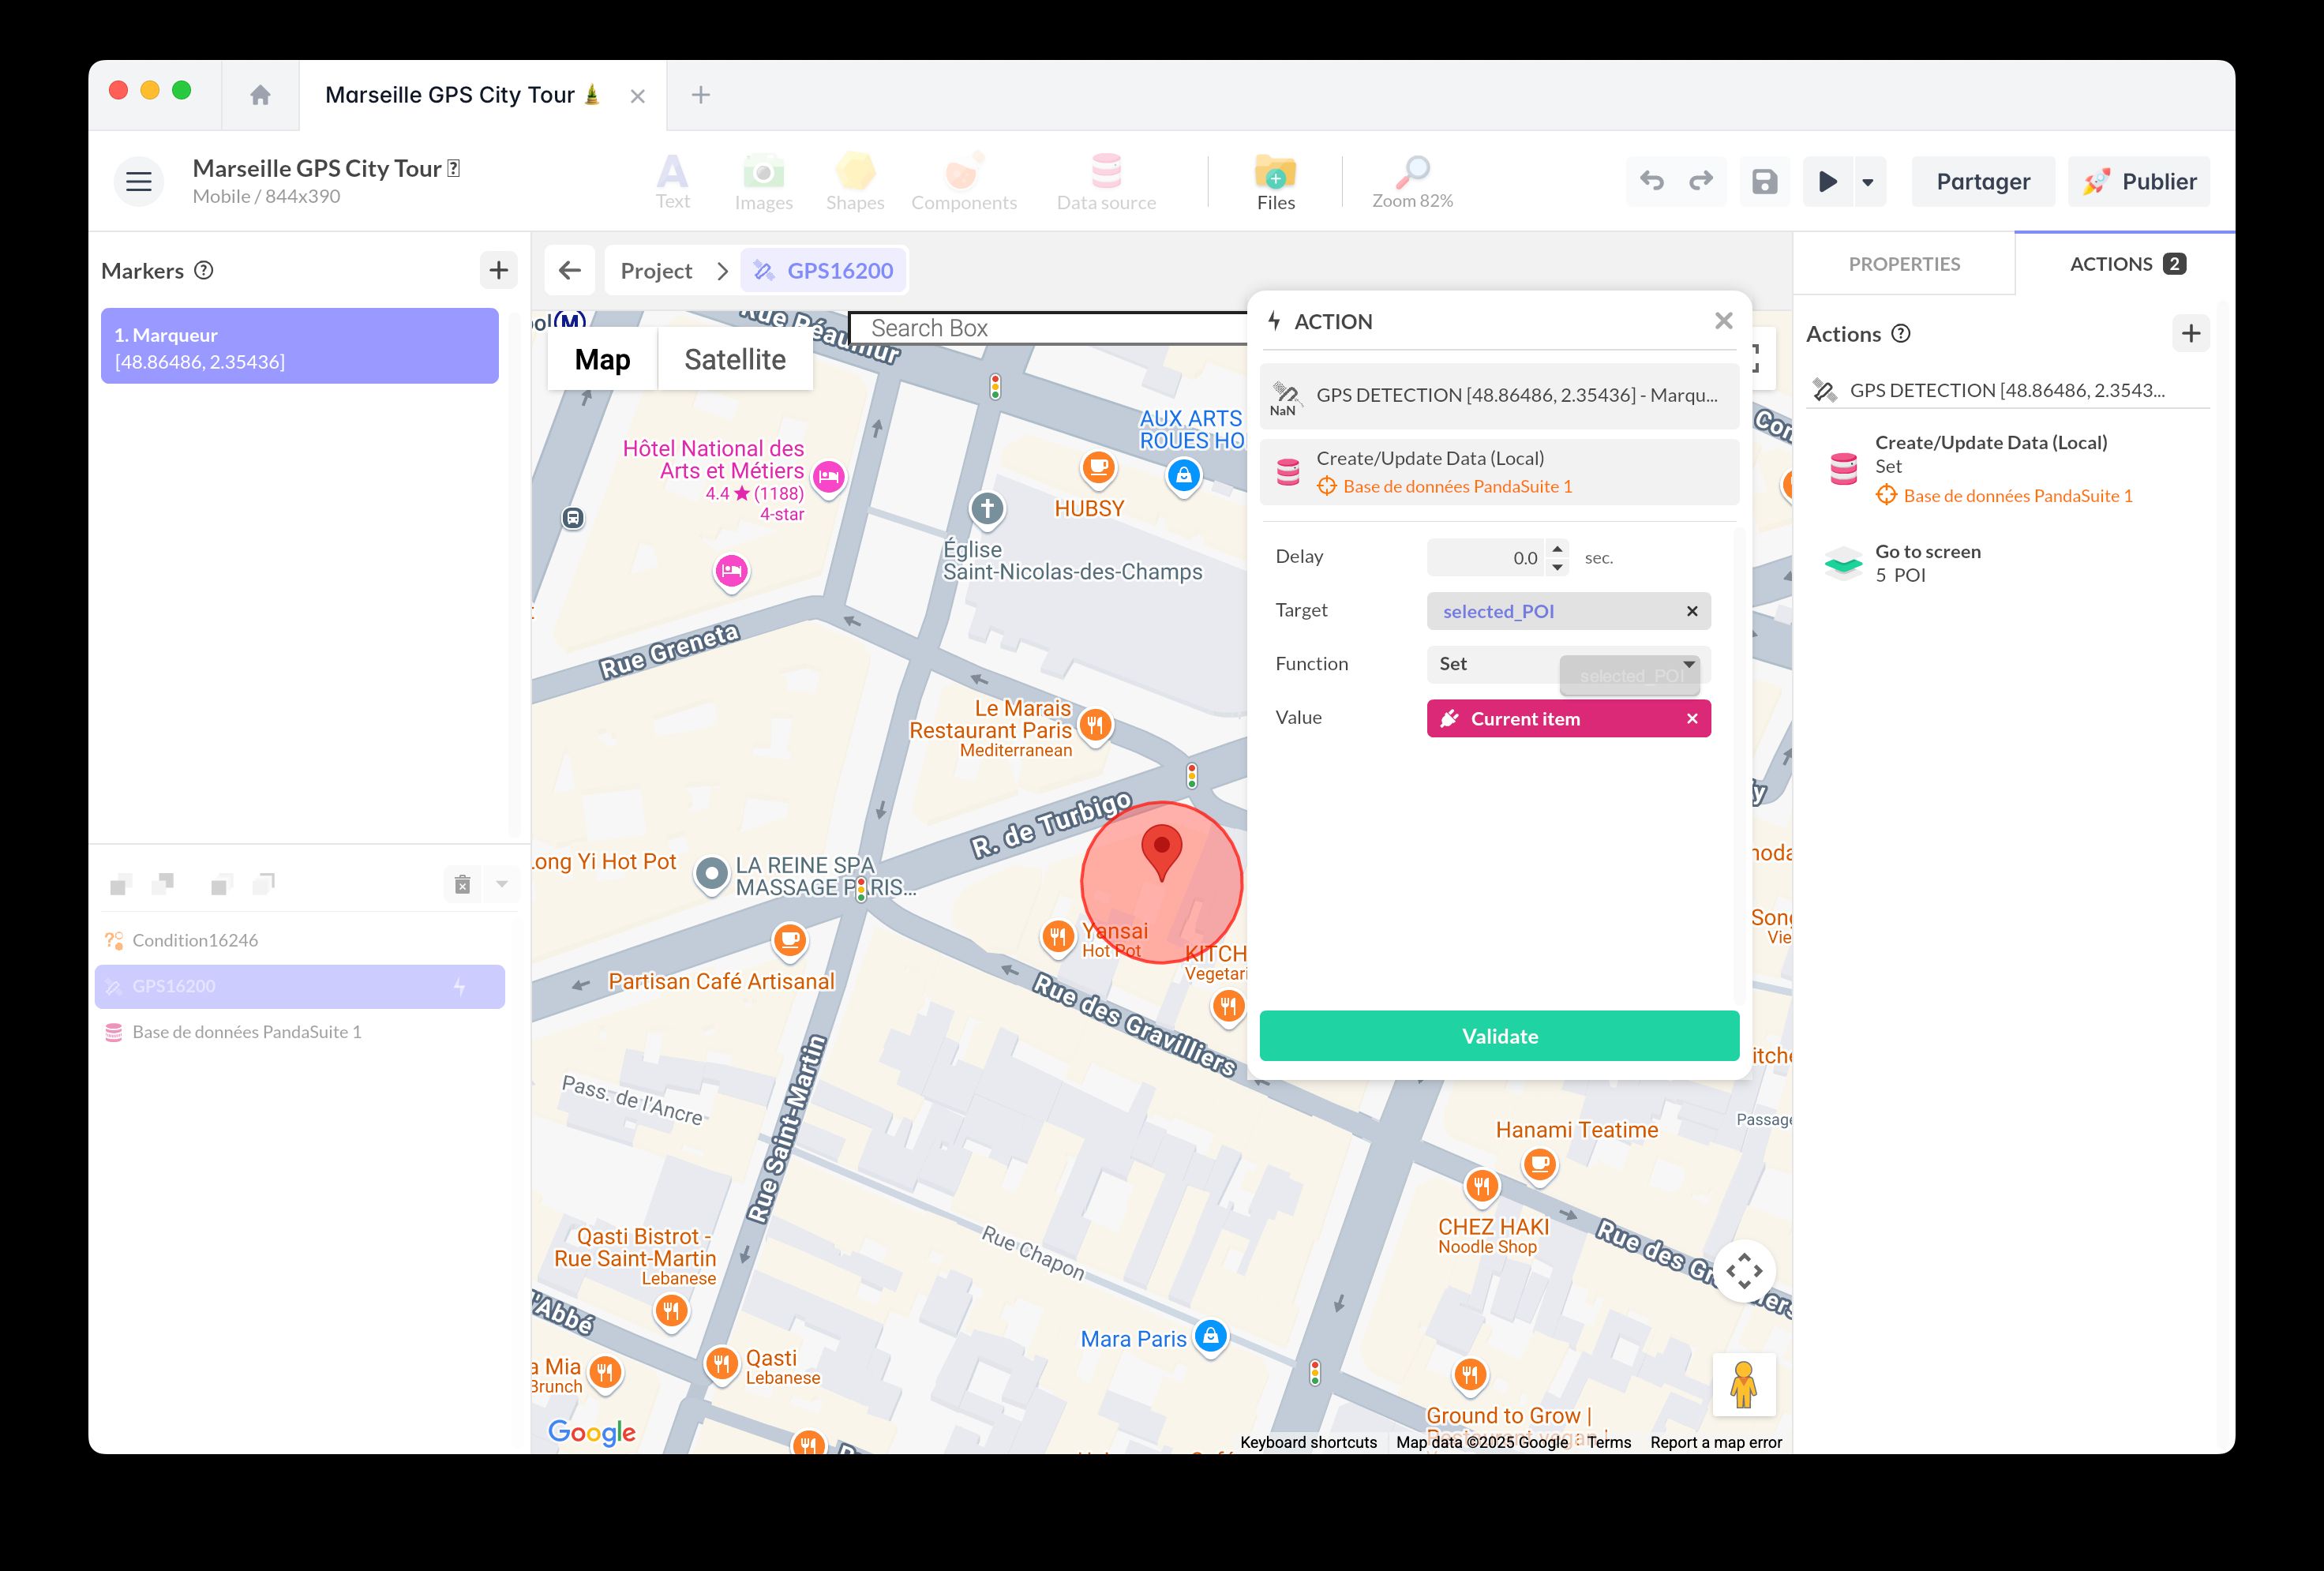
Setting a reference on your data allows you to “remember” and easily reuse information associated with each GPS point elsewhere in your application.
Best Practices & Tips
- In certain environments (indoors, areas with poor coverage), GPS accuracy may be limited. Consider using the Beacon component as an alternative.
- Regularly test your application in real conditions to ensure triggers work as intended.