Firebase Session
The Firebase Session component allows you to manage user logins and sessions within your PandaSuite application. With this component, you can easily integrate Firebase authentication and associate specific data with each user, such as a score, progress, or access type. This component can be used with or without a user interface, depending on your needs.
Enable Authentication via Firebase
Firebase is Google’s mobile platform that enables the creation of a scalable and high-performance backend, primarily dedicated to mobile applications. The backend represents the server side of the application, handling responsibilities such as authentication, storage, notifications, etc.
You need to have created a Firebase project for your application. Follow this tutorial to create a new project, then follow the instructions below.
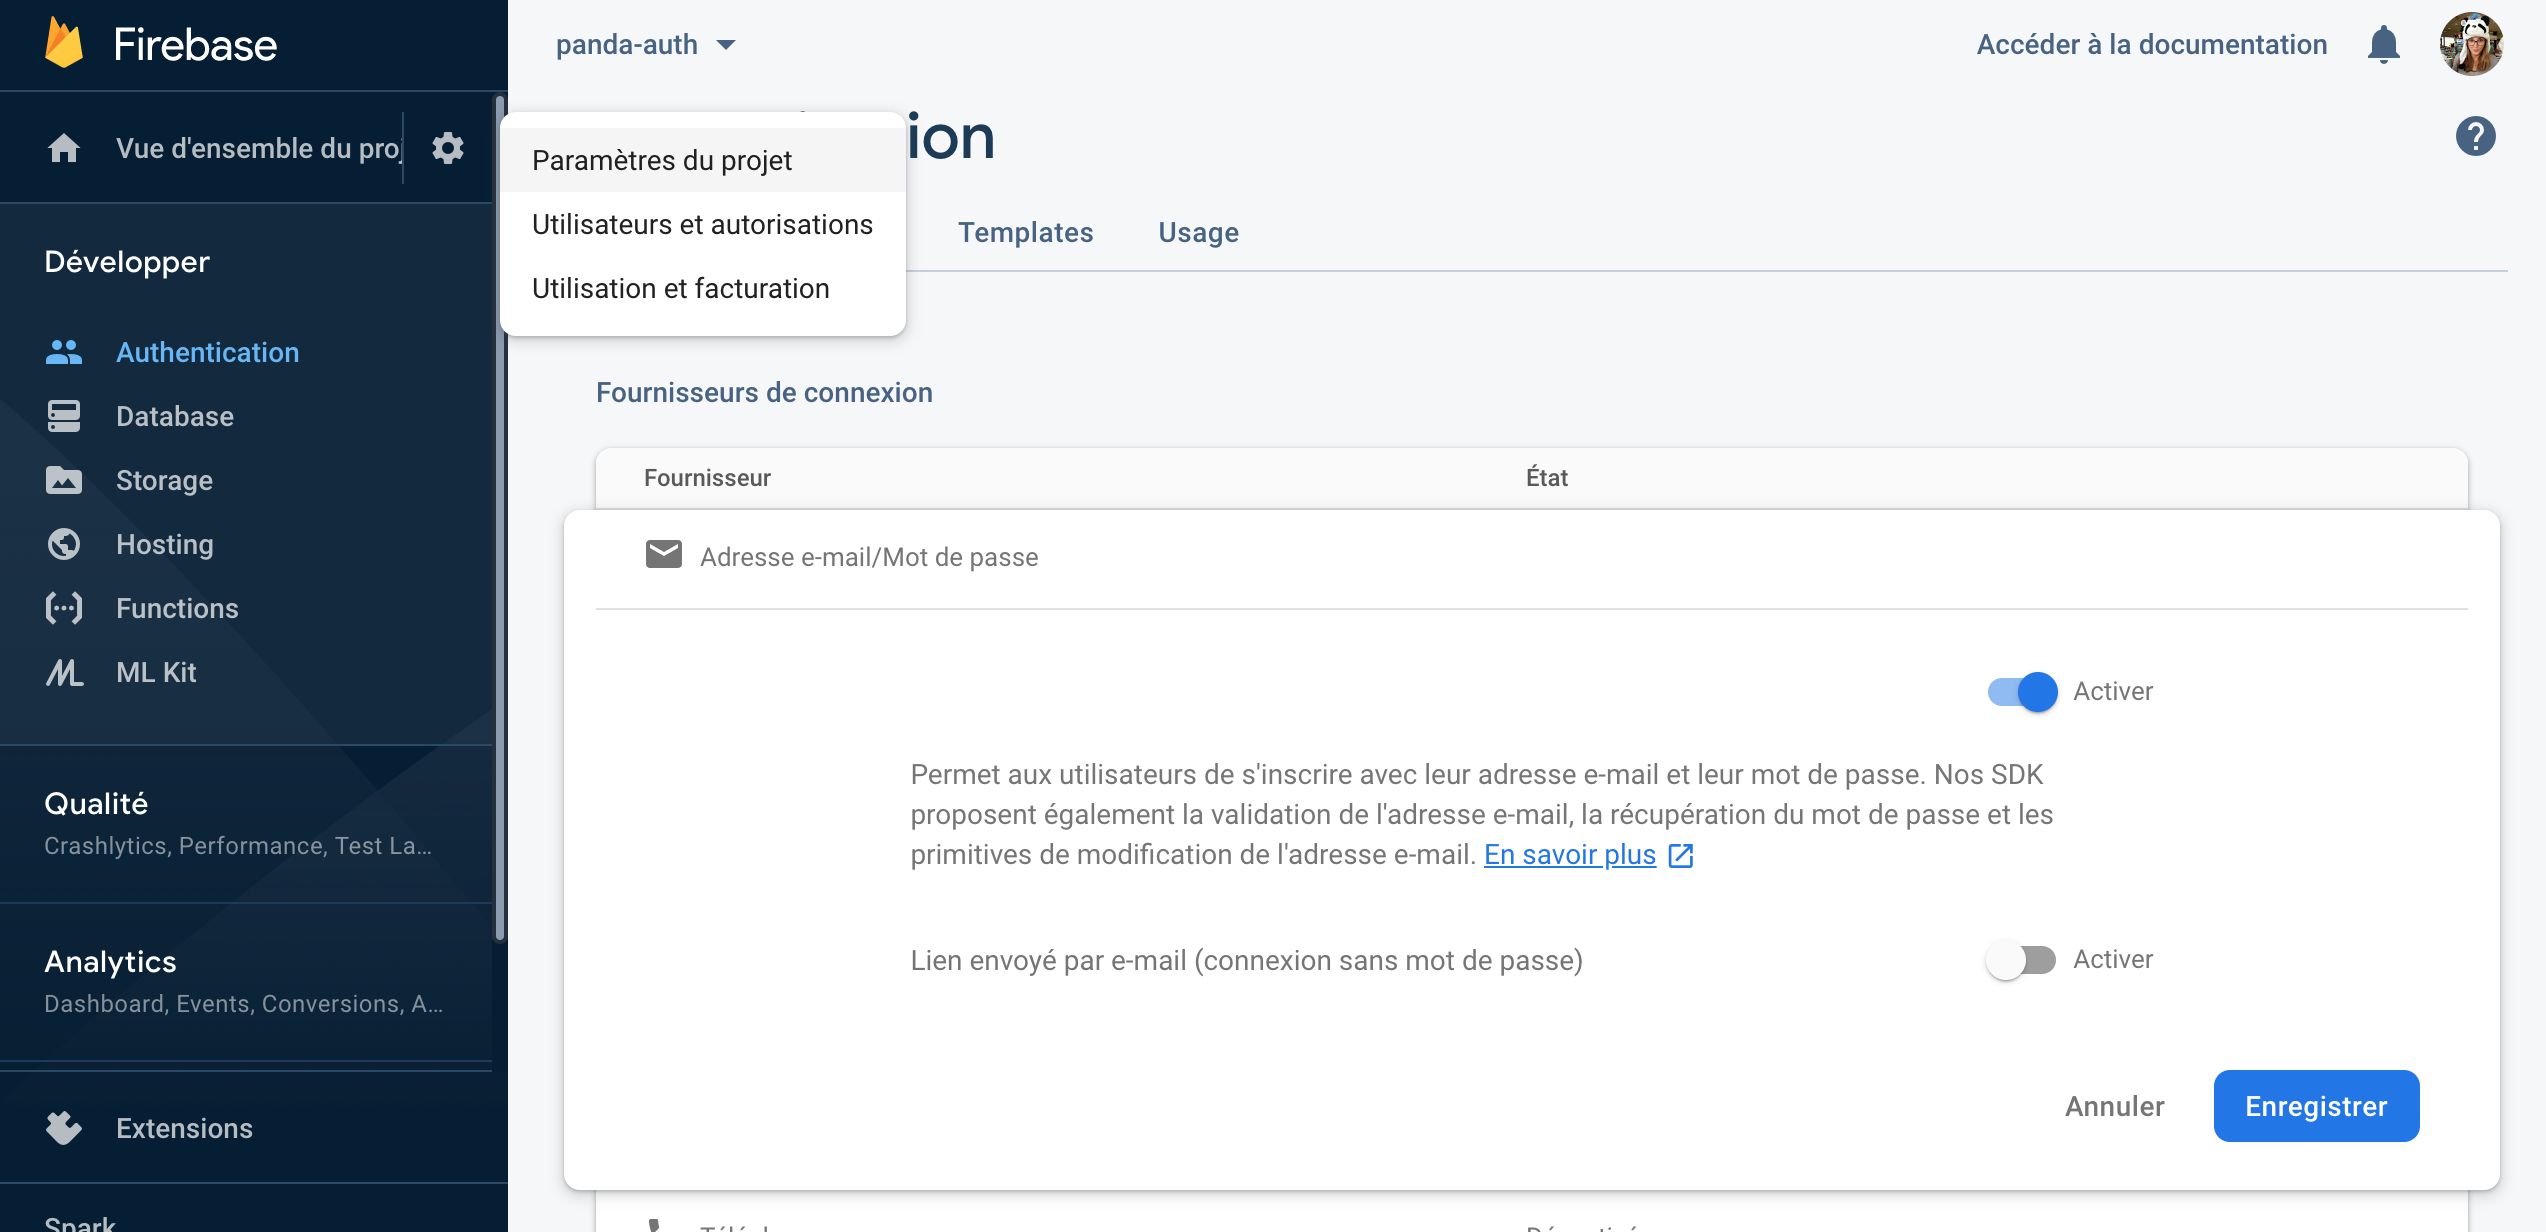
Enable Email/Password Login
Add an authentication method for your application.
- Go to Authentication and click on Get Started.
- In the Sign-in method tab, select Email/Password and click on Enable.

You now have an email and password authentication procedure.
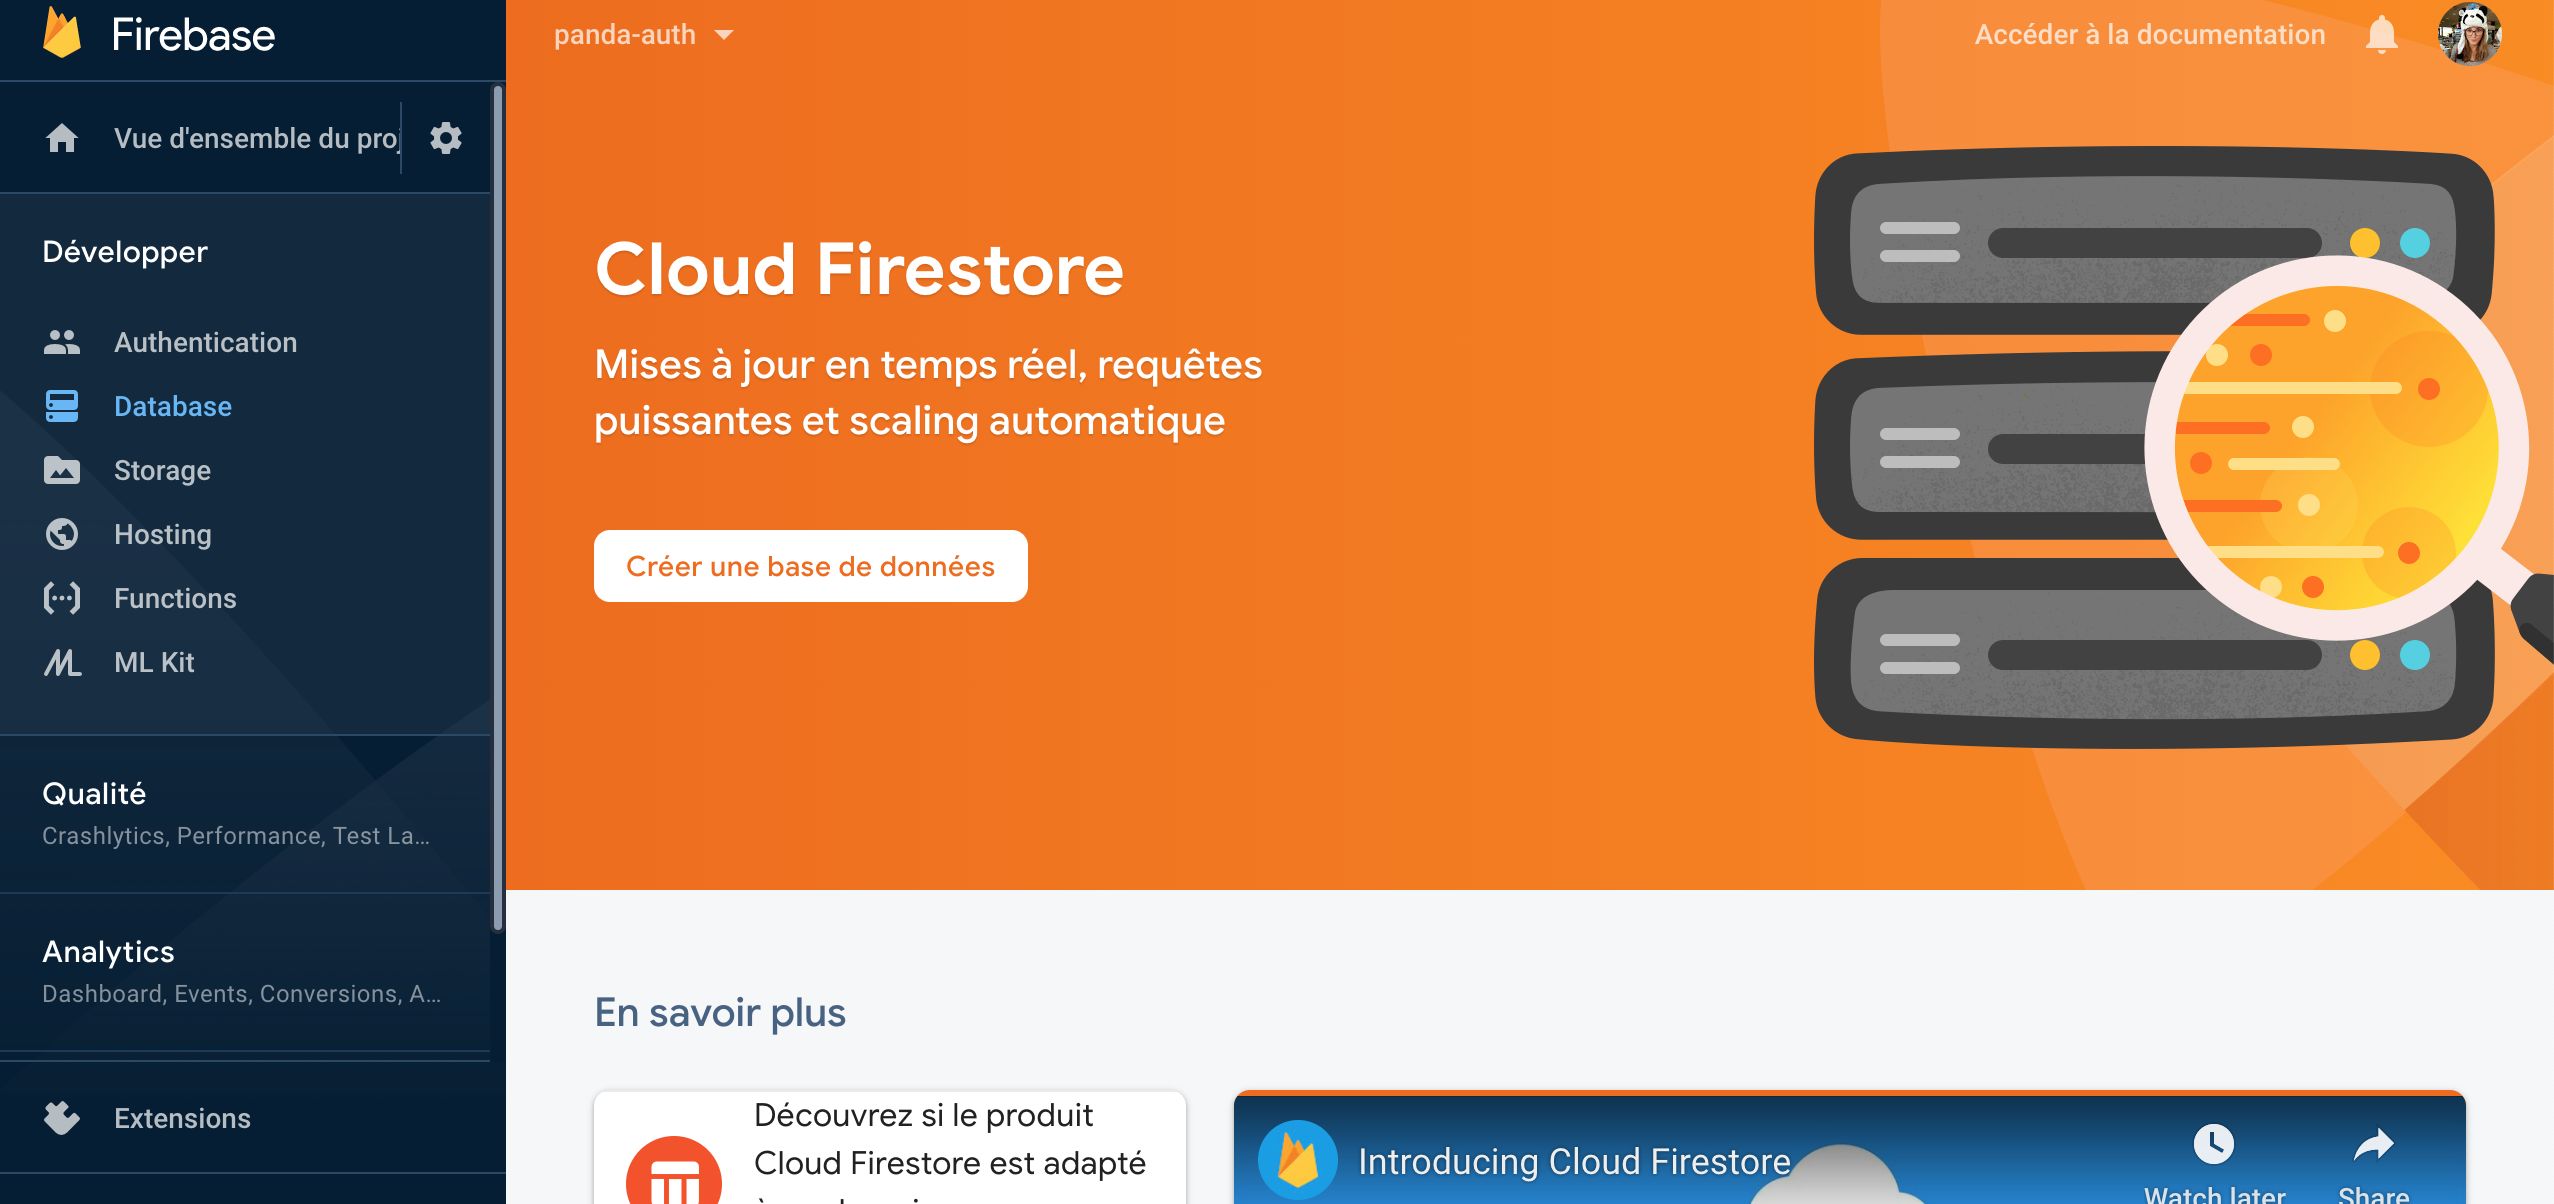
Configure Cloud Firestore
Cloud Firestore is a database specific to Firebase. It allows you to associate data with your users.
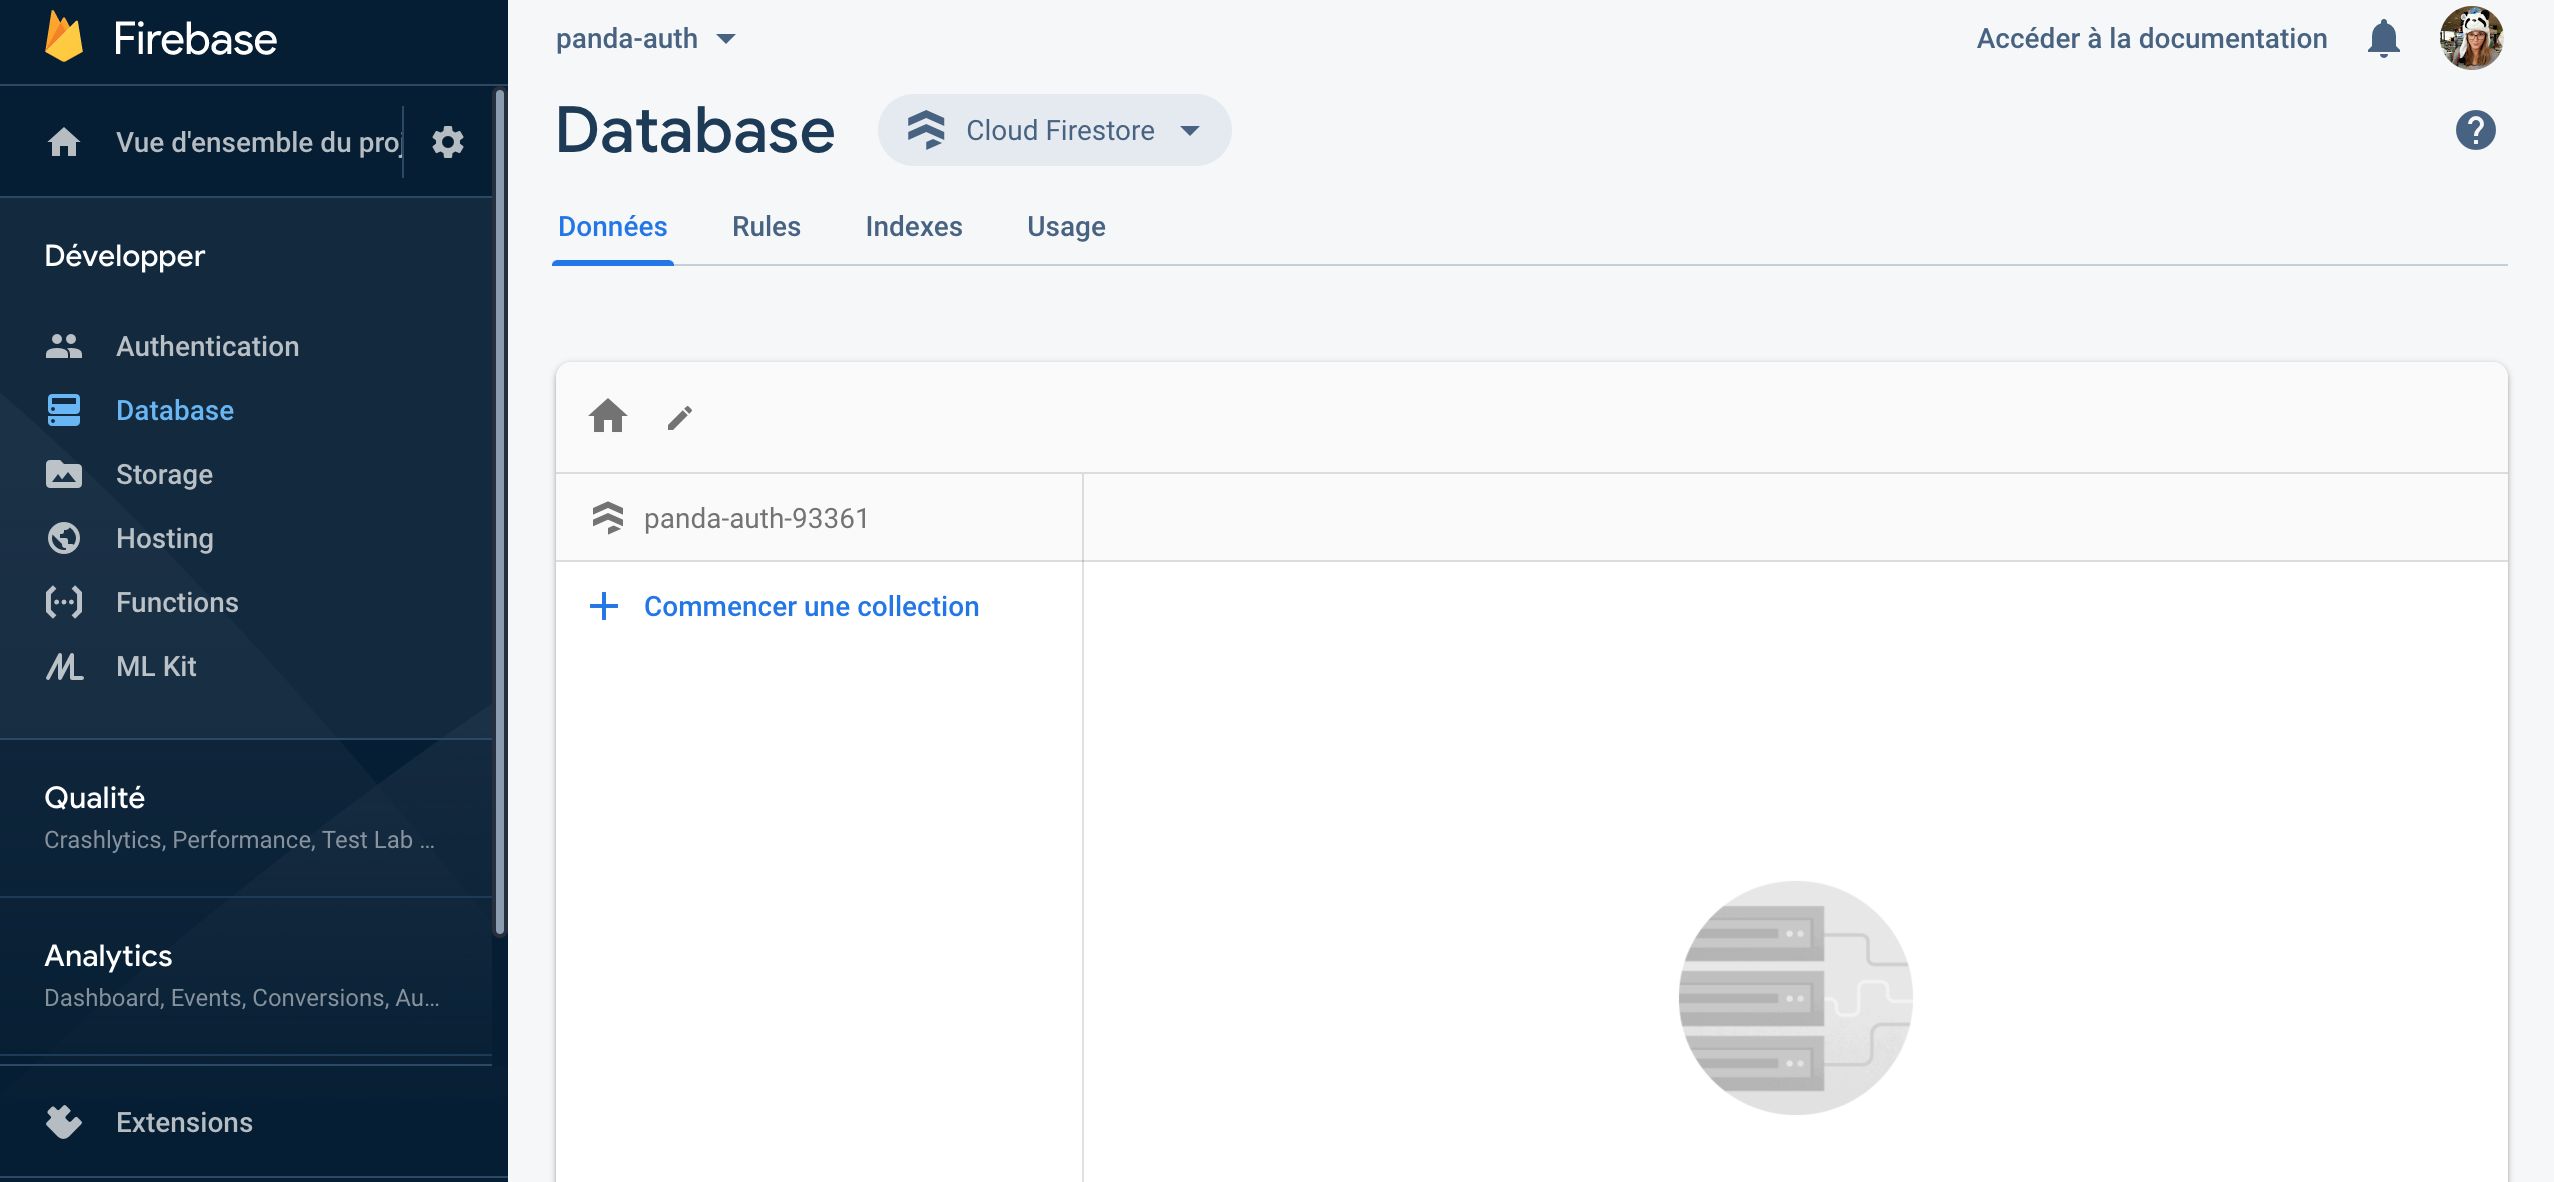
- Go to the Firestore Database tab. Click on Create Database.
- Choose the Start in test mode option.

- Go to the Rules tab: you need to update the security rules to avoid being blocked after 30 days. Copy and paste the code below:
rules_version = '2';service cloud.firestore { match /databases/{database}/documents { match /users/{userId} { allow read, write: if request.auth.uid == userId } }}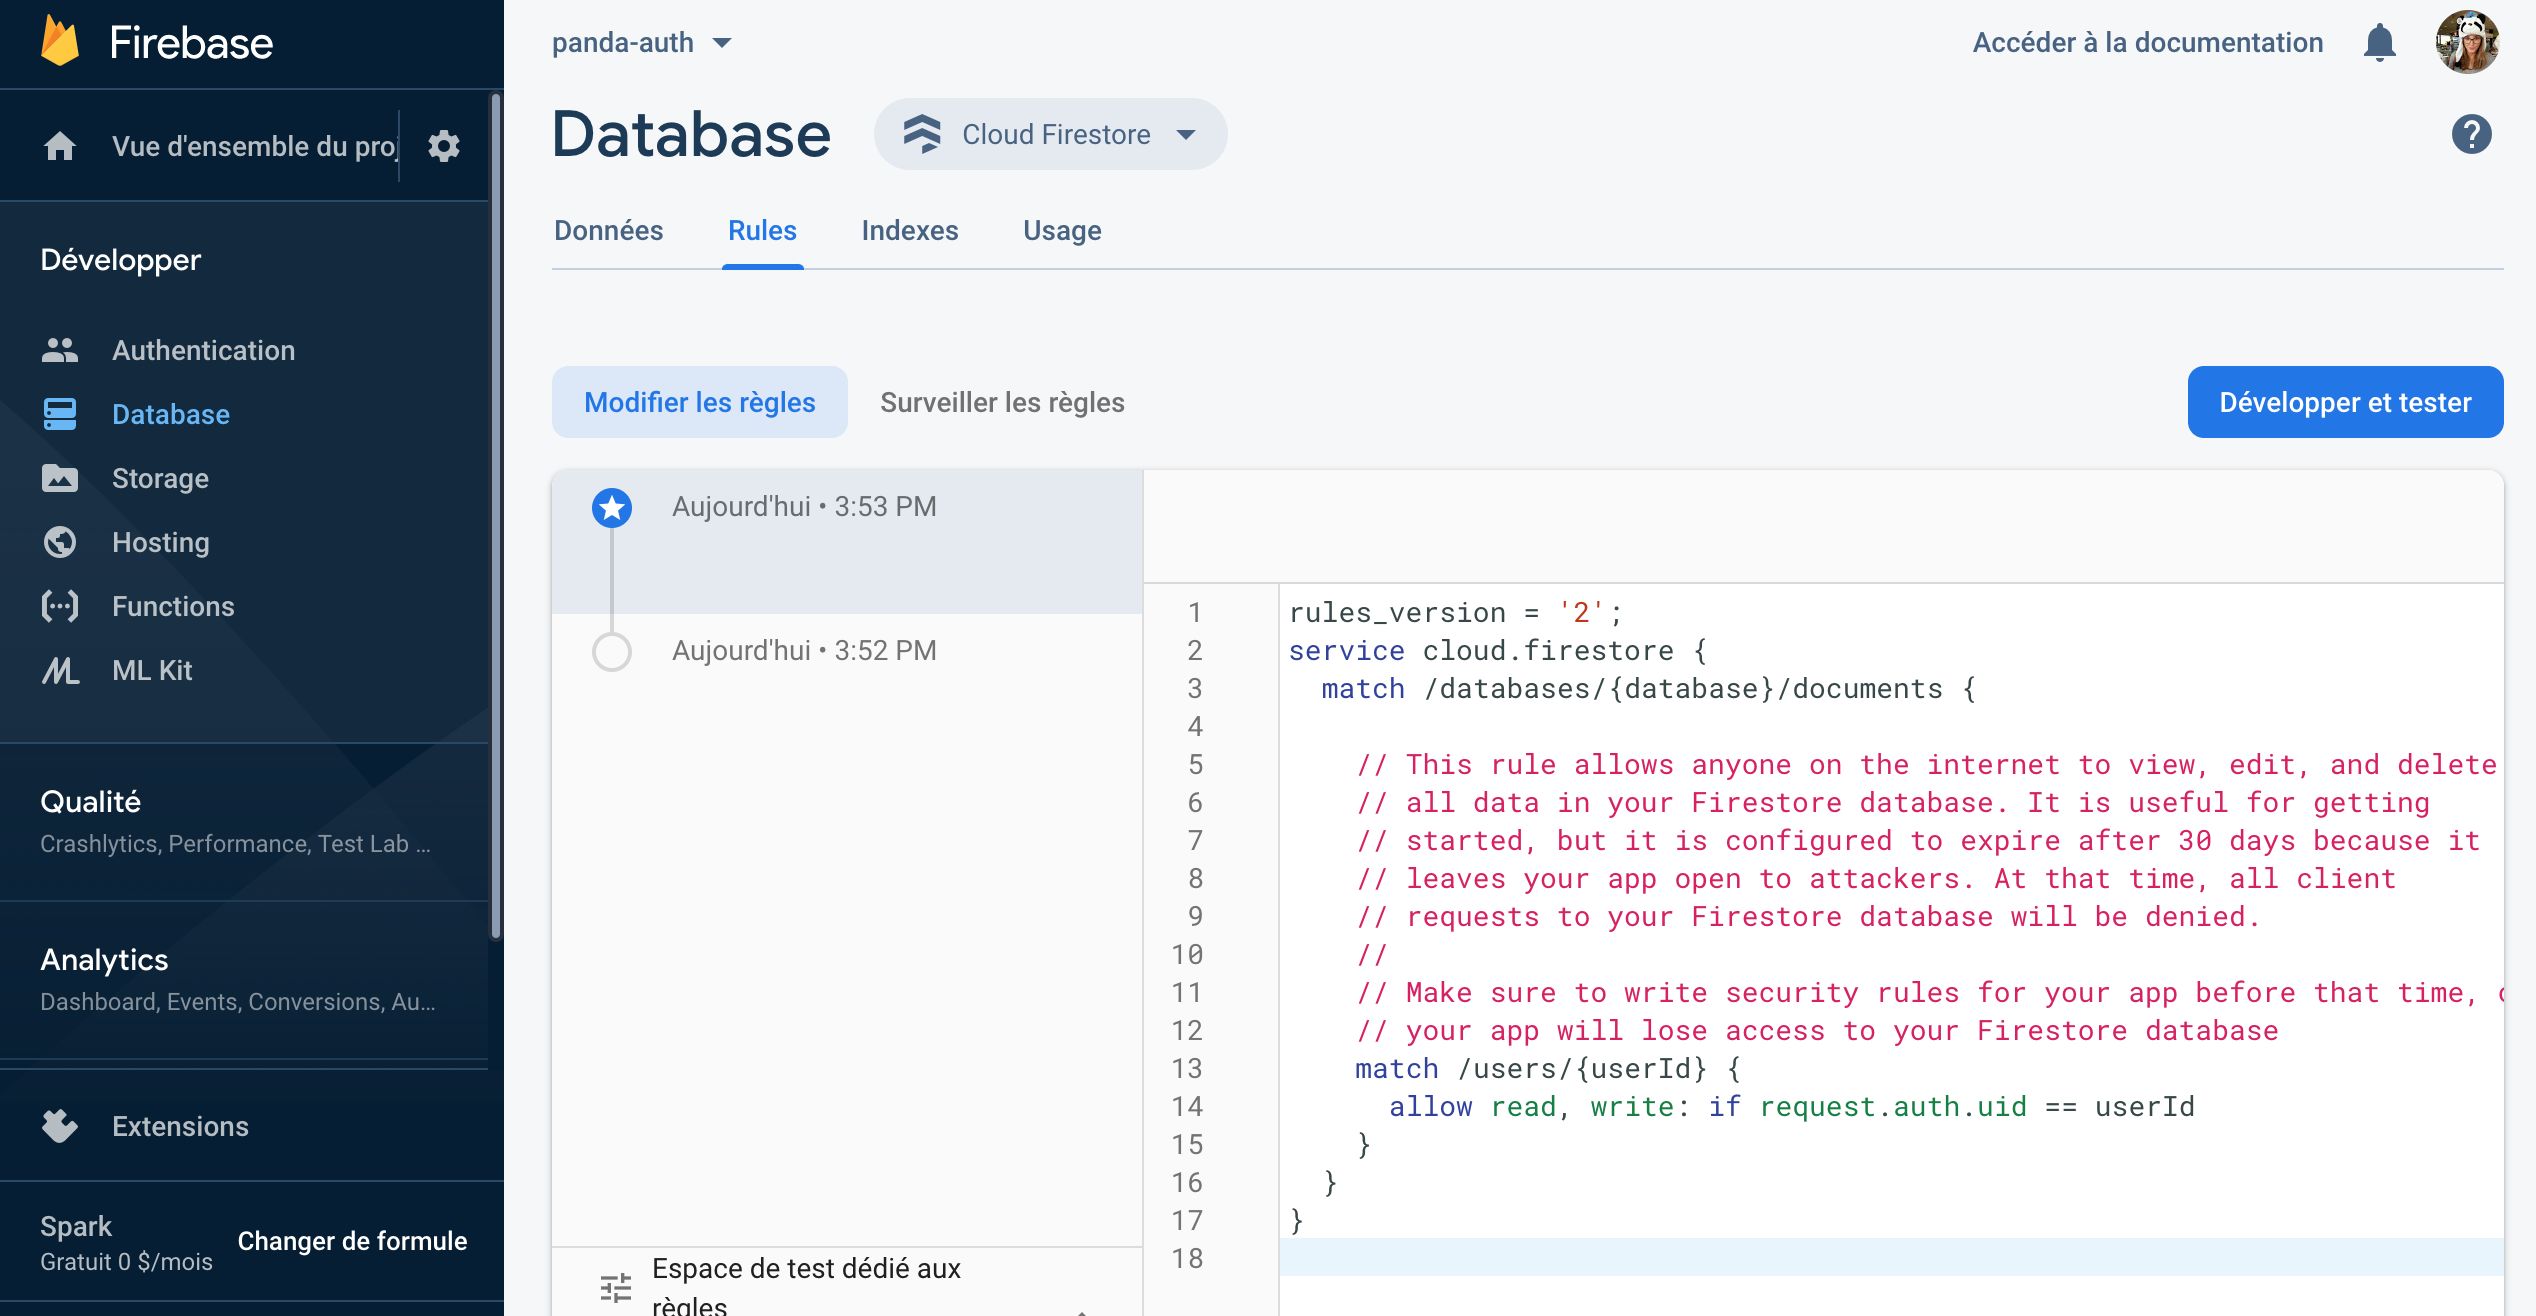
Your Cloud Firestore configuration is ready.
Configure the Firebase Session Component
Click on Components and choose Firebase Session. To make the component accessible throughout the application, insert it at the project level.
In PandaSuite Studio, the component editor includes two helpful tabs:
- Test Session: Sign in with a Firebase user to inspect the loaded Cloud Firestore document.
- Default user data: Prepare the data structure that should be created for each new user.
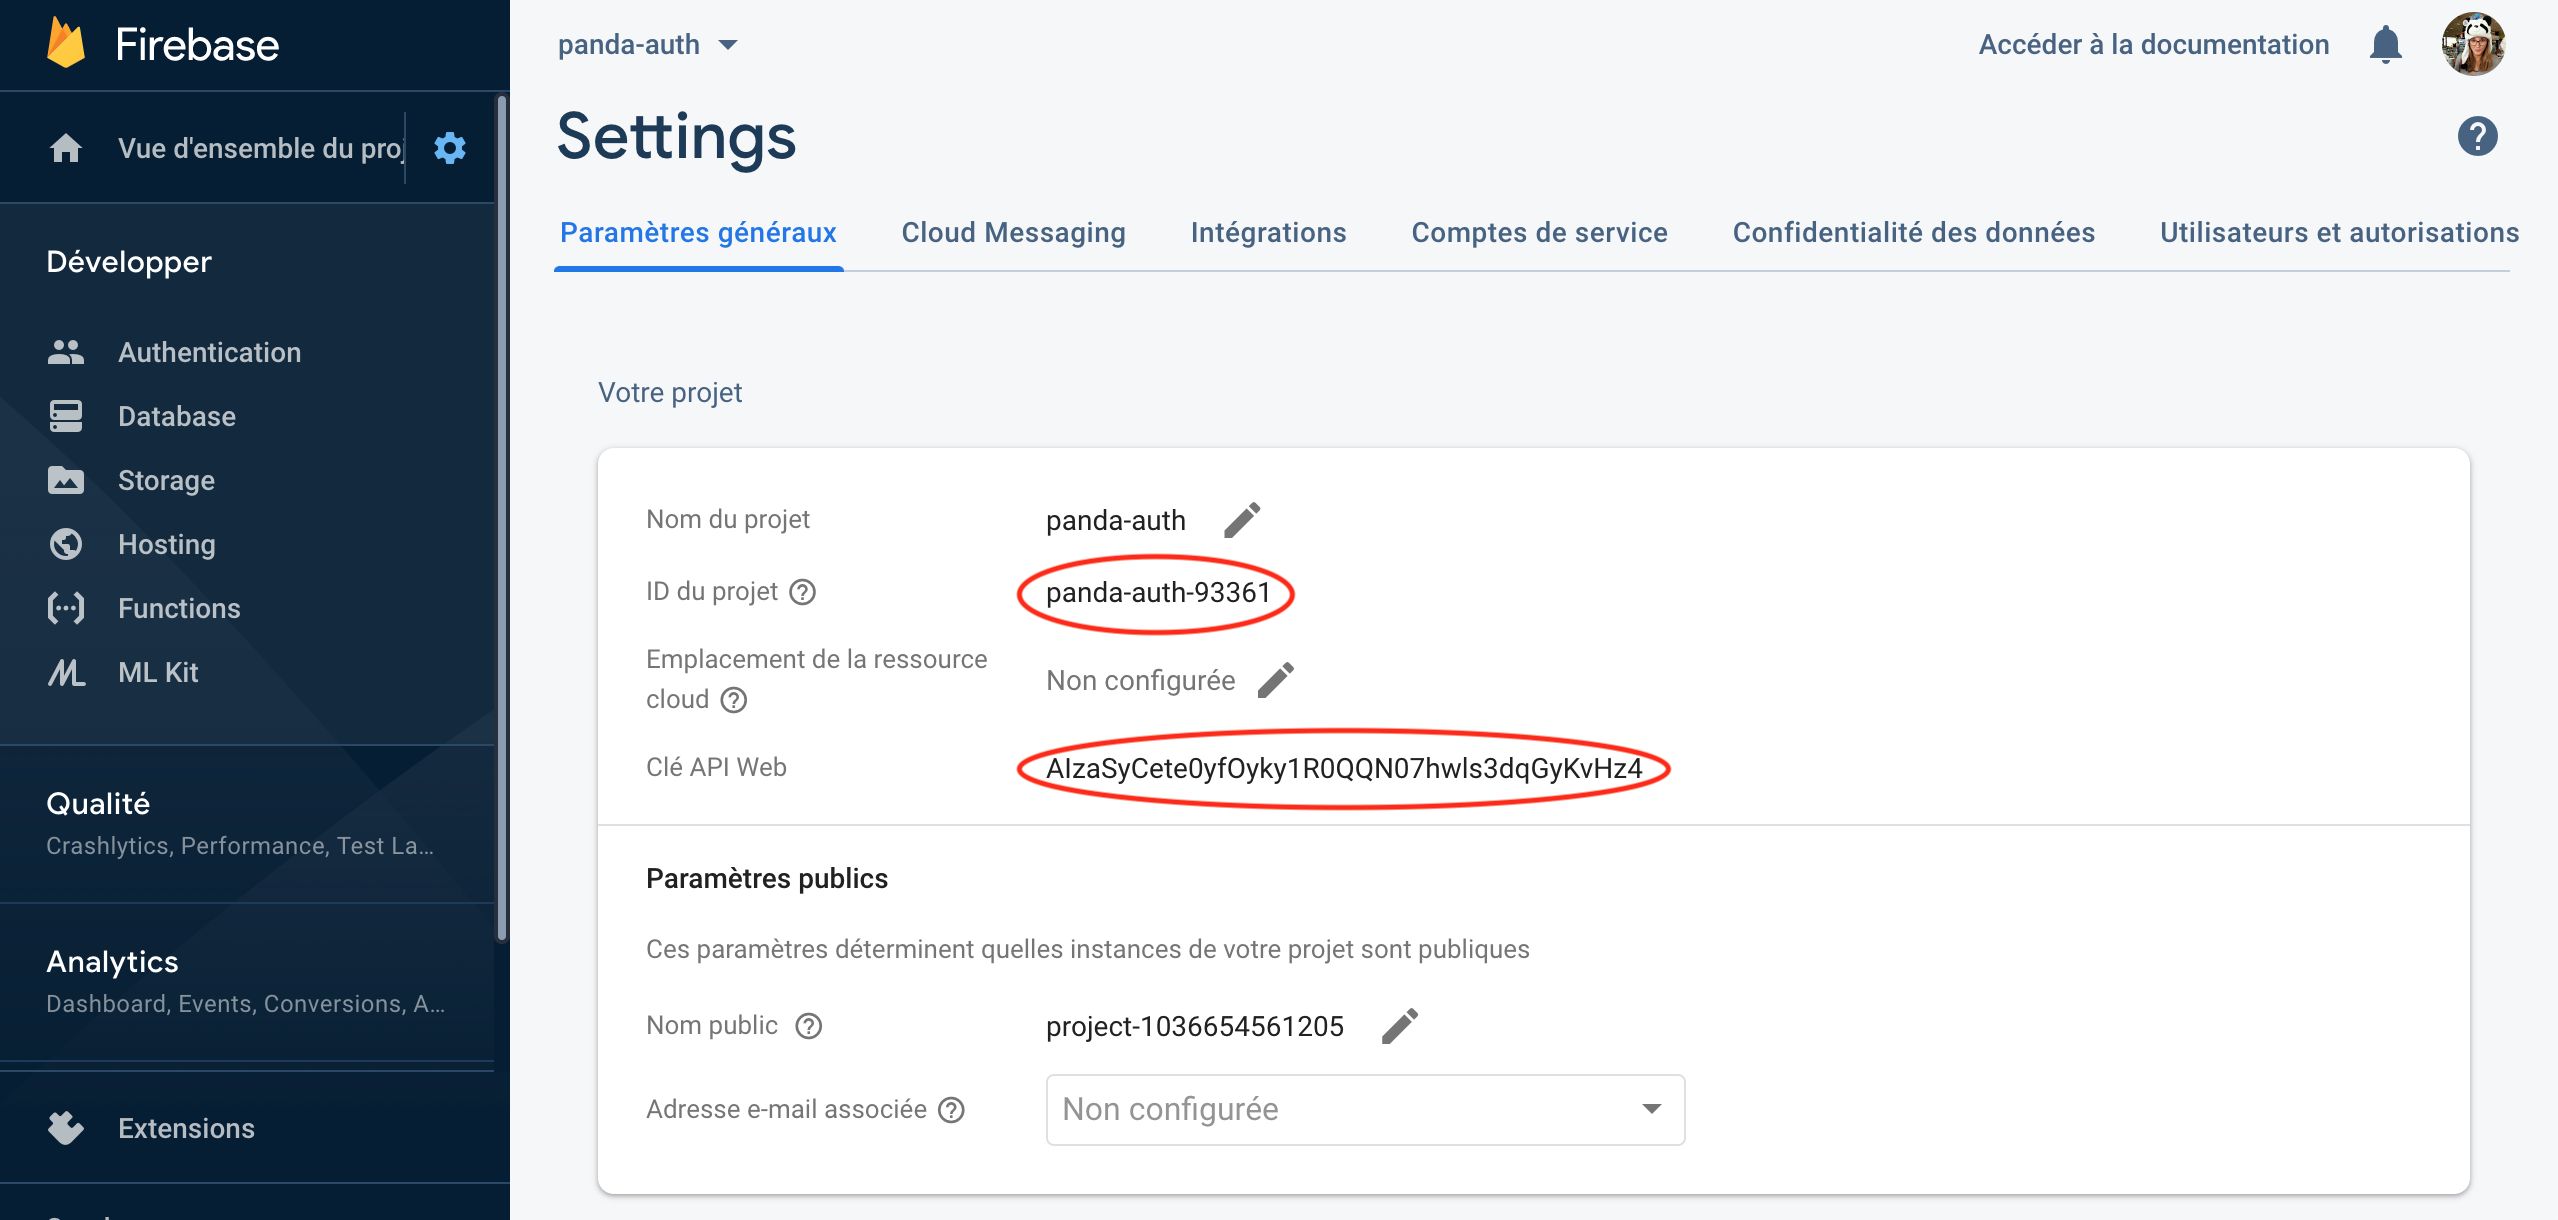
Project ID and API Key
In the properties, copy/paste the Project ID and the API Key from the Firebase console.

These details are available in the Project Settings on Firebase.
Force Authentication After (hours)
This option specifies the number of hours (after identification) during which the session remains valid, even without an internet connection. Beyond this number of hours, an internet connection will be required to continue. When the session is still valid, the user will not need to log in again. By default, a value of 0 creates an infinite session.
Don’t forget to insert the Authentication component to display the login form in your application.
Enforce email verification
This is an additional email validation step where the user receives a confirmation email with a link. This step is required before accessing the application.
Default user data
Open the Default user data tab to define the document created in Cloud Firestore for each new user when they register.
Use this tab to prepare nested objects, arrays, or PandaSuite collections before the first sign-in. In Studio, it can also reuse data already available in your project, including collections. This makes it easier to initialize structured user data without manually typing every identifier.
Values added later during registration, such as Traits in headless mode or Advanced user fields in the Authentication component, are merged into this default structure.
To update this user document later from the app, see Save user data in Firebase.
When a new user signs up, you should now see this default structure in that user’s document in Cloud Firestore.
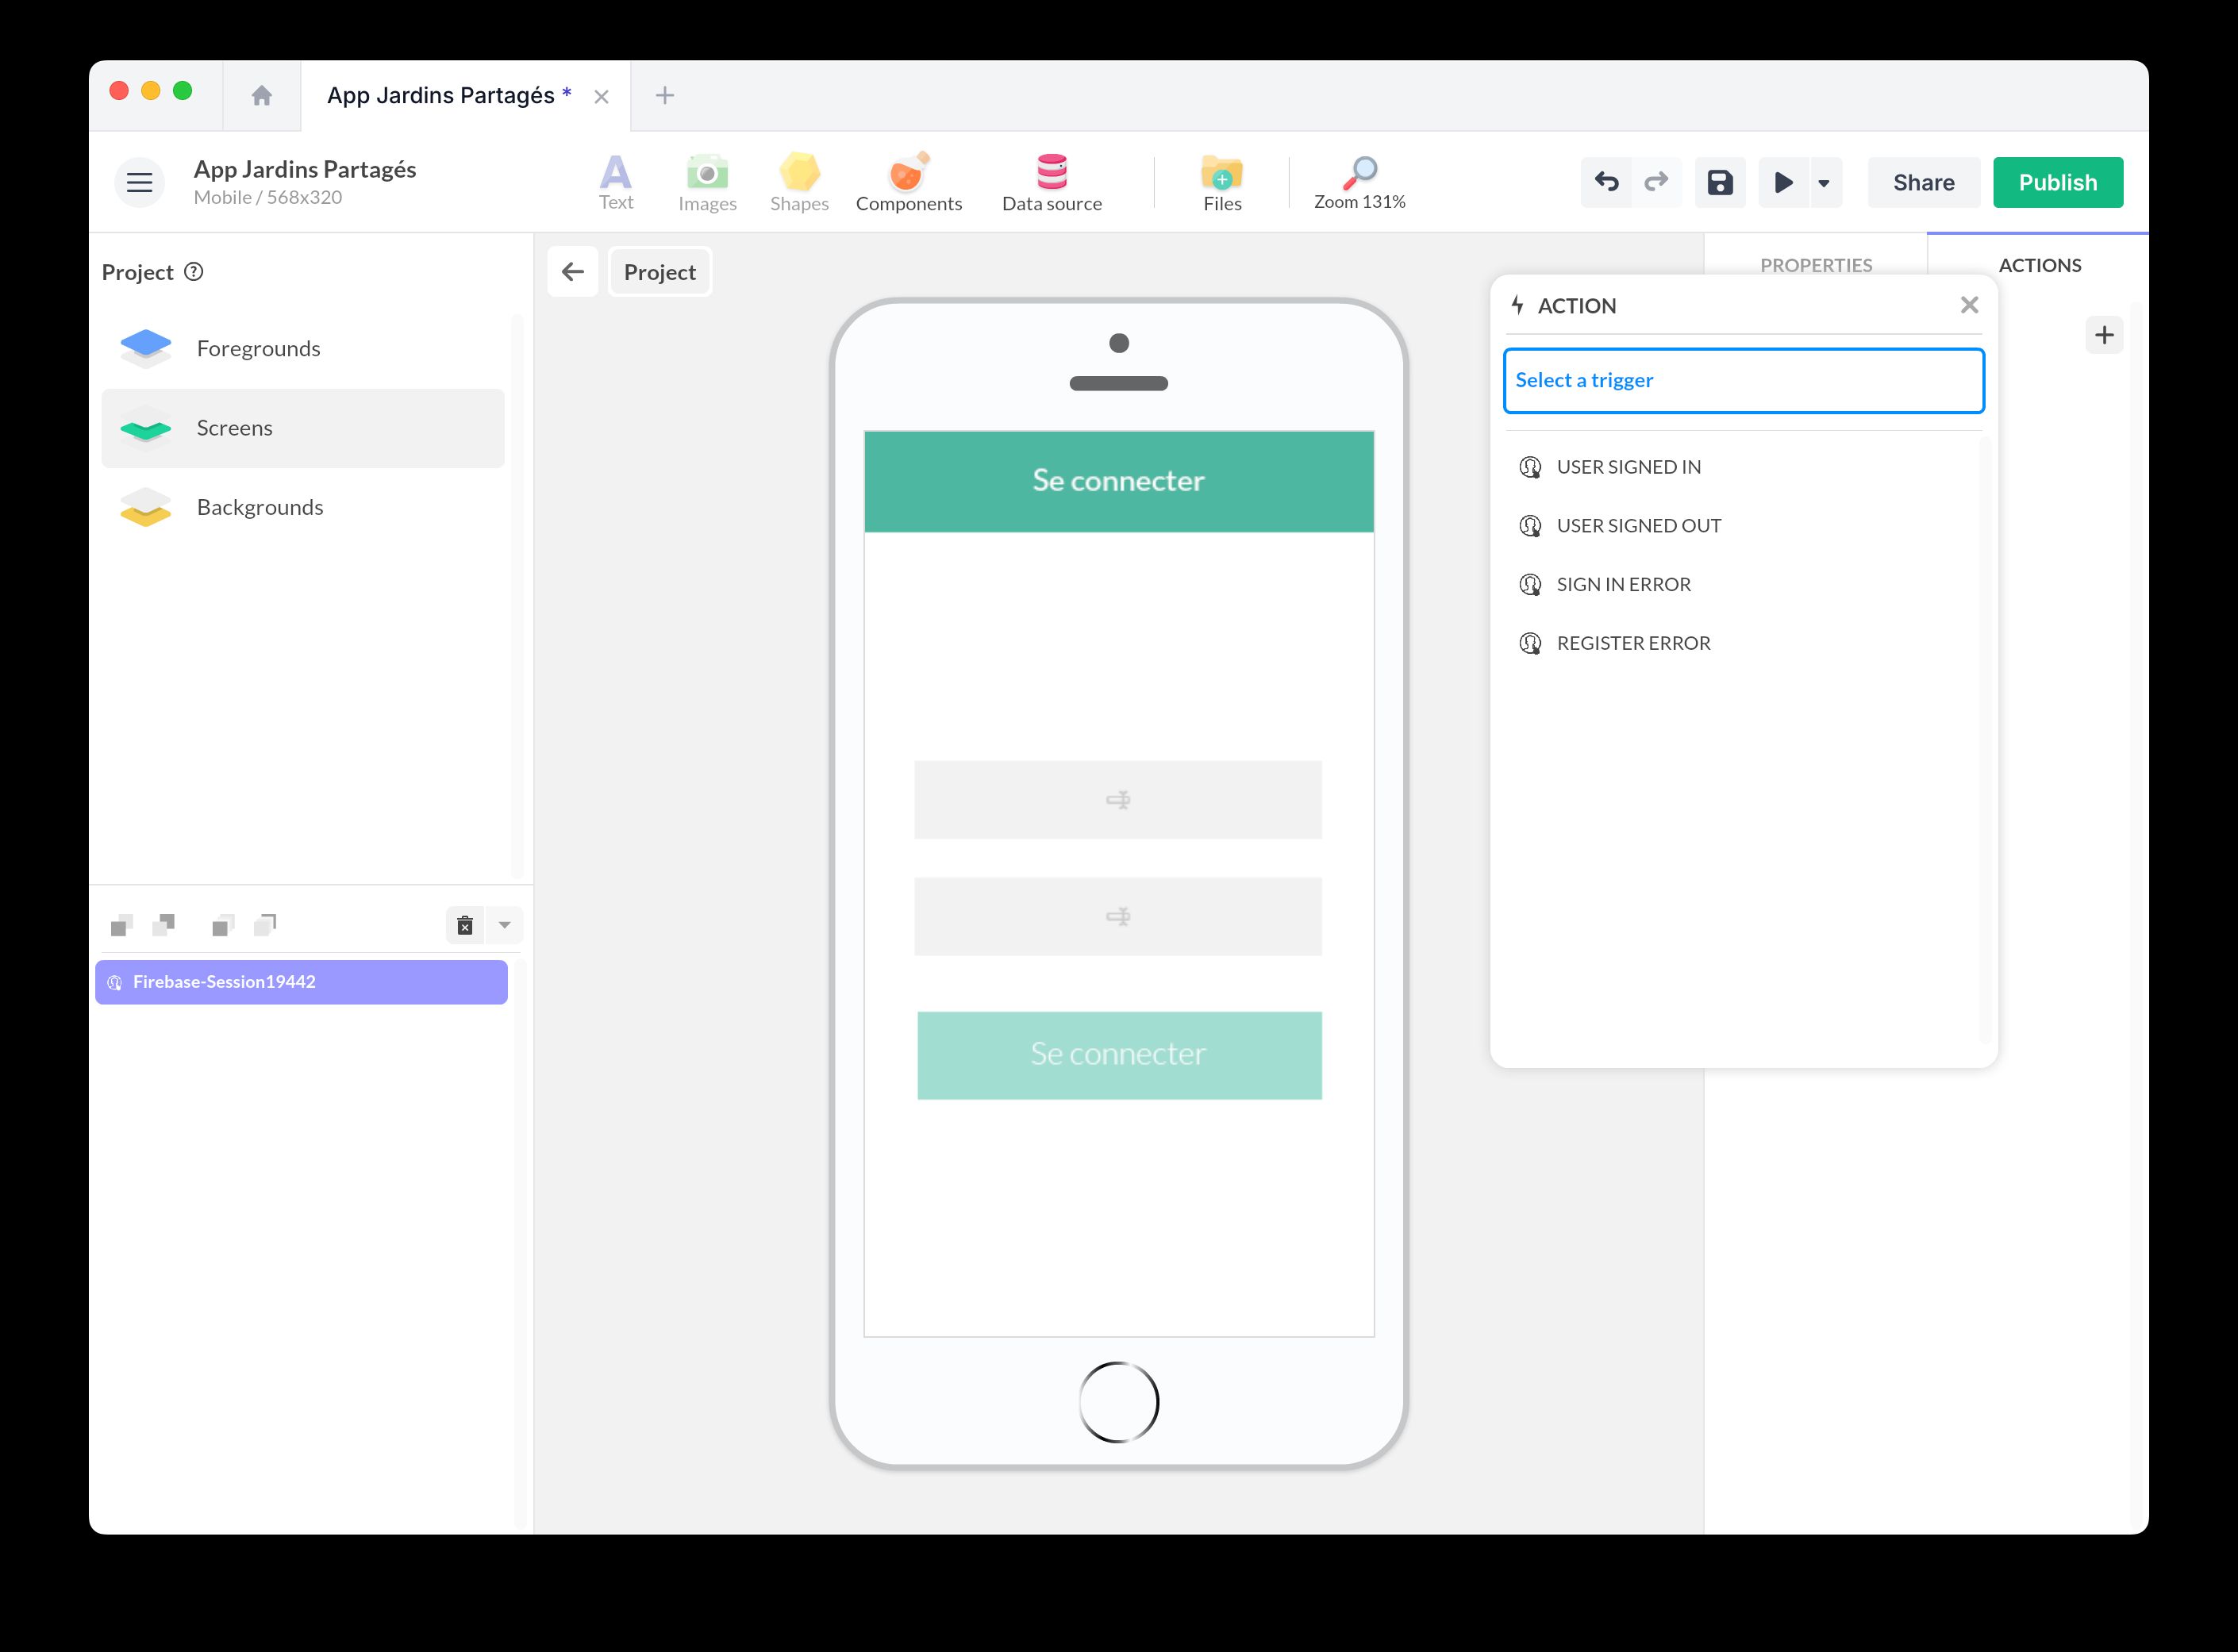
Trigger an Action Based on User’s Connection Status
To trigger an action based on the session state, select the Firebase Session component and add an action. Choose from the following triggers:
- User Connected: The user session is valid. This trigger can be used to proceed to the next screen if the user is logged in.
- User Disconnected: The user session has expired. This can redirect the user to the login screen.
You can also disconnect the user: Act on a Component > Firebase Session > Logout.
Manage Your Users
You can manage your users directly on Firebase. Go to Authentication and the Users tab to access the user database. You can view user email, creation date, last login date, and unique user ID.
You can also associate data with your users, such as a score, progress, or profile.
Session Management Without User Interface (Headless Usage)
If you want to design a fully customized interface, you can use Firebase Session without a visual interface. This headless usage allows you to manage sessions in the background while building a tailored UI.
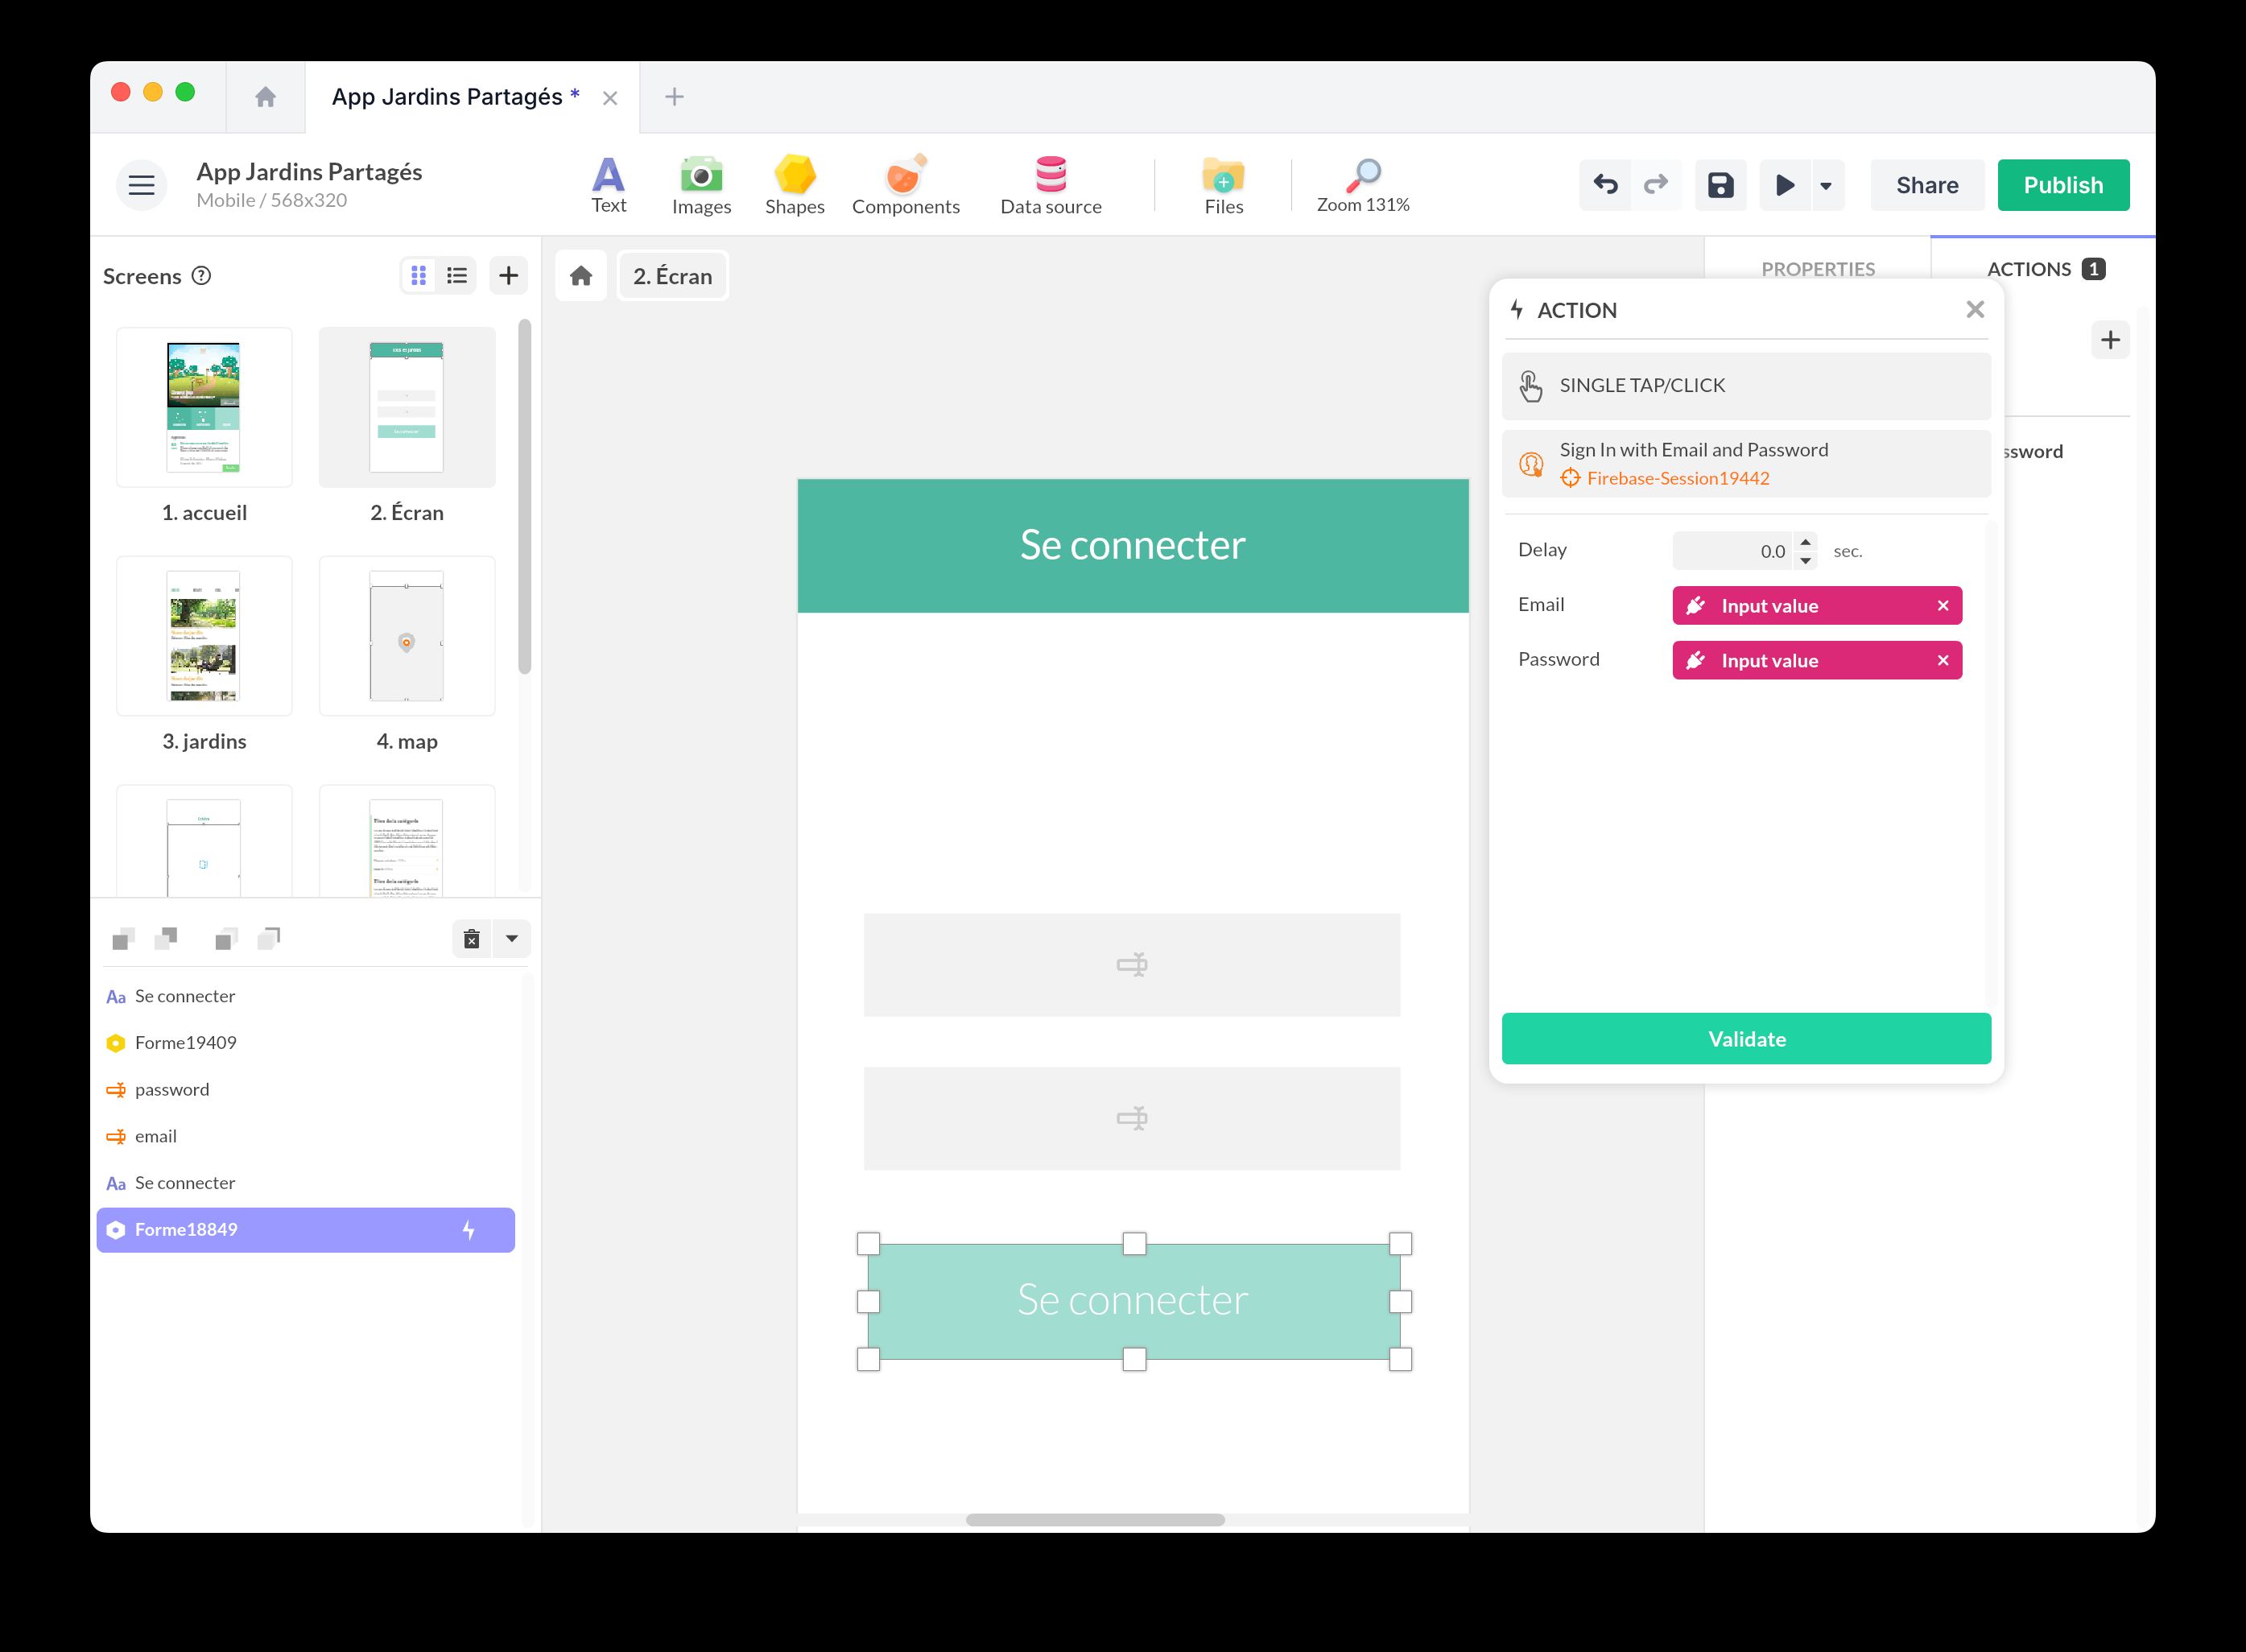
Features available in headless usage:
- Email and password authentication: You can integrate Text Input fields to enter credentials, then trigger the authentication action.
- Login with a custom token: Ideal for systems where the backend generates secure tokens.

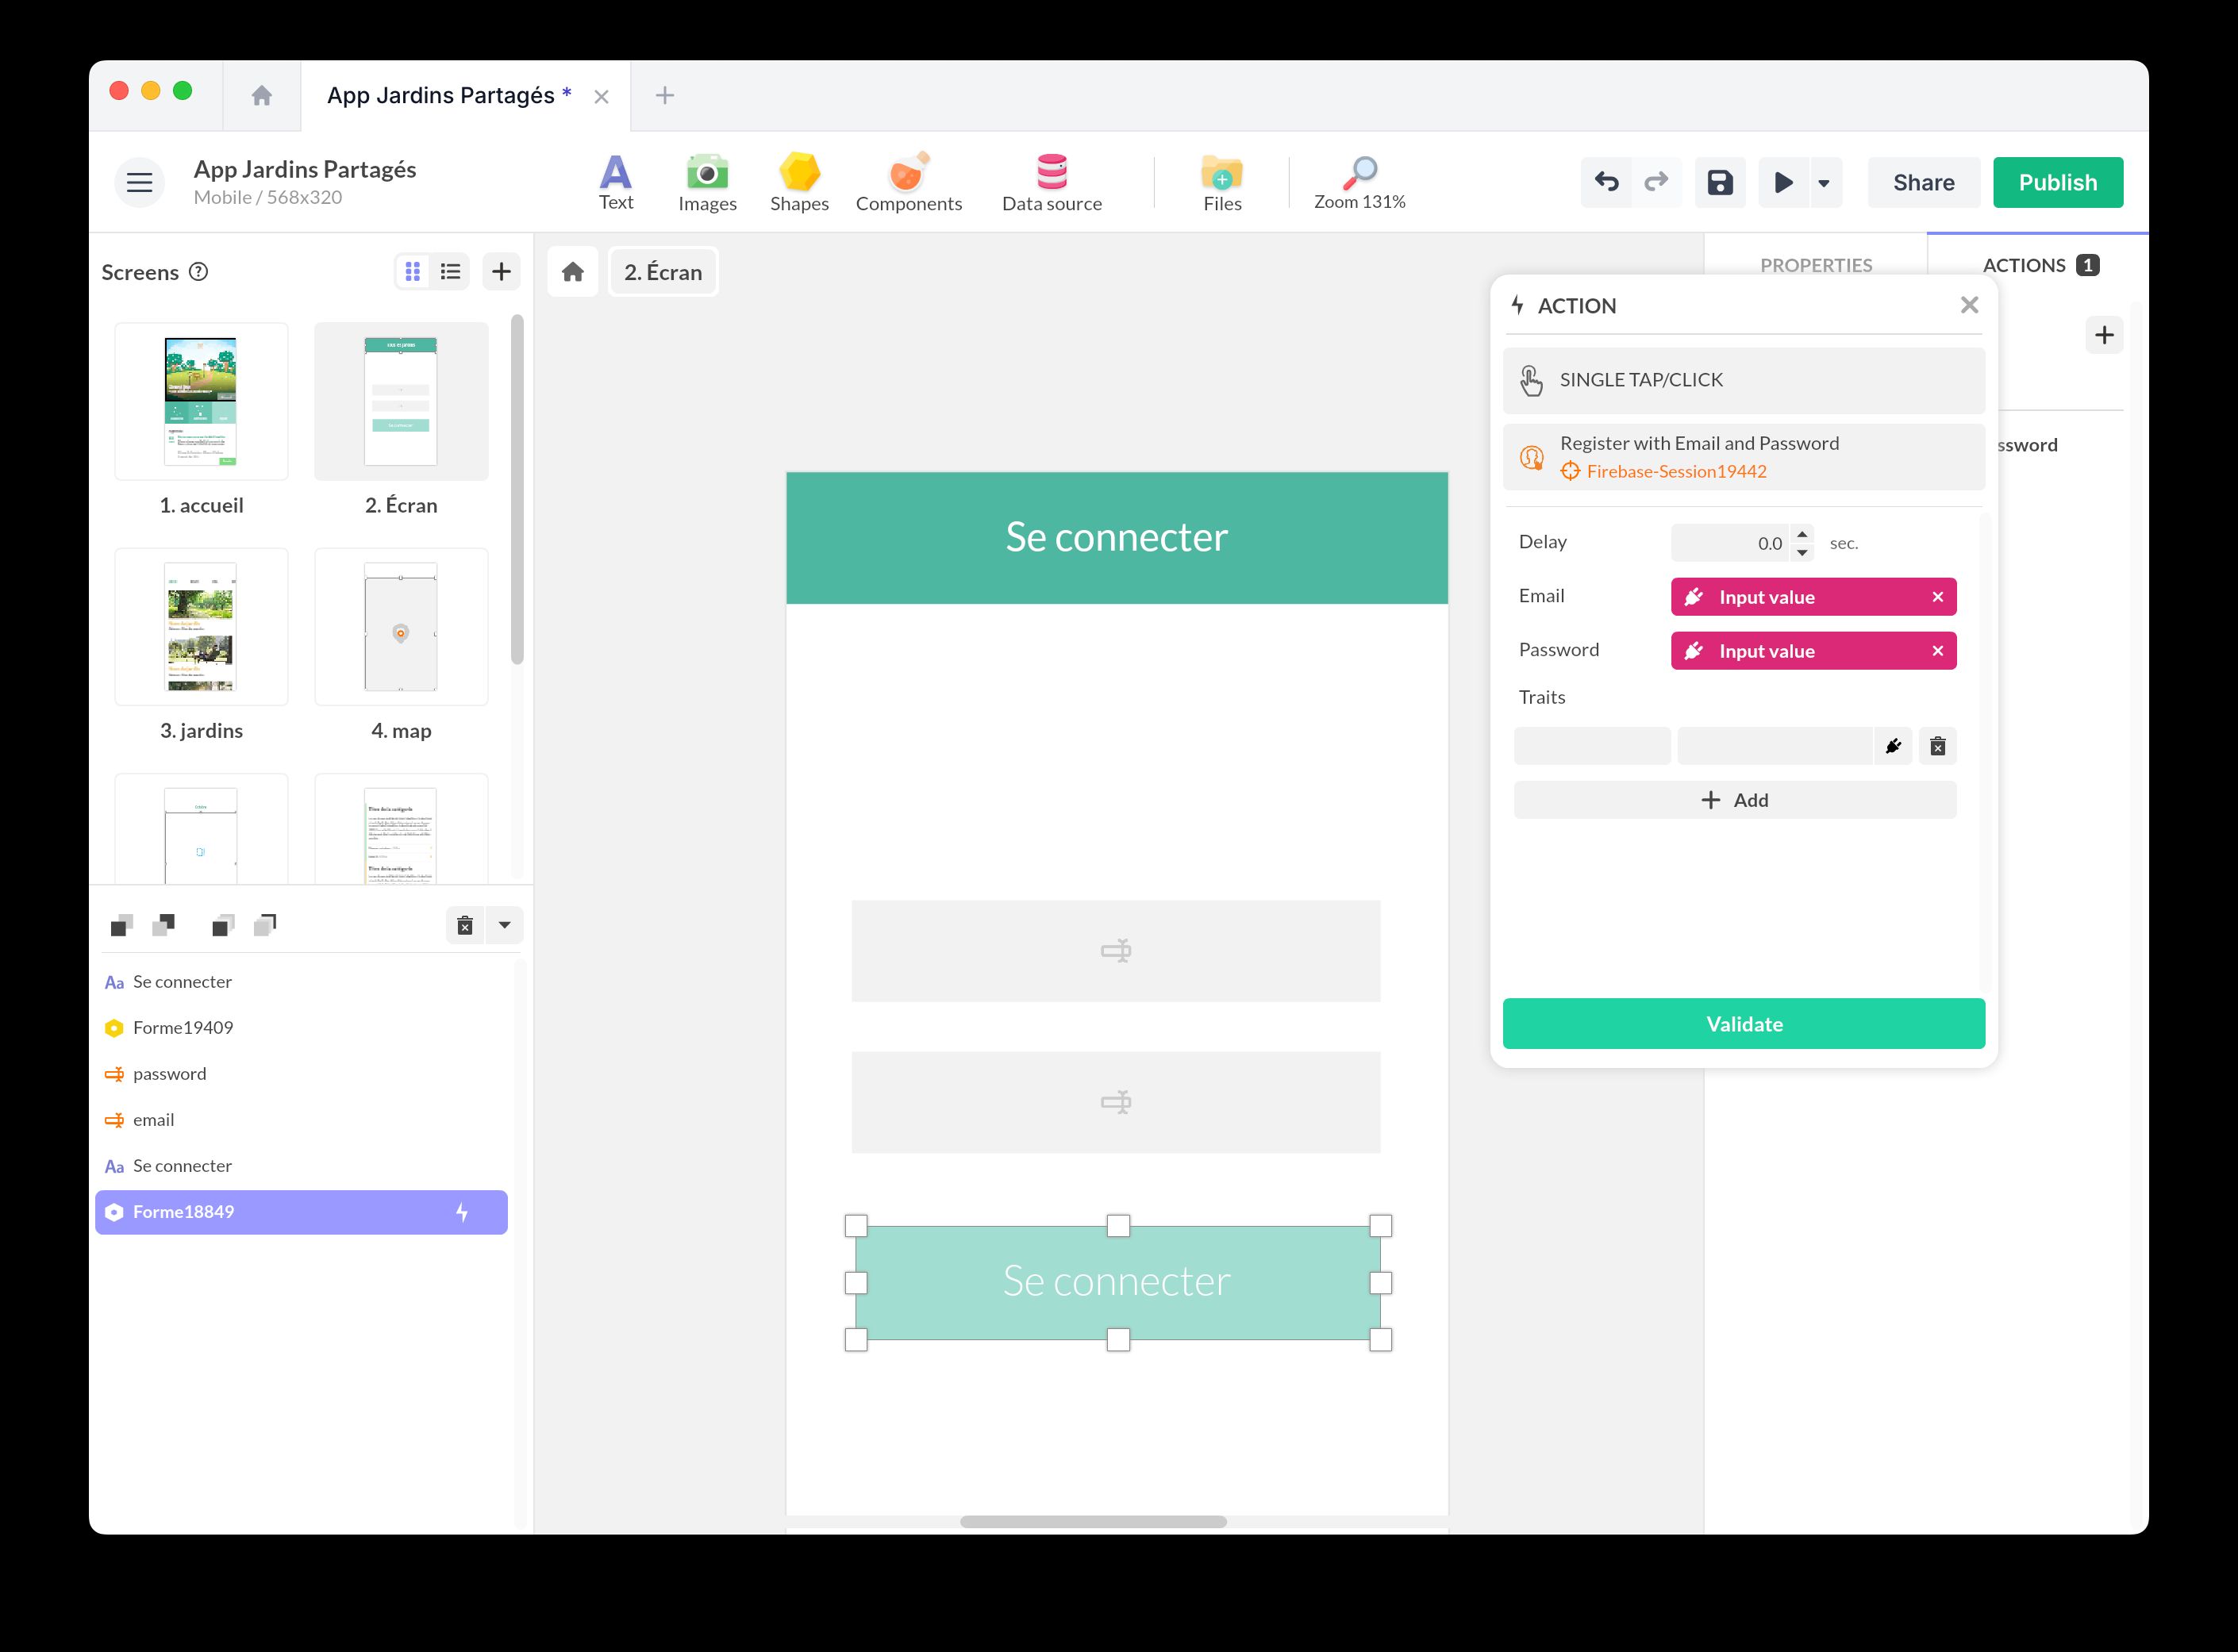
- Registration with custom fields: If you build your own headless sign-up flow, the Traits field lets you pass additional values during registration. Use it for advanced cases where you need to enrich the user document outside the standard Authentication form.
- Error management: When an error occurs, such as a poorly formatted email, the Login Error or Registration Error event captures the error message. You can store this message in a variable and display it using a Condition or Text component.