
Implement SSO authentication
Single Sign-On (SSO) allows users to log in to PandaSuite using their corporate identity, without needing to create an additional account. PandaSuite supports both SAML v2 and OpenID Connect (OIDC), used by many identity providers (IdP) such as Azure AD, Google Workspace, Okta, Auth0, etc.
SSO can be enabled in two places:
- On the editor side → For users accessing PandaSuite Studio.
- On the web app side → For applications created with PandaSuite (Web App / PWA).
These two configurations are independent. You can enable SSO for Studio, for a web app, or both. For each area, you choose one protocol (SAML or OIDC).
What is SSO?
Single Sign-On (SSO) is an authentication method that allows users to securely log in to multiple applications with a single credential.
Why use SSO?
- Enhanced security: fewer passwords to manage, reducing the risk of phishing.
- Seamless experience: smooth login without repeated authentication.
- Centralized management: access controlled by the IT administrator via an IdP.
The SAML v2 protocol
SAML (Security Assertion Markup Language) is an XML standard that allows a service provider (SP), like PandaSuite, to delegate authentication to an identity provider (IdP).
The OpenID Connect (OIDC) protocol
OpenID Connect (OIDC) is a modern protocol built on OAuth 2.0. It allows a service provider (like PandaSuite) to delegate authentication to an identity provider and receive standardized identity information (claims).
How does SSO work?
SSO is based on a secure exchange of authentication tokens between PandaSuite and your identity provider (IdP).
- The user attempts to access PandaSuite or a web app.
- PandaSuite sends an authentication request to the IdP with a token containing the user’s email.
- The IdP checks if the user is already logged in:
- ✅ If yes, access is granted immediately.
- 🔄 Otherwise, they are redirected to their company’s login page.
- The user authenticates with their IdP (e.g., Microsoft 365, Google, Okta credentials, etc.).
- The IdP validates the identity and sends authentication information back to PandaSuite (SAML assertion or OIDC token).
- PandaSuite validates it and grants access to the user.
Everything happens in the background, without the user having to enter a password on PandaSuite!
Setting up SSO for a web app
Currently, SSO authentication is only compatible with web apps / PWA. For a native application, please contact our team.
-
Retrieve PandaSuite information
- Access your PandaSuite account
- Go to the Apps section and select your web app
- Go to the Security tab
- Enable SSO
- Select a Protocol (SAML or OIDC)
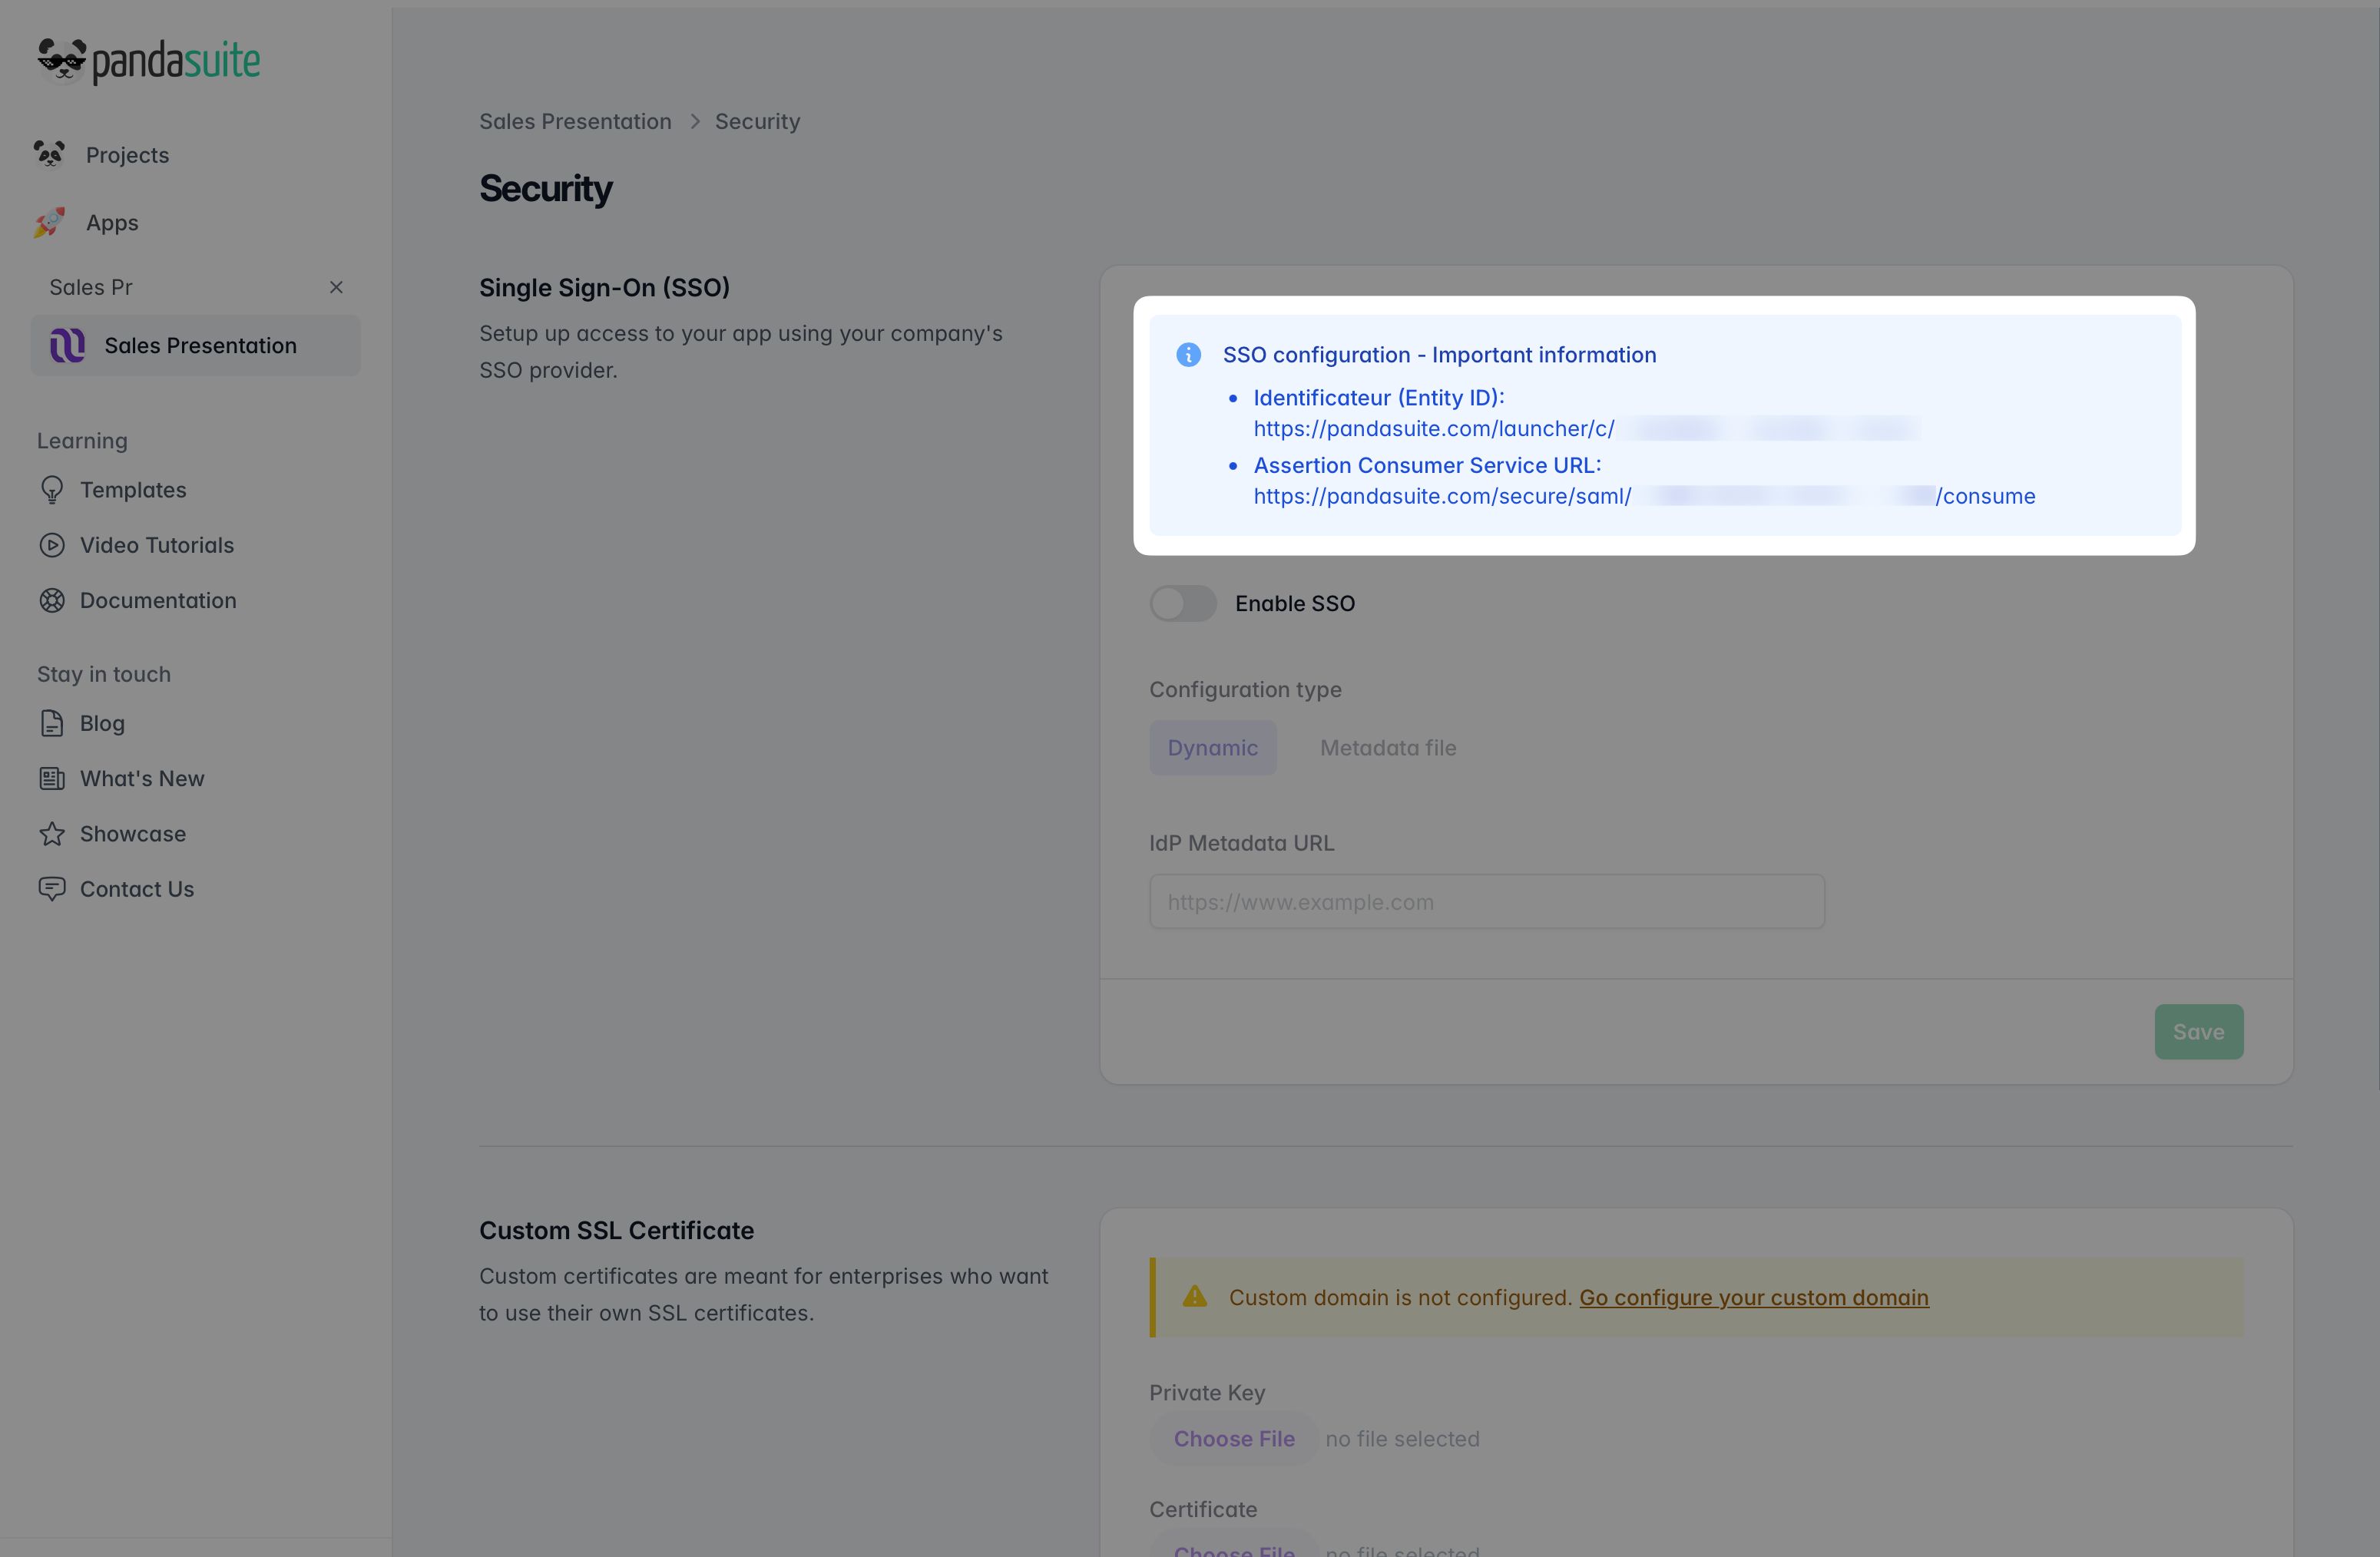
PandaSuite automatically provides you with the following information (depending on the selected protocol):
- SAML
- Metadata URL:
https://pandasuite.com/secure/saml/[APP_ID]/metadata - Entity ID:
https://pandasuite.com/launcher/c/[APP_ID] - Assertion Consumer Service URL:
https://pandasuite.com/secure/saml/[APP_ID]/consume
- Metadata URL:
- OIDC
- Callback URL:
https://pandasuite.com/secure/oidc/callback
- Callback URL:
-
Configure your identity provider (IdP)
Use the information above to configure your PandaSuite application in your identity provider (Azure AD, Google Workspace, Okta, etc.).
-
Finalize the configuration in PandaSuite
- If you selected SAML:
- In Configuration type, choose Dynamic URL to paste the IdP Metadata URL, or choose Metadata file to upload your metadata file.
- Optional: enable Sign AuthnRequests if your identity provider requires PandaSuite to sign SAML authentication requests.
- Optional: enable Require signed assertions to reject SAML assertions that are not signed by your identity provider.
- If Sign AuthnRequests is enabled:
- PandaSuite generates a signing certificate when you save the configuration.
- Prefer the PandaSuite Metadata URL when your identity provider can refresh it automatically. Use Download PEM certificate only when you need a manual certificate import.
- Add one or more email addresses in Certificate expiry notifications to receive reminders 30 days and 7 days before the active certificate expires.
- When PandaSuite prepares a replacement certificate, it appears as Next. Import it into your identity provider before selecting it in PandaSuite. PandaSuite does not switch certificates automatically.
- If you selected OIDC:
- Fill in Issuer URL, Client ID, and Client Secret.
- If a client secret is already configured, leave Client Secret empty to keep it unchanged.
- Optional: adjust Scopes (default:
openid,email,profile) and User ID Claim (default:sub).
- Save the configuration and test the connection.
- If you selected SAML:
Optional: Restrict access with Access Rules
In the Security tab, you can create Access Rules to restrict access based on:
- SAML attributes (including the NameID field)
- OIDC claims (including the Subject (sub) claim)
Use the visitor identity in your app
Once SSO is enabled on your web app, your project can read the visitor’s attributes and prove their identity to other services.
Expose SSO attributes to your project
In PandaSuite Studio, open the project properties and add the attribute names you need (for example email or role) in the SSO parameters field. Only the attributes you declare are shared with the project. Their values appear in the data binding tree under Project > SSO parameter(s) > ..., ready to display or reuse in your project.
Declaring a name filters what reaches the project: it does not make your identity provider send it. Ask whoever manages your IdP which attributes are released to the app, and declare exactly those names. A declared attribute that stays empty means the IdP does not send it under that name.
Get a verifiable proof of identity
Your app may need to prove to another service who the visitor is: your own backend, an API, or a custom component. Attribute values are not a proof, since anything readable in the app can be copied. For a real proof, add the reserved name pandasuiteIdentityAssertion to the same SSO parameters field.
For example, your backend can unlock content reserved for your customers when the token’s sub matches an account you already know.
When a visitor signs in through SSO, PandaSuite places a signed token under that name, next to the other declared attributes. To send it, bind the pandasuiteIdentityAssertion value into an HTTP component request or into a custom component property. Send it within five minutes of the app loading, and do not store it for later: past that delay, your service will reject it as expired. Every load of the app during an active SSO session receives a fresh token.
You declare the name in Studio. Verifying the token is a developer’s job: give your developer the details below.
| The token at a glance | Details |
|---|---|
| Format | JWT signed by PandaSuite (RS256, typ header: pandasuite-identity+jwt) |
| Lifetime | 5 minutes |
| Verification | offline, against the public keys published at https://pandasuite.com/.well-known/jwks.json, checking that aud matches your app |
sub | a stable, anonymous identifier of the visitor (it starts with psid_), never the raw identifier from your IdP |
auth_time | when the visitor signed in at the identity provider; require a recent value if your service needs a fresh sign-in |
email and attributes | included only when you also declare those attribute names |
aud and publication_id | identify where the sign-in took place (the app or the publication) |
channel_id | present only when the visitor signed in through your app, absent for a direct publication link |
Setting up SSO to access PandaSuite Studio
-
Request creation of your organization
- Contact the PandaSuite team to request the creation of your SSO organization
- Confirm which protocol you want to use (SAML or OIDC)
- The PandaSuite team will provide you with the necessary information (depending on the selected protocol):
- SAML: Metadata URL, Entity ID, and Assertion Consumer Service URL
- OIDC: Callback URL
-
Configure your identity provider (IdP)
Use the information provided by the PandaSuite team to configure PandaSuite Studio in your identity provider (Azure AD, Google Workspace, Okta, etc.).
-
Send IdP metadata
- If you selected SAML: send the PandaSuite team the XML metadata file from your identity provider or a metadata URL, and confirm whether you need Sign AuthnRequests and/or Require signed assertions.
- If you selected OIDC: send the PandaSuite team the Issuer URL, Client ID, and Client Secret (and optional Scopes and Email Claim).
-
Finalization
Once the configuration is completed by the PandaSuite team, your users will be able to access PandaSuite Studio via SSO.
If your Studio SSO uses SAML request signing, PandaSuite can also expose the signing certificate through the Metadata URL or a downloadable PEM file, plus Certificate expiry notifications to help you prepare the rotation. When PandaSuite prepares a replacement certificate, it appears as Next. Import it into your identity provider before activating it in PandaSuite.