Blow Sensor
The Blow sensor allows you to create a blowing-related action on an iOS & Android device.
How it works
The Blow sensor is based on the saturation of the microphone of the iOS & Android device: your user must blow at the microphone for his action to be recognized. Depending on the type of device, the microphone is not in the same place.
⚠️ Only for iOS & Android apps: These features are only available for native apps.
Insert the Blow Sensor
Click on Components and insert the Blow Sensor.
This is a System component, it has no visual representation in your screen but is accessible from Objects.
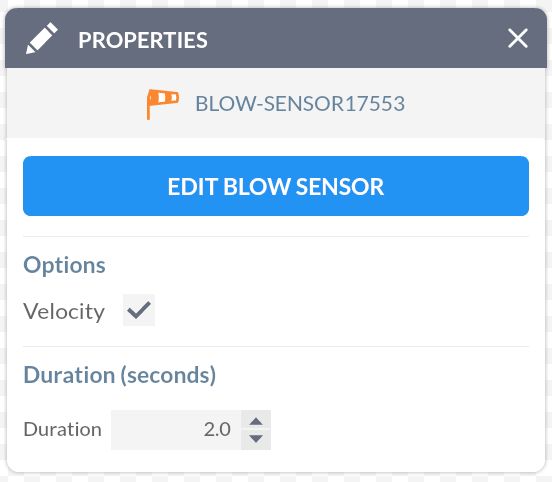
In the Properties window, customize the Blow sensor:
- Velocity: the velocity allows you to match the speed of the action to the intensity of the breath felt
- Duration: choose the duration required to fully execute the action
Create a time marker
To trigger an action after a specific time in your blow action, you need to create a time marker.
Go to the Component Properties window and click on the Edit button. Add a time marker.
In the Actions window, choose this marker and associate it with the action of your choice.
Synchronize an action with the blowing
It is possible to synchronize a blowing action with another component: the Scrolling Area, an Image Sequence, an Audio file etc…
If we take the example of the video, it is a question of synchronizing an image sequence with a breath action.
Add a Synchronization component and select the two components to synchronize.