Before After Image Slider
Discover how to build a Before/After comparison slider between two images.

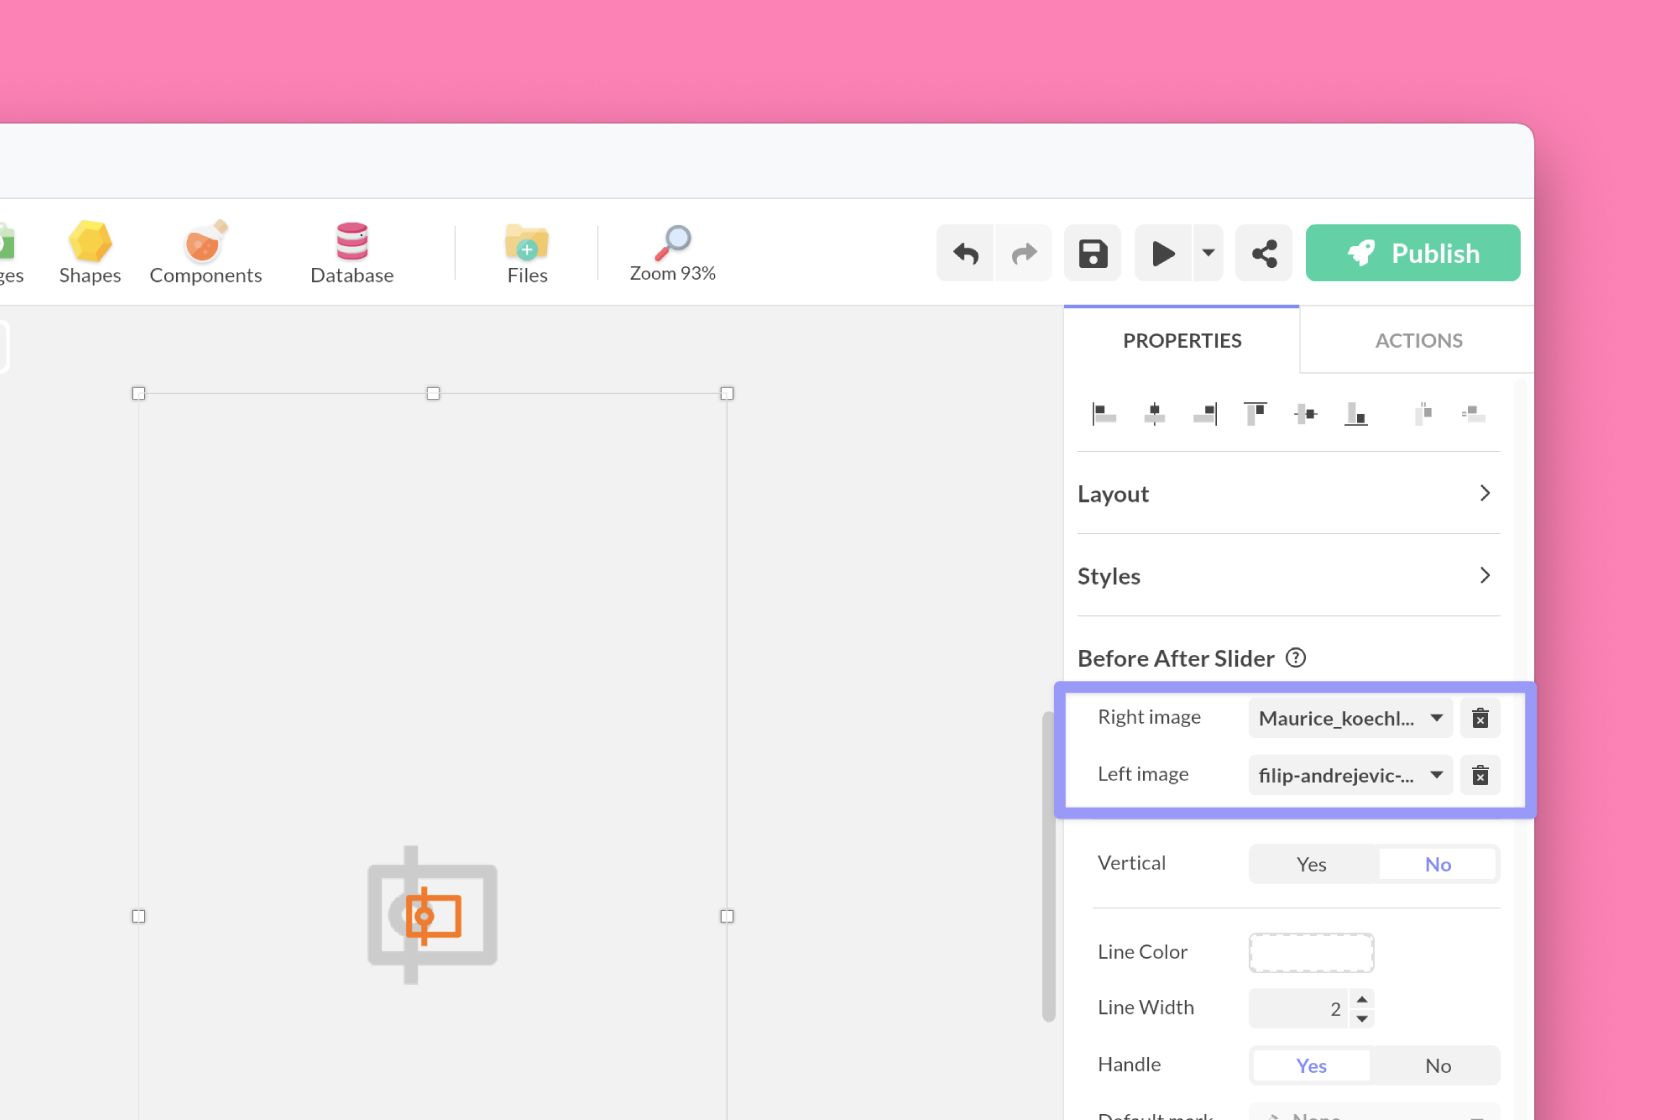
Insert the Before/After Slider component from the list of components. In the properties, choose the left and right images. Make sure they are the same size.
To view the before/after image, you must go inside the component. Double-click on the component area.
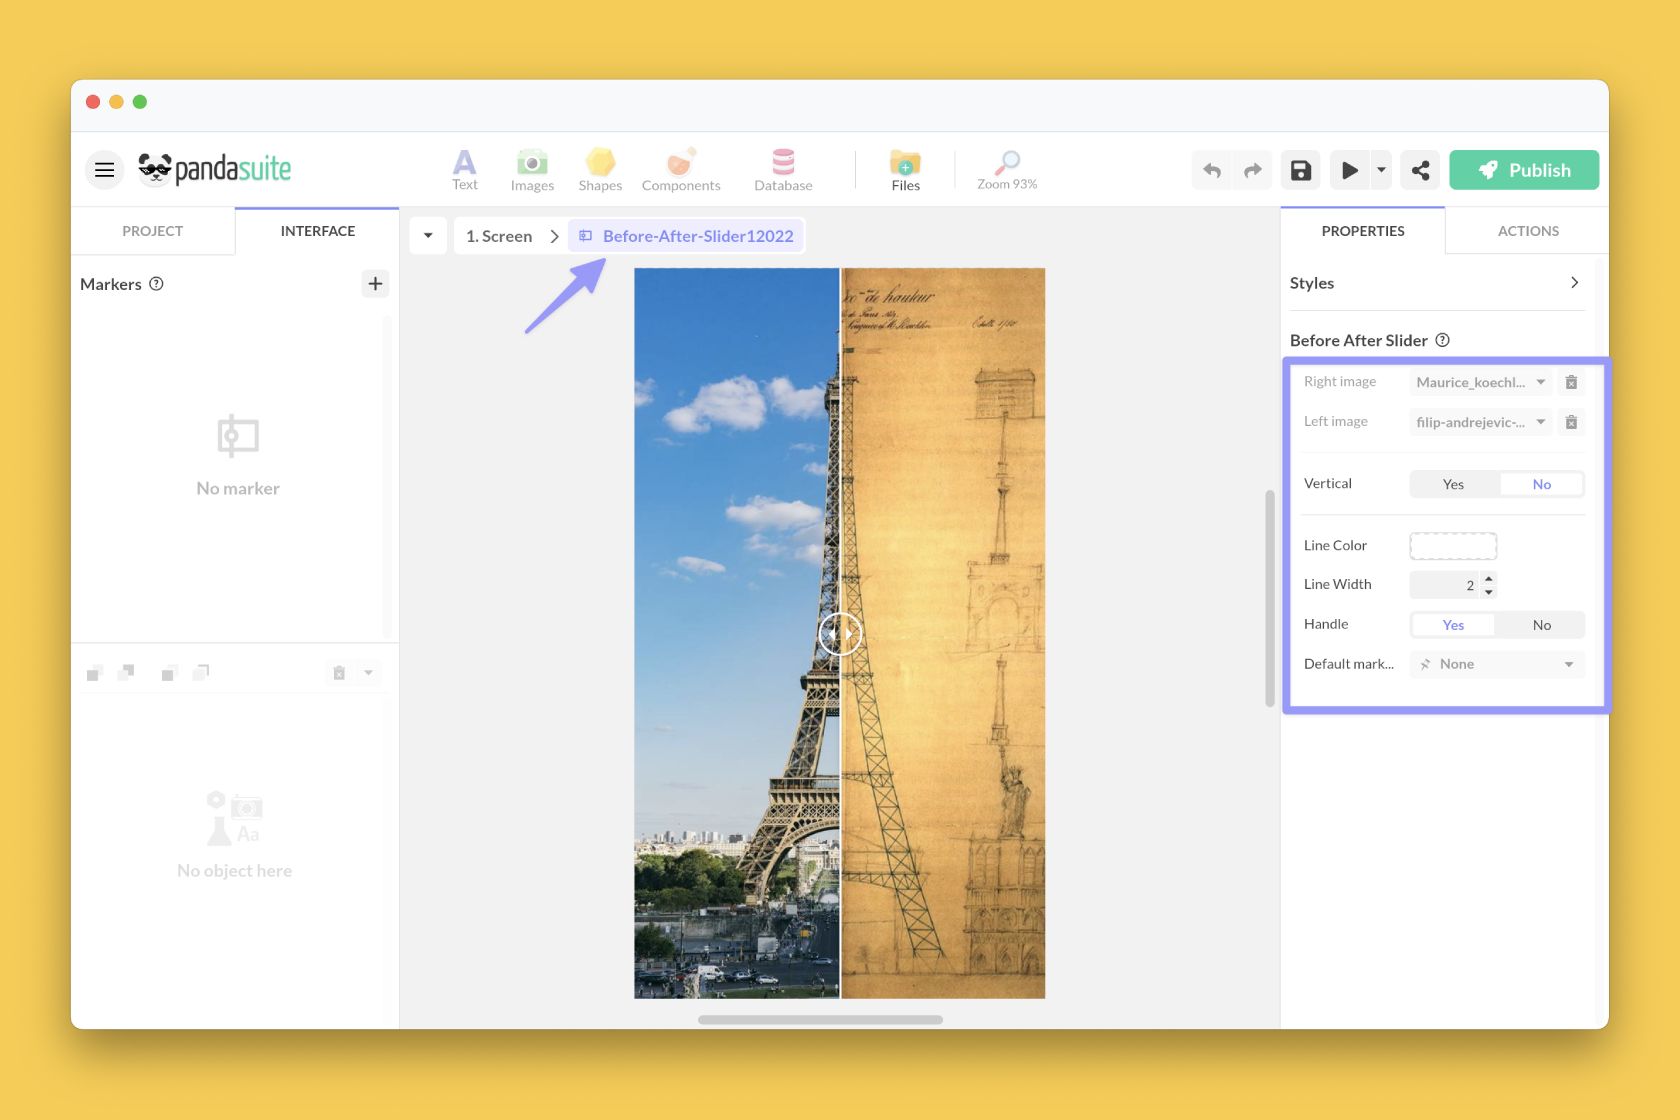
Here are the properties of the Before/After Slider component:
- Vertical: choose if your cursor is placed vertically or horizontally
- Line color: choose the color of your line
- Line width: choose the width of the line.
- Handle: display or not the handle of the cursor
You can add one or more markers to trigger actions and go to a location. It is also possible to synchronize this before/after image with another component.
If you don’t want to display the cursor, remove the handle and set the line width to 0.