Connect to Airtable
Easily connect your application to an Airtable database to retrieve and send data.
Airtable Animal Quiz
Add this template to your account in just a few clicks. Edit and customize it freely.
→ Add this template to your accountCreate a free account on Airtable
Airtable is a well-known tool that combines spreadsheets, databases, and project management. It allows you to manage a wide range of data types, not just numbers: phone numbers, dates, barcodes, photos, etc. Its simplicity, intuitive interface, and free plan make it a key tool in the no-code ecosystem.
To create a free Airtable account: https://airtable.com/signup
Prepare your Airtable database
Create a new database by clicking Add a base.
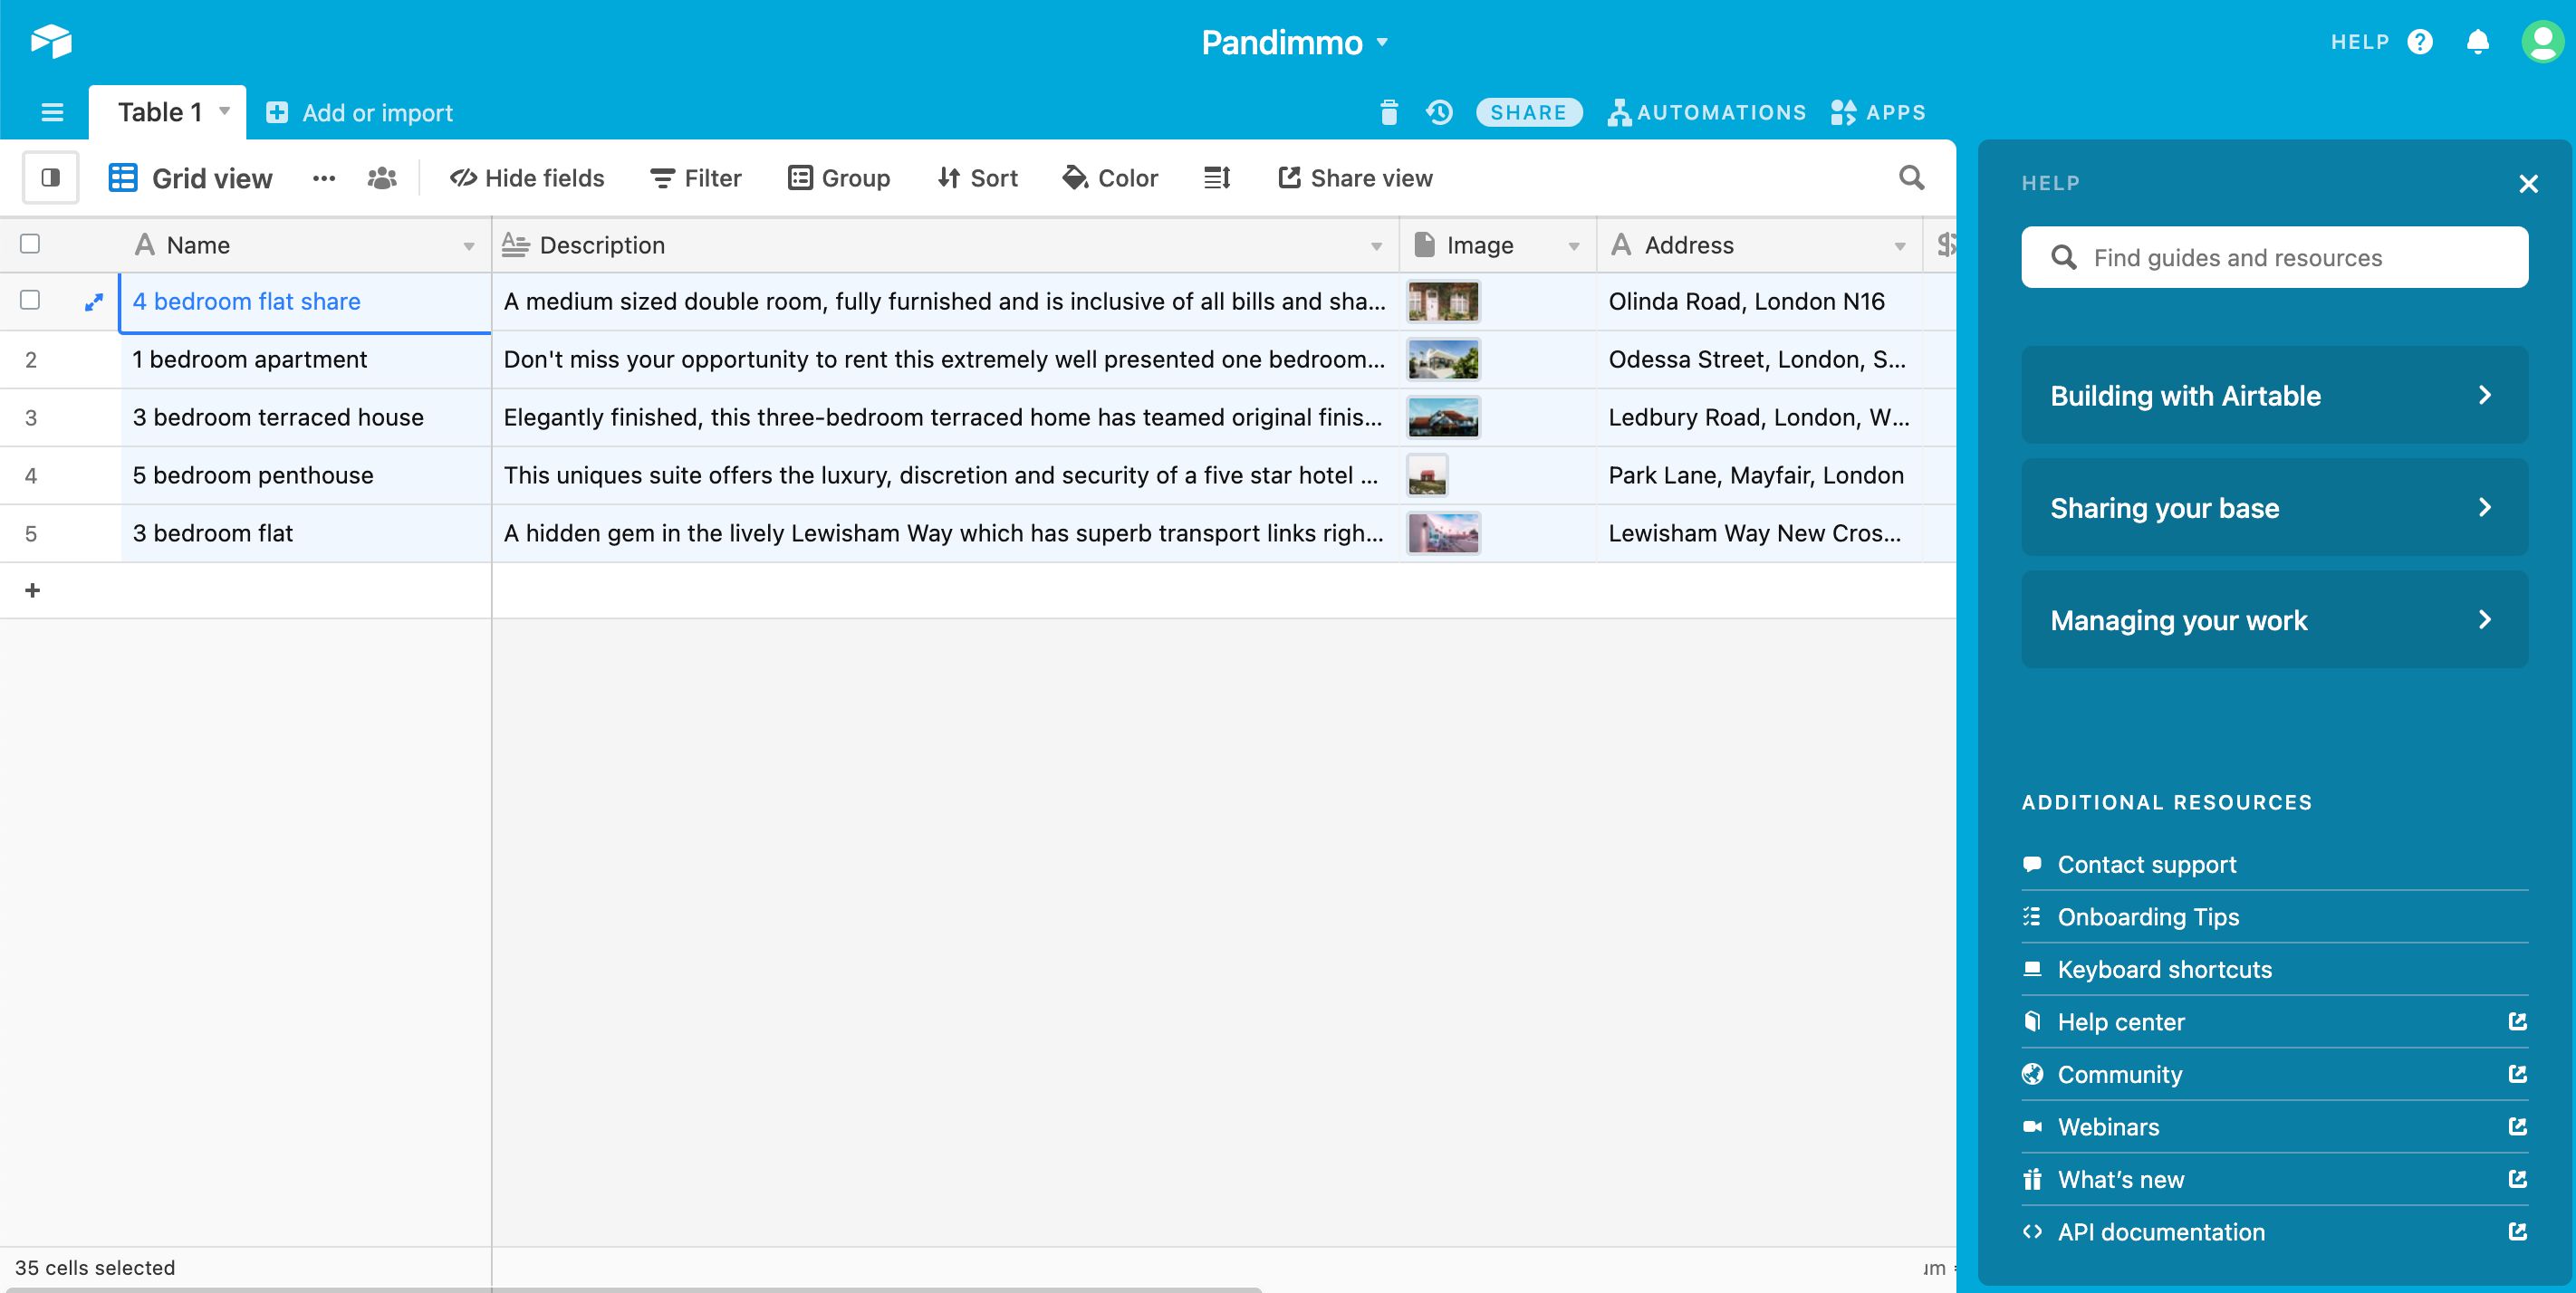
Structure your data within a table by adding fields for each type of data.
Here is an example of a real estate database:
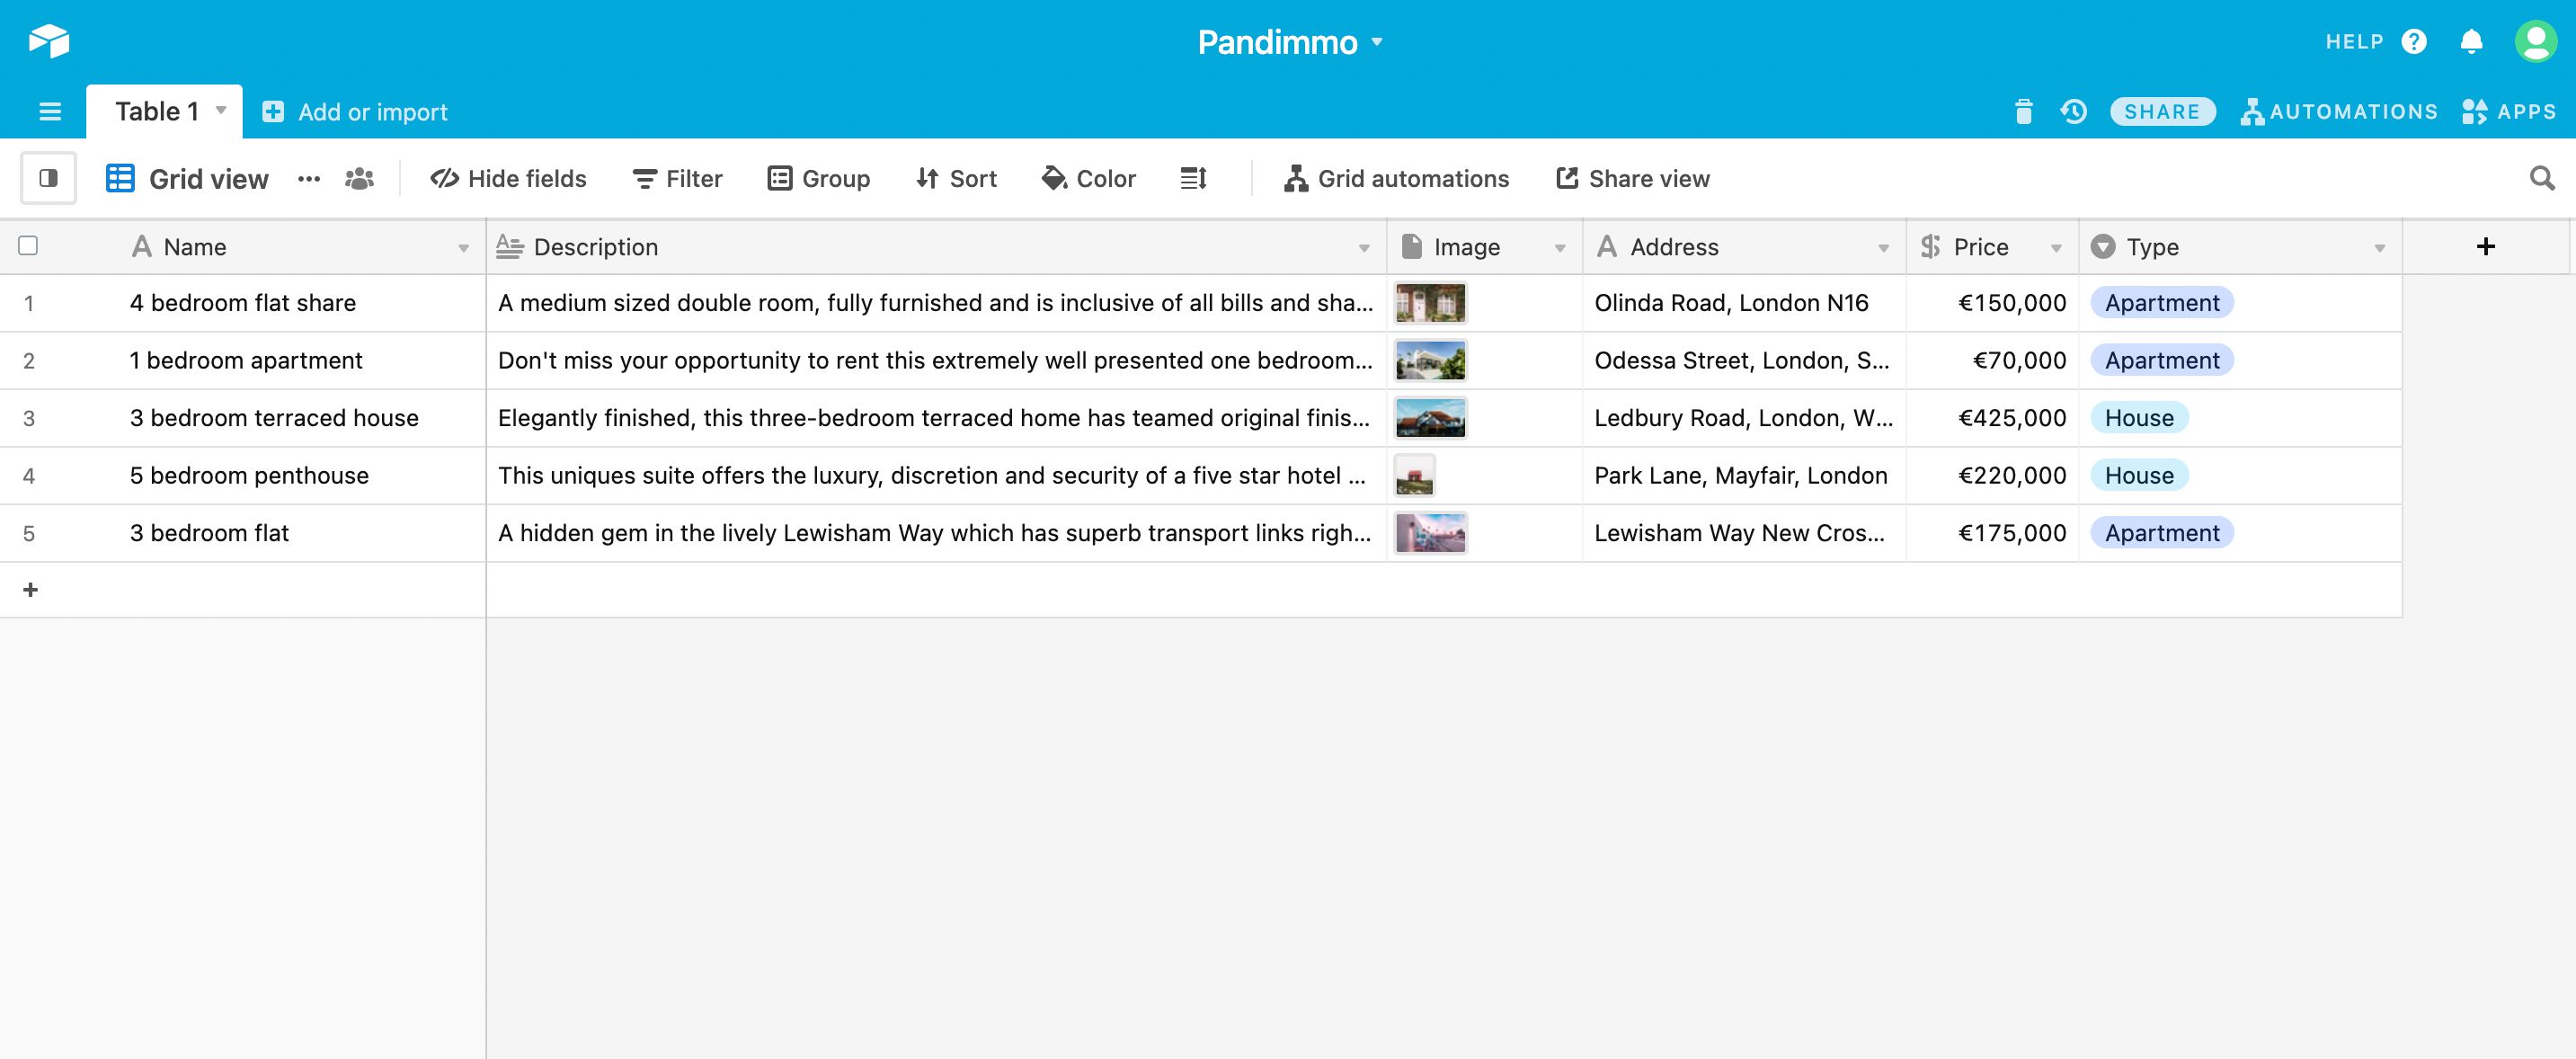
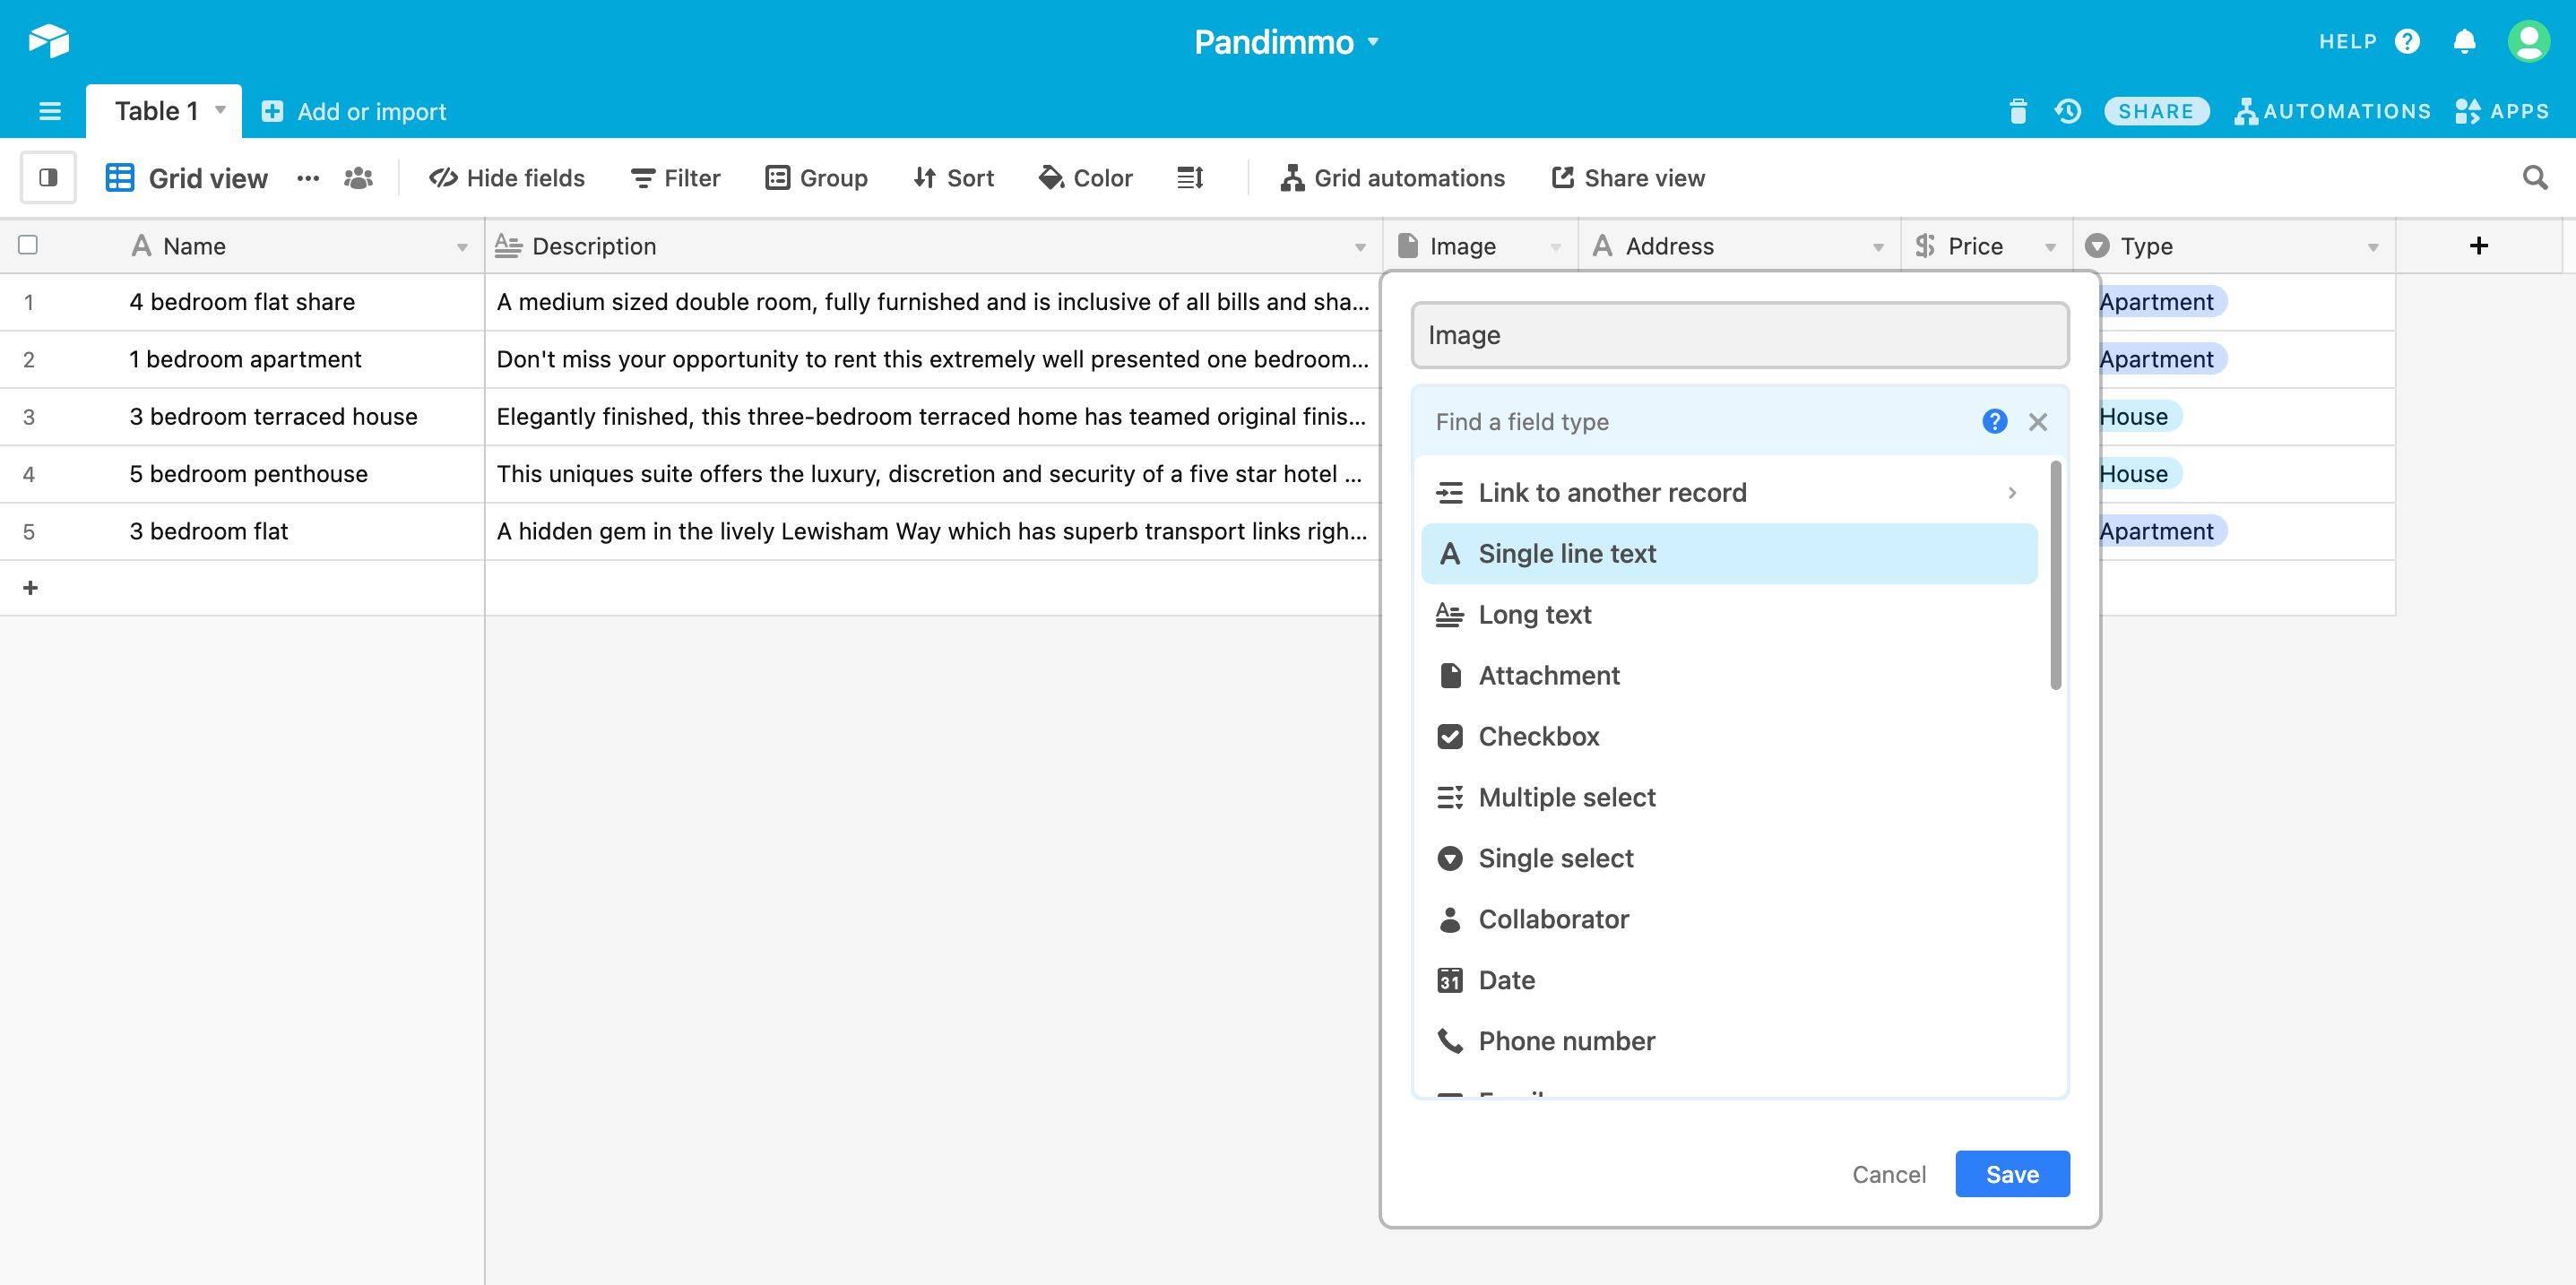
You can choose from different field types: checkbox, text, date, image, etc.
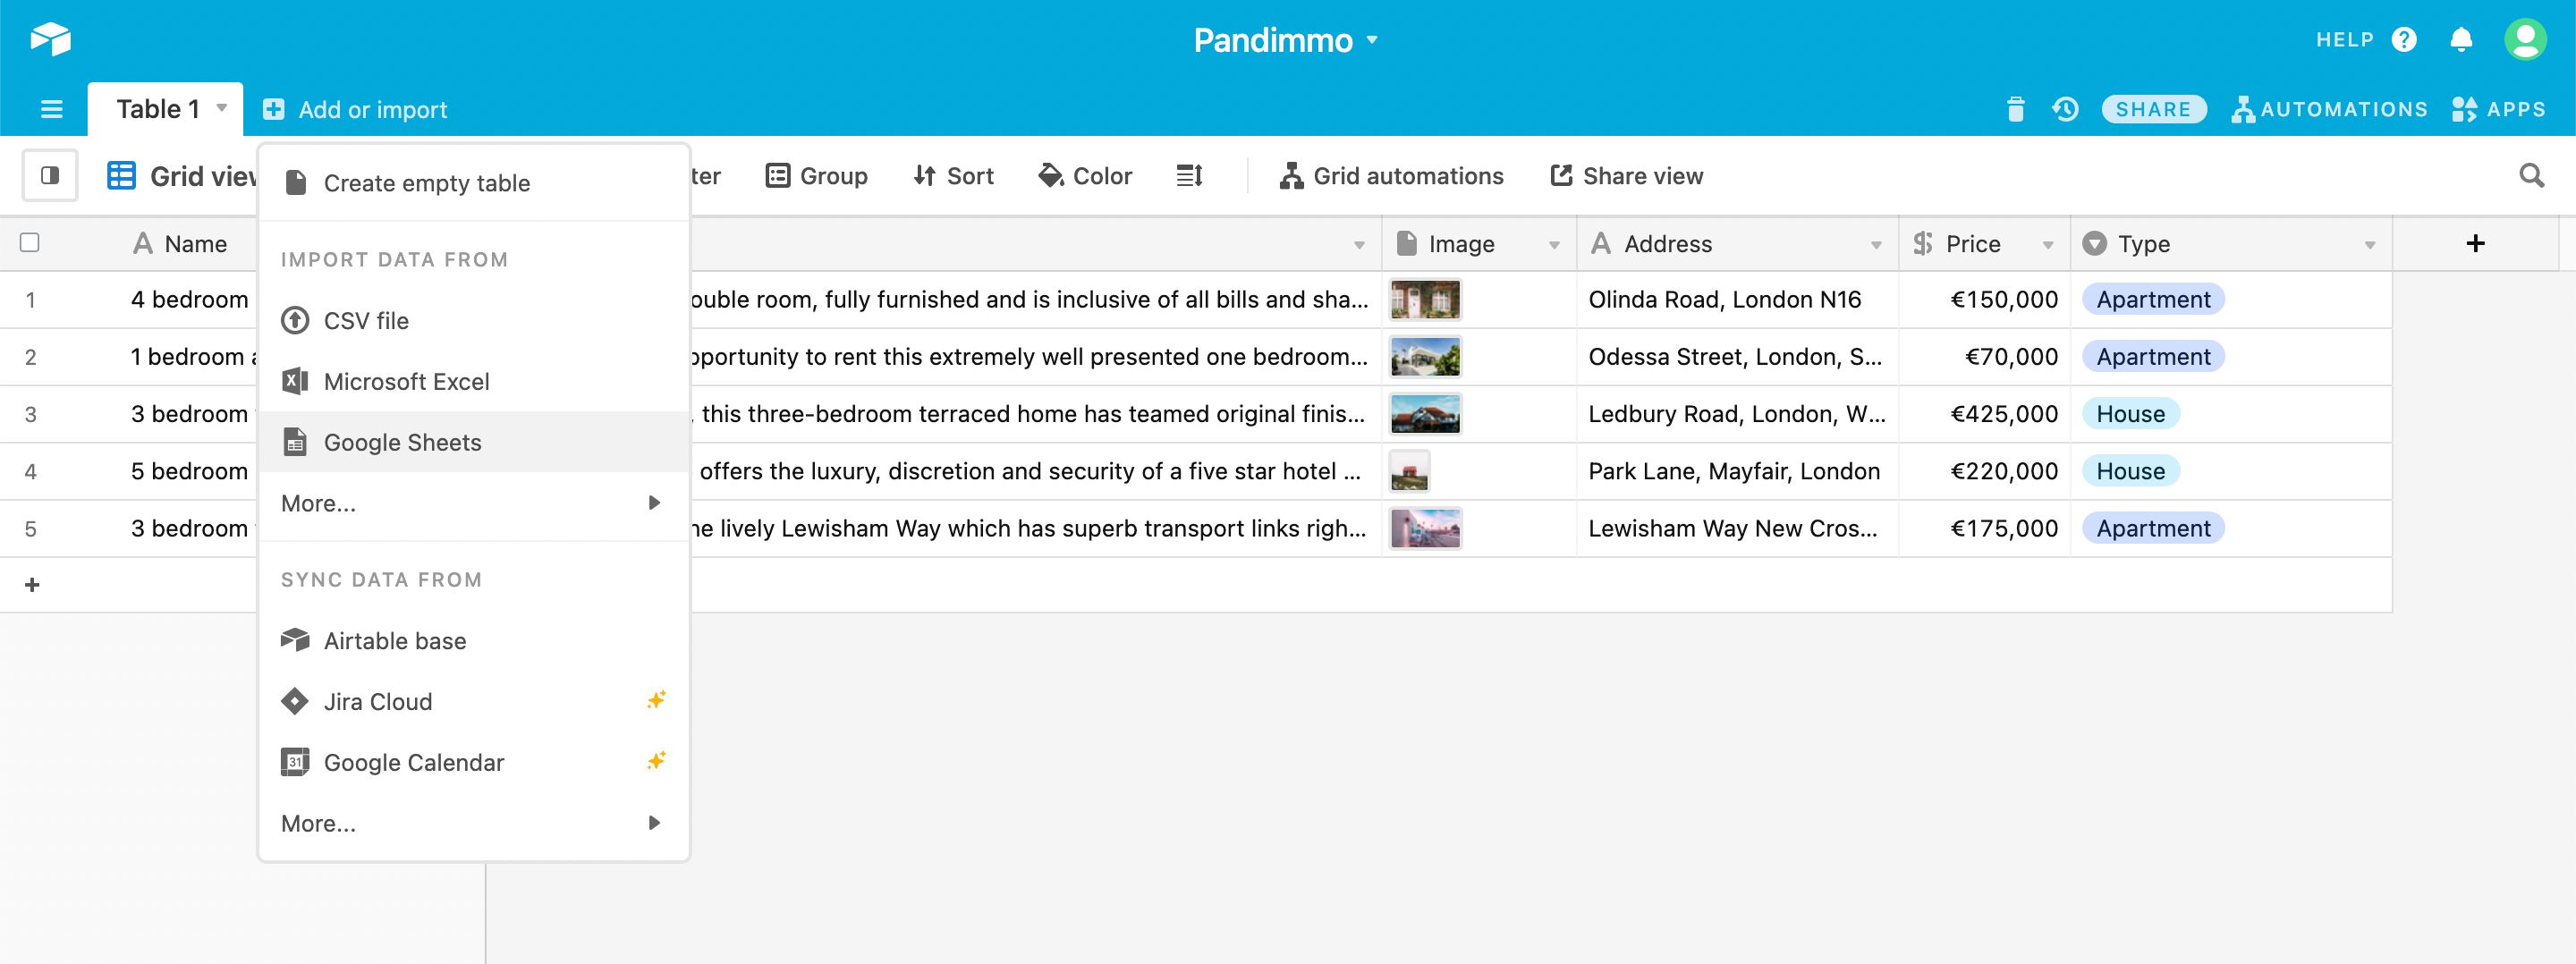
Import your data manually or from a .csv file, Microsoft Excel, or Google Sheets:
For more information on Airtable, check out the help center: https://support.airtable.com/
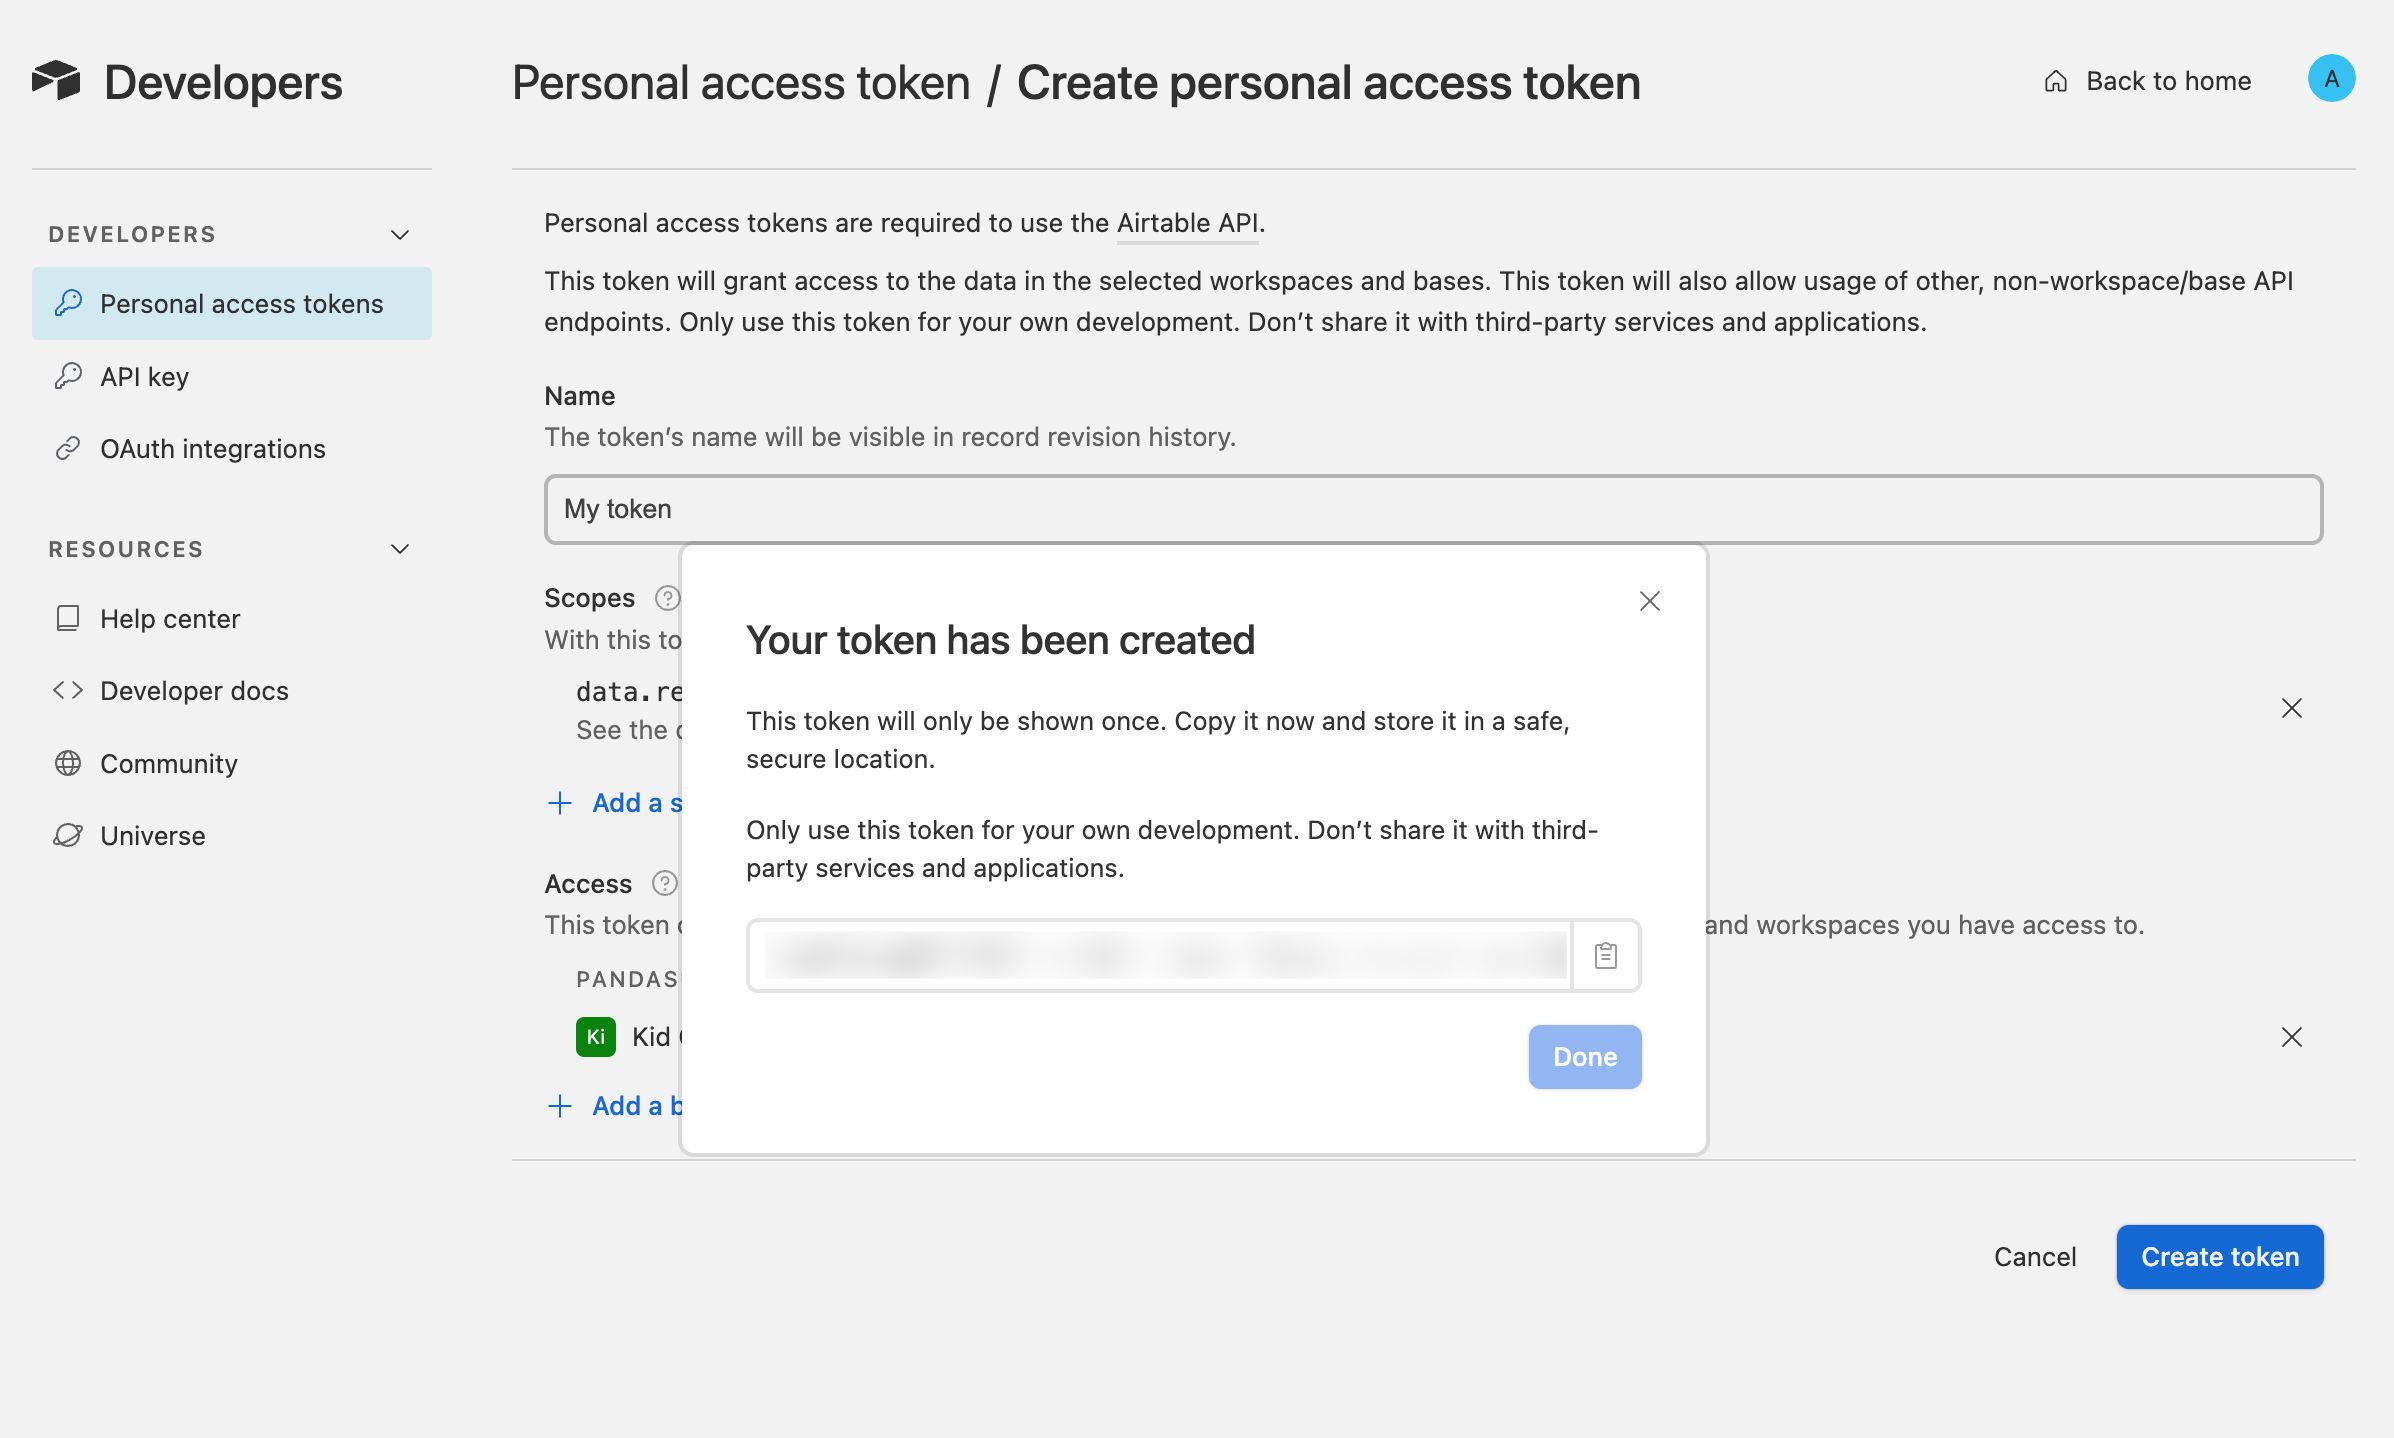
Create a personal token
Since 2024, Airtable has enhanced its security rules, requiring a personal token for API connections.
To create a personal token:
-
Go to your Airtable account’s token section: https://airtable.com/create/tokens
-
Click Create token
-
Define a Name, a Scope, and associate a database.
-
Regarding Permissions, choose based on your needs:
- If you only need to retrieve data, select Read.
- If you need to both retrieve and modify data, select Write. In this case, protect the token using the proxy mode (see below).
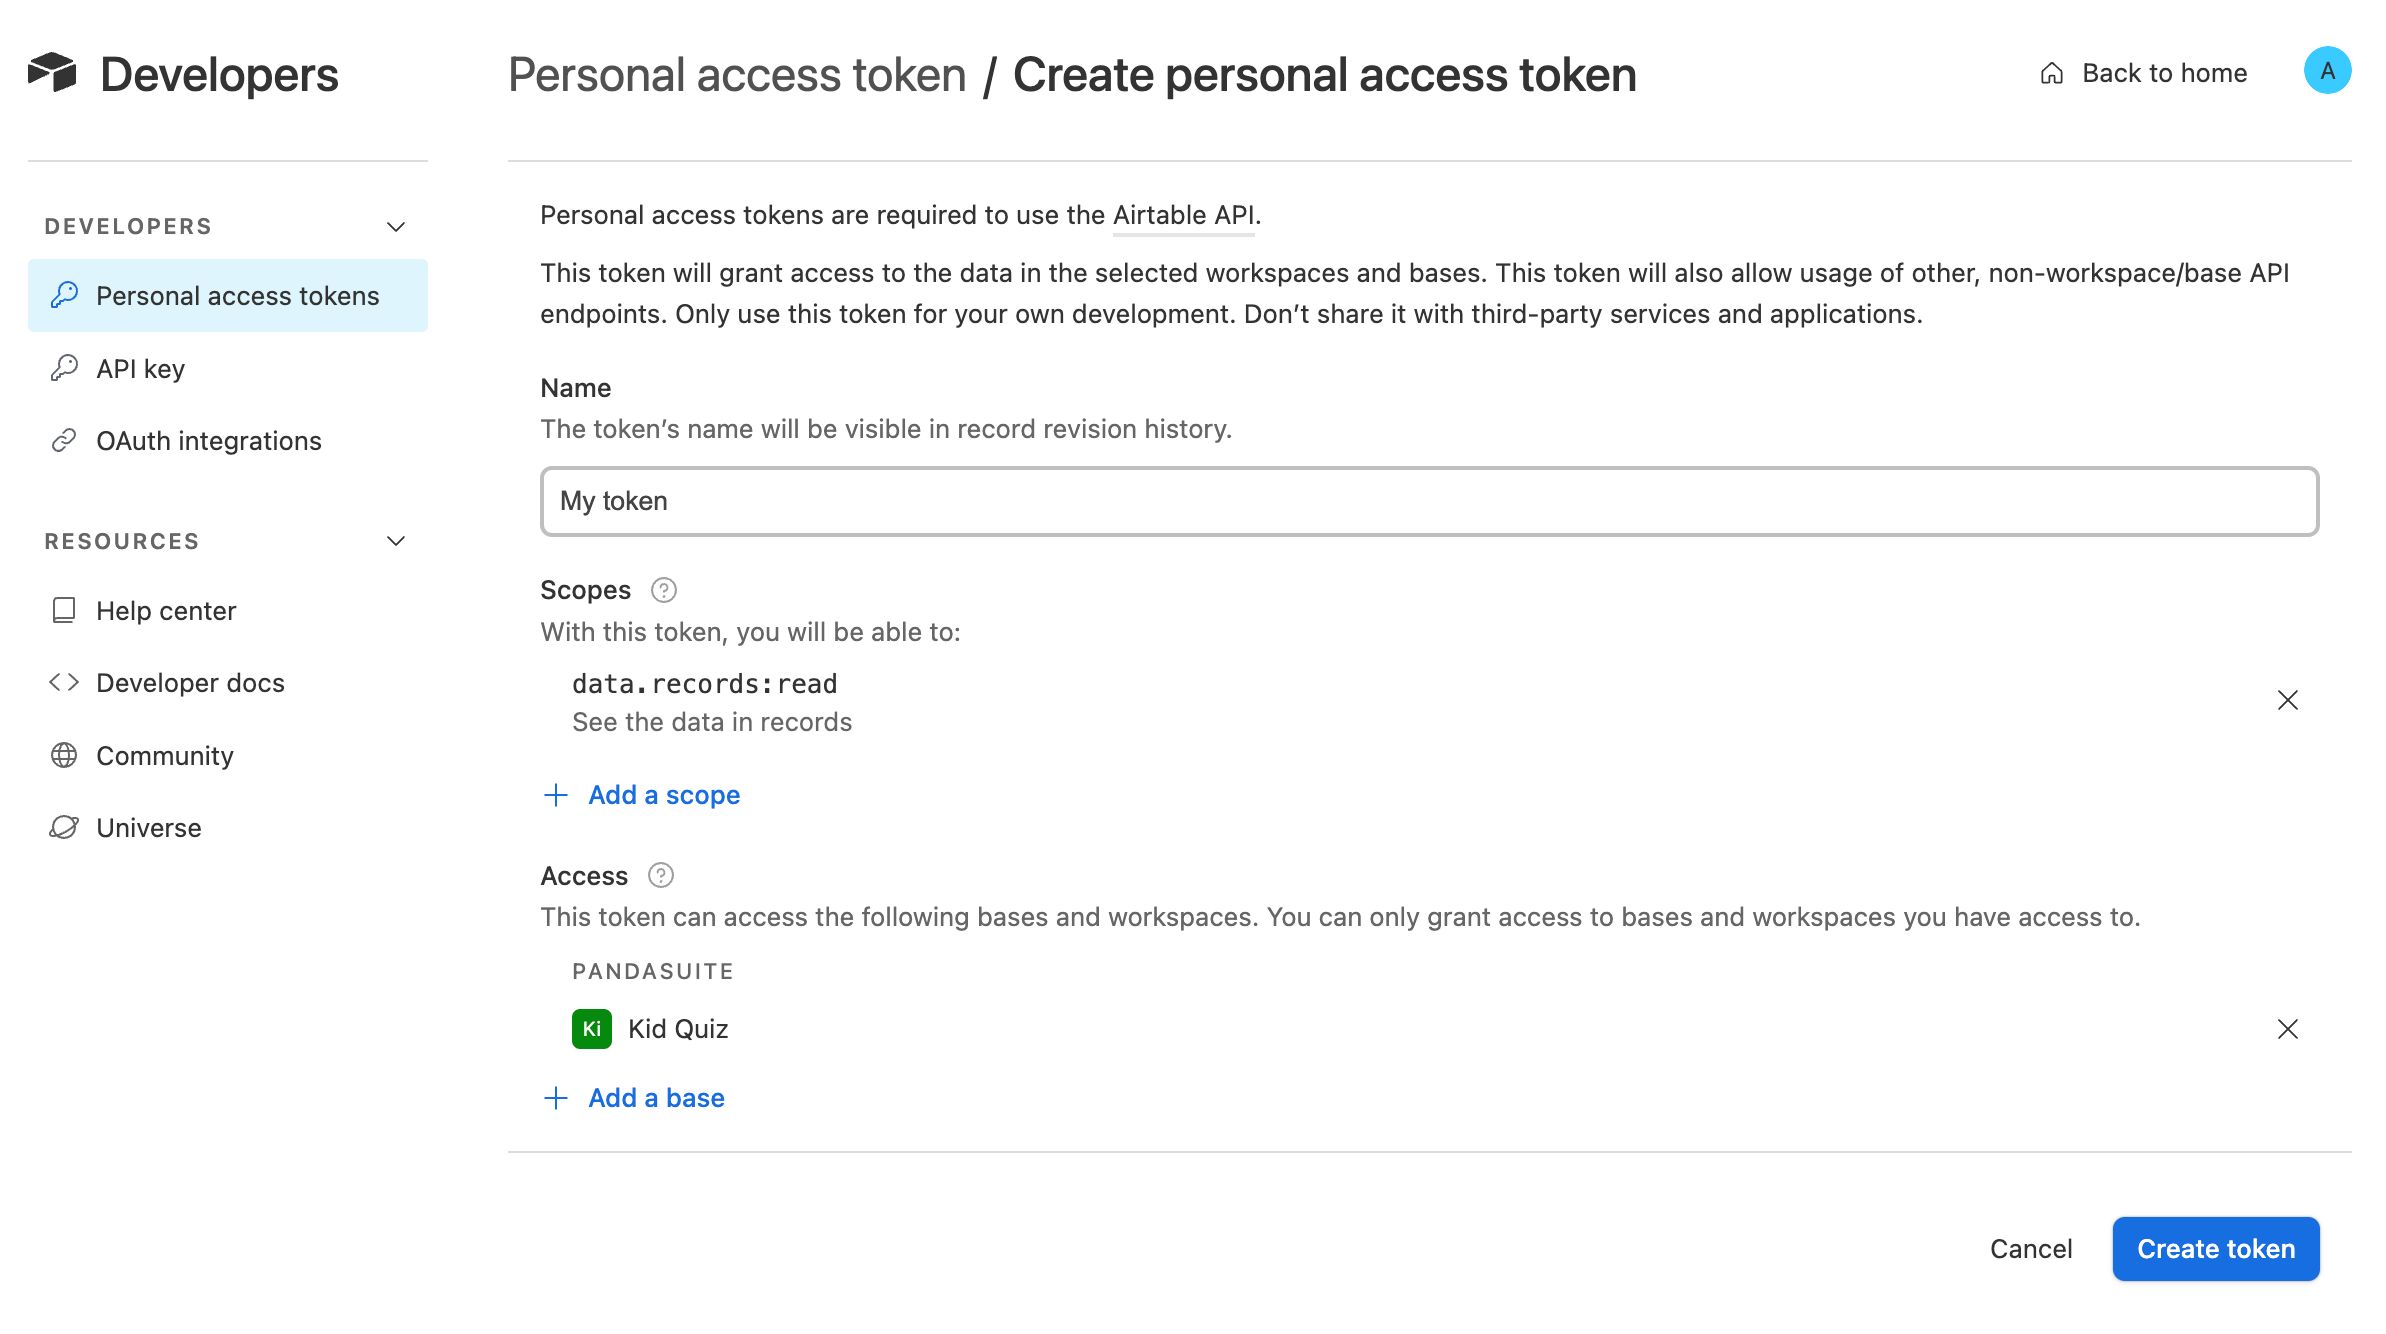
- Your personal token is now ready. Copy and store it in a secure location.
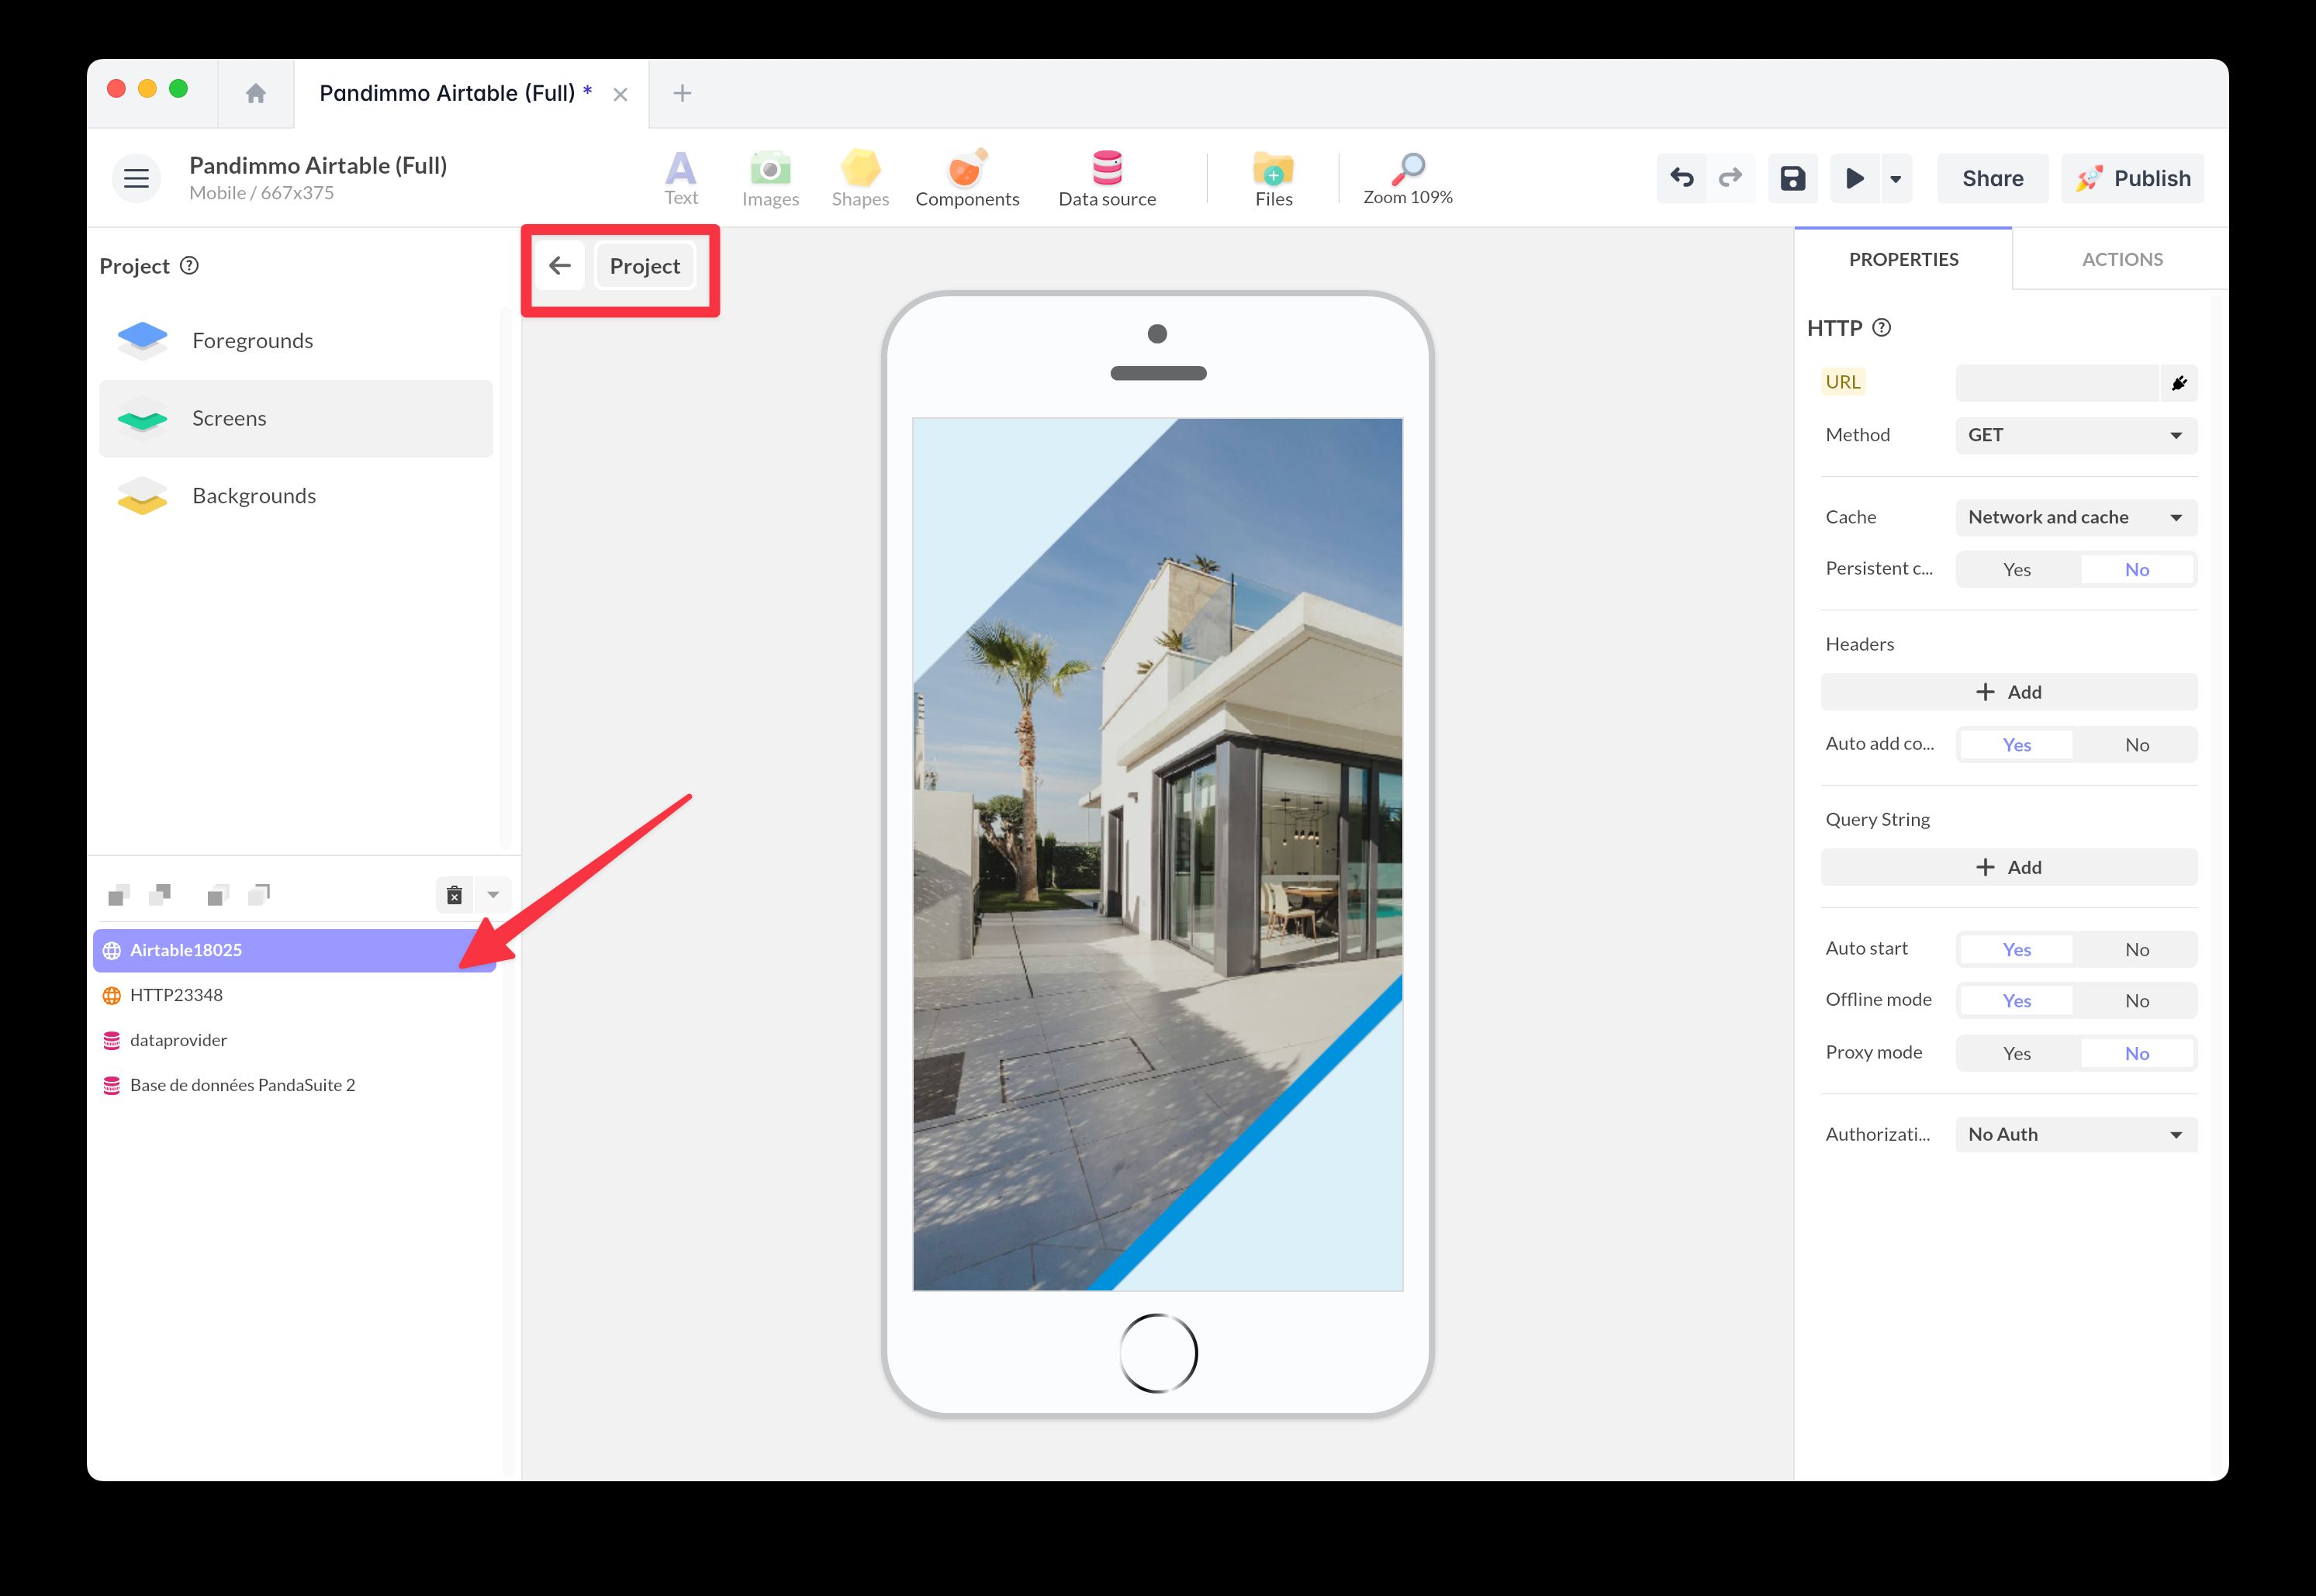
Configure the HTTP component
Connect your Airtable database to your PandaSuite application using the HTTP component.
To configure your HTTP component:
- Select your Project: placing it here makes it accessible throughout your application.
- Click Components > HTTP to insert it.
- To enter your Airtable base properties, go to HELP > API Documentation in Airtable to retrieve the API parameters.
URL
To retrieve the API URL, select your Table on the left and click List Records.
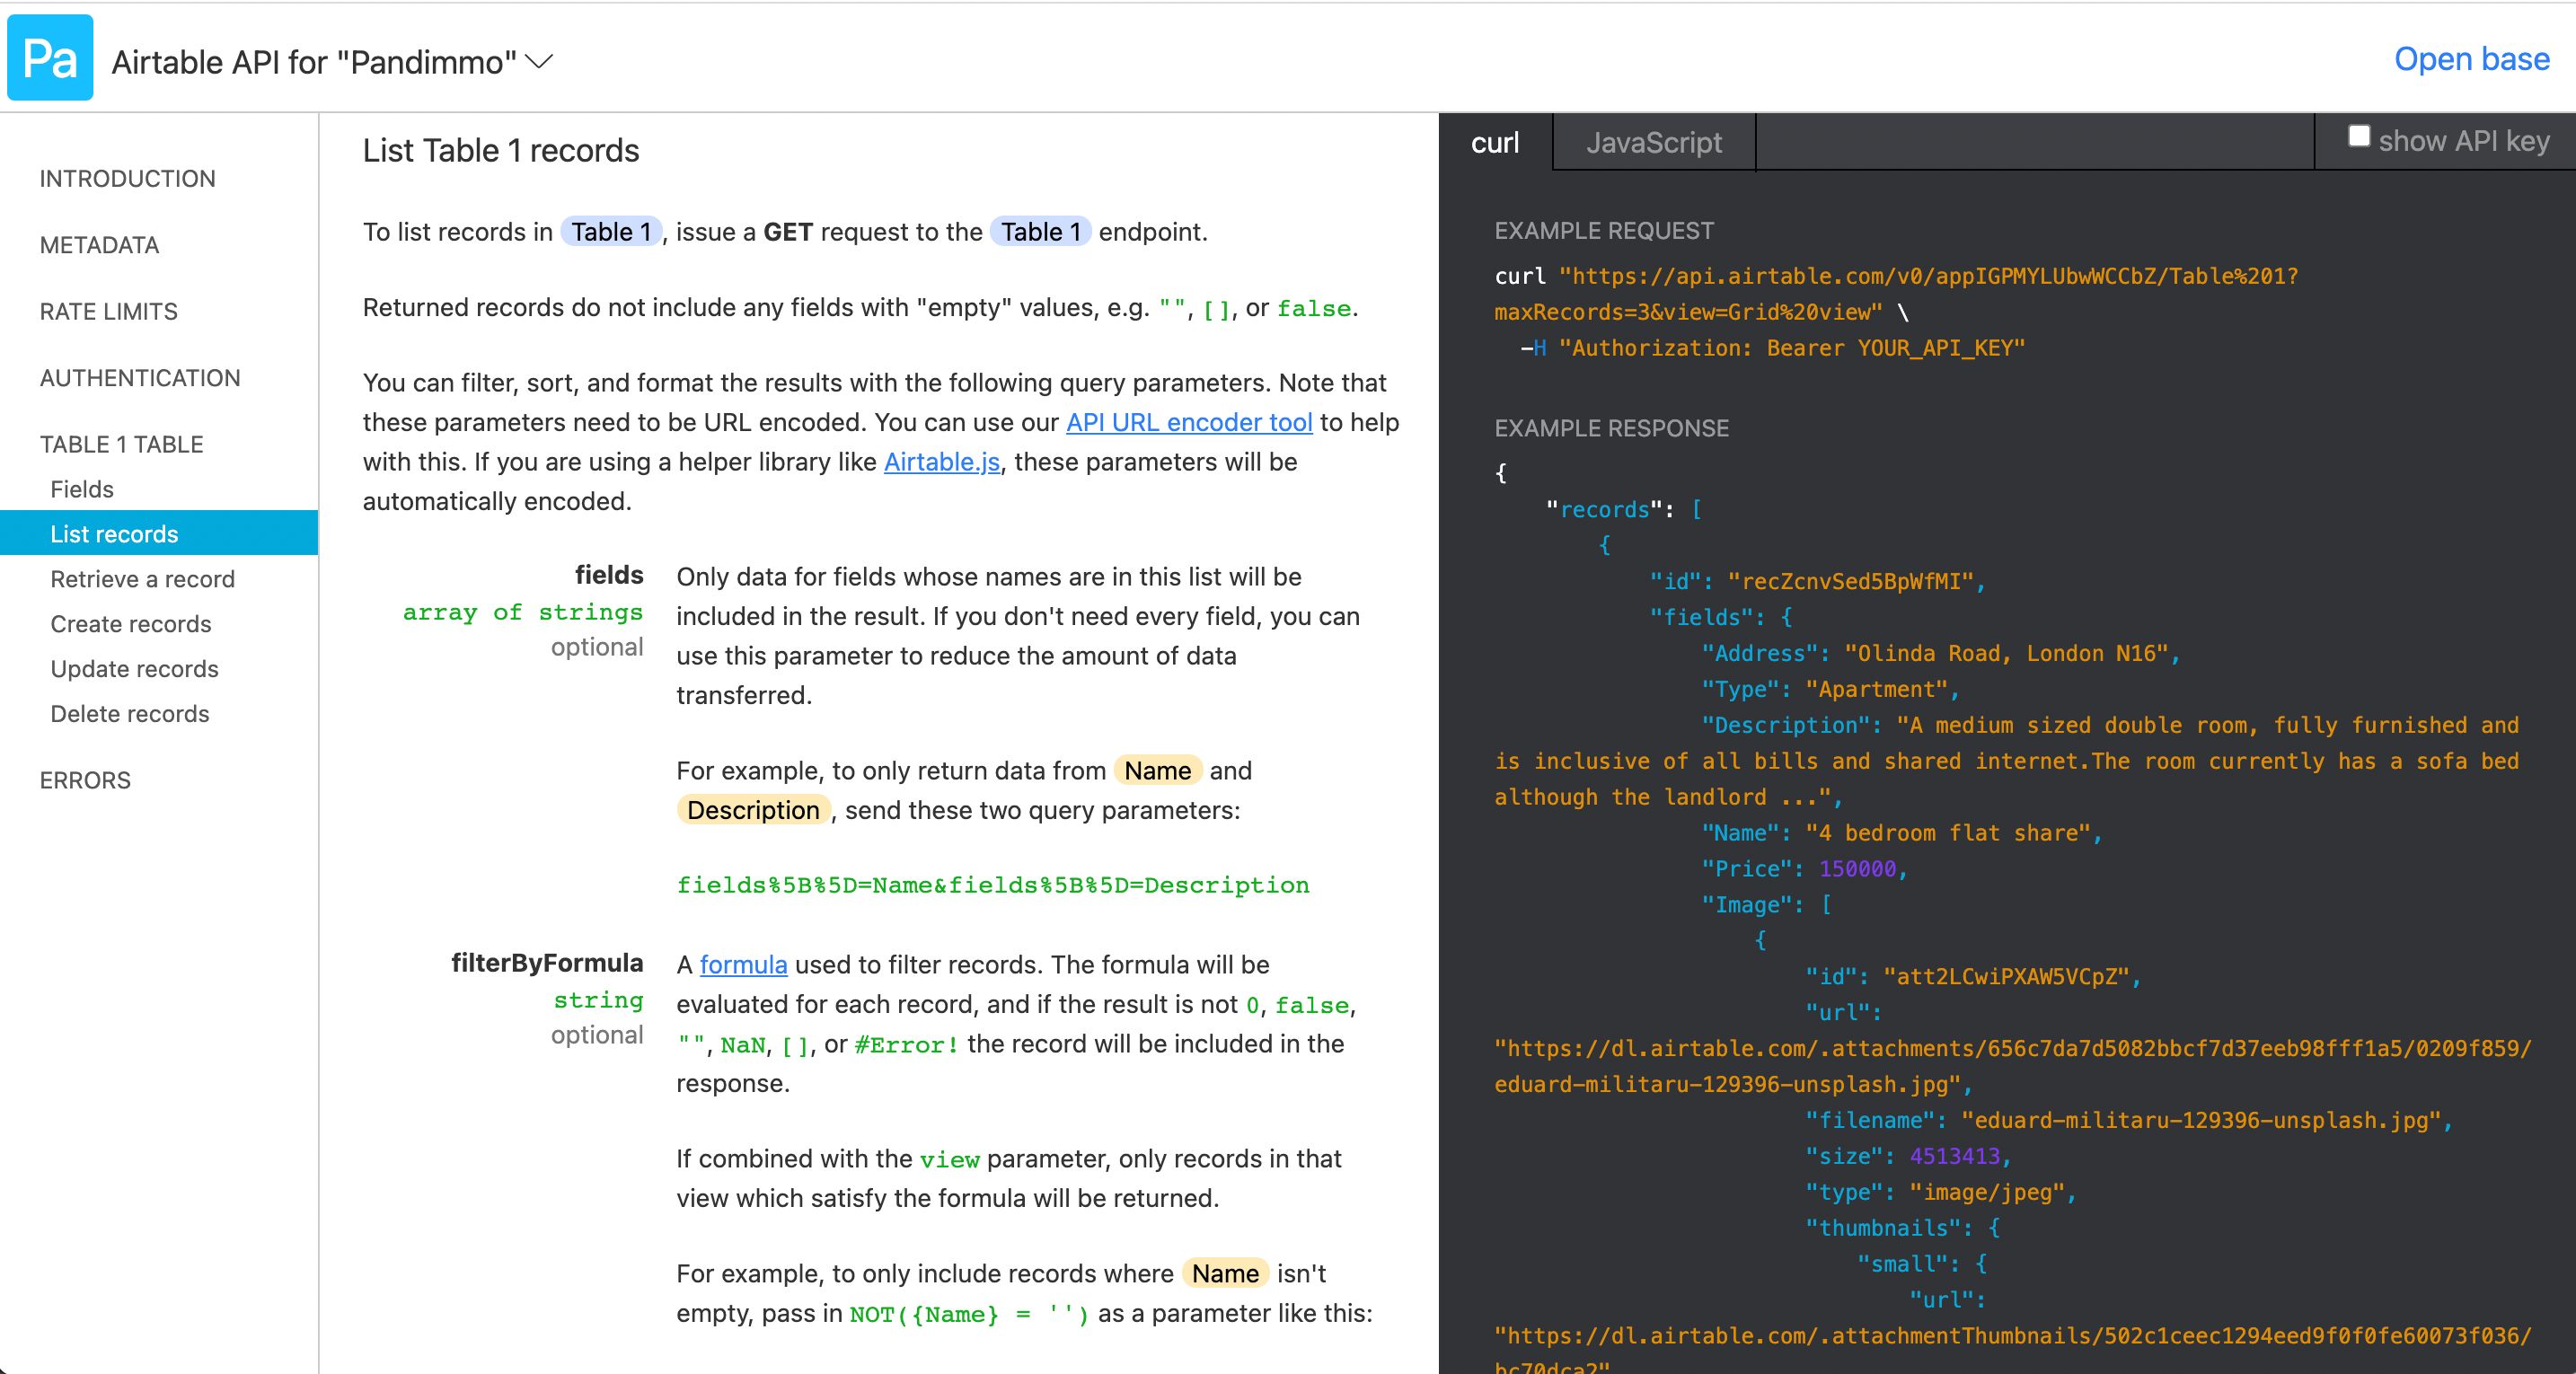
Copy and paste the API URL. Here is an example URL:
https://api.airtable.com/v0/appIGPMYLUbwWCCbZ/Table%201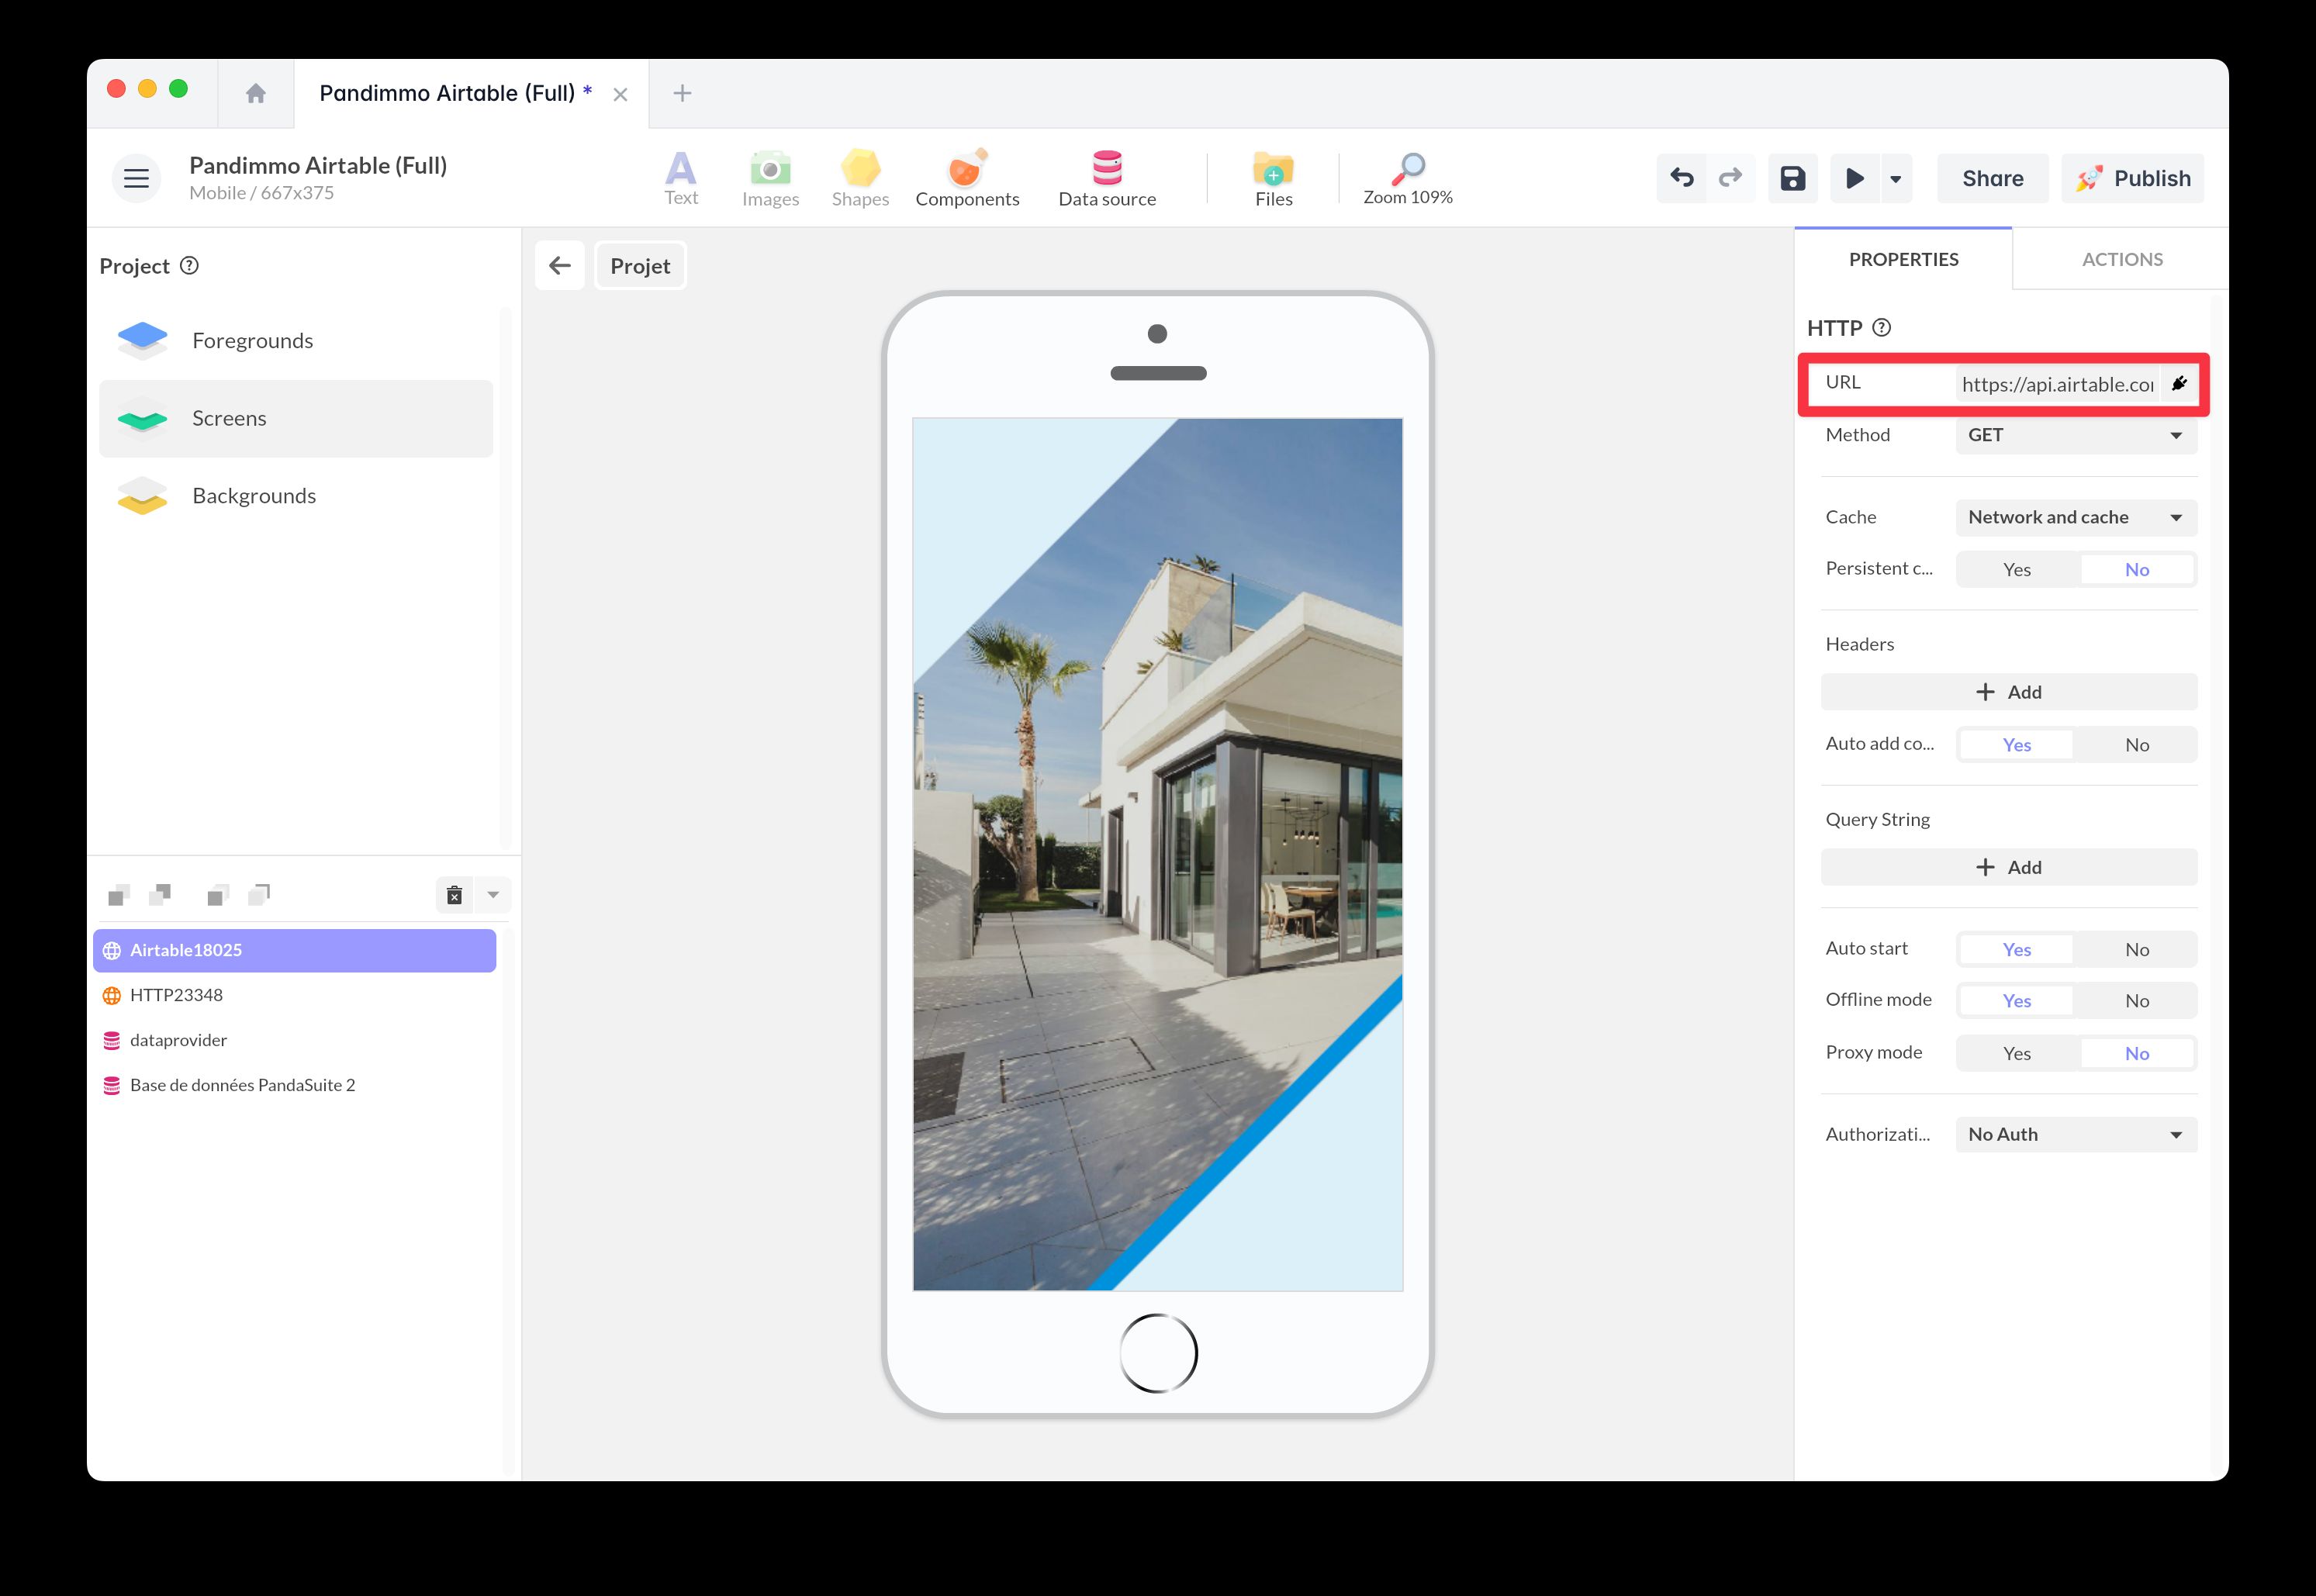
Personal token
There are different ways to add your personal token based on access permissions.
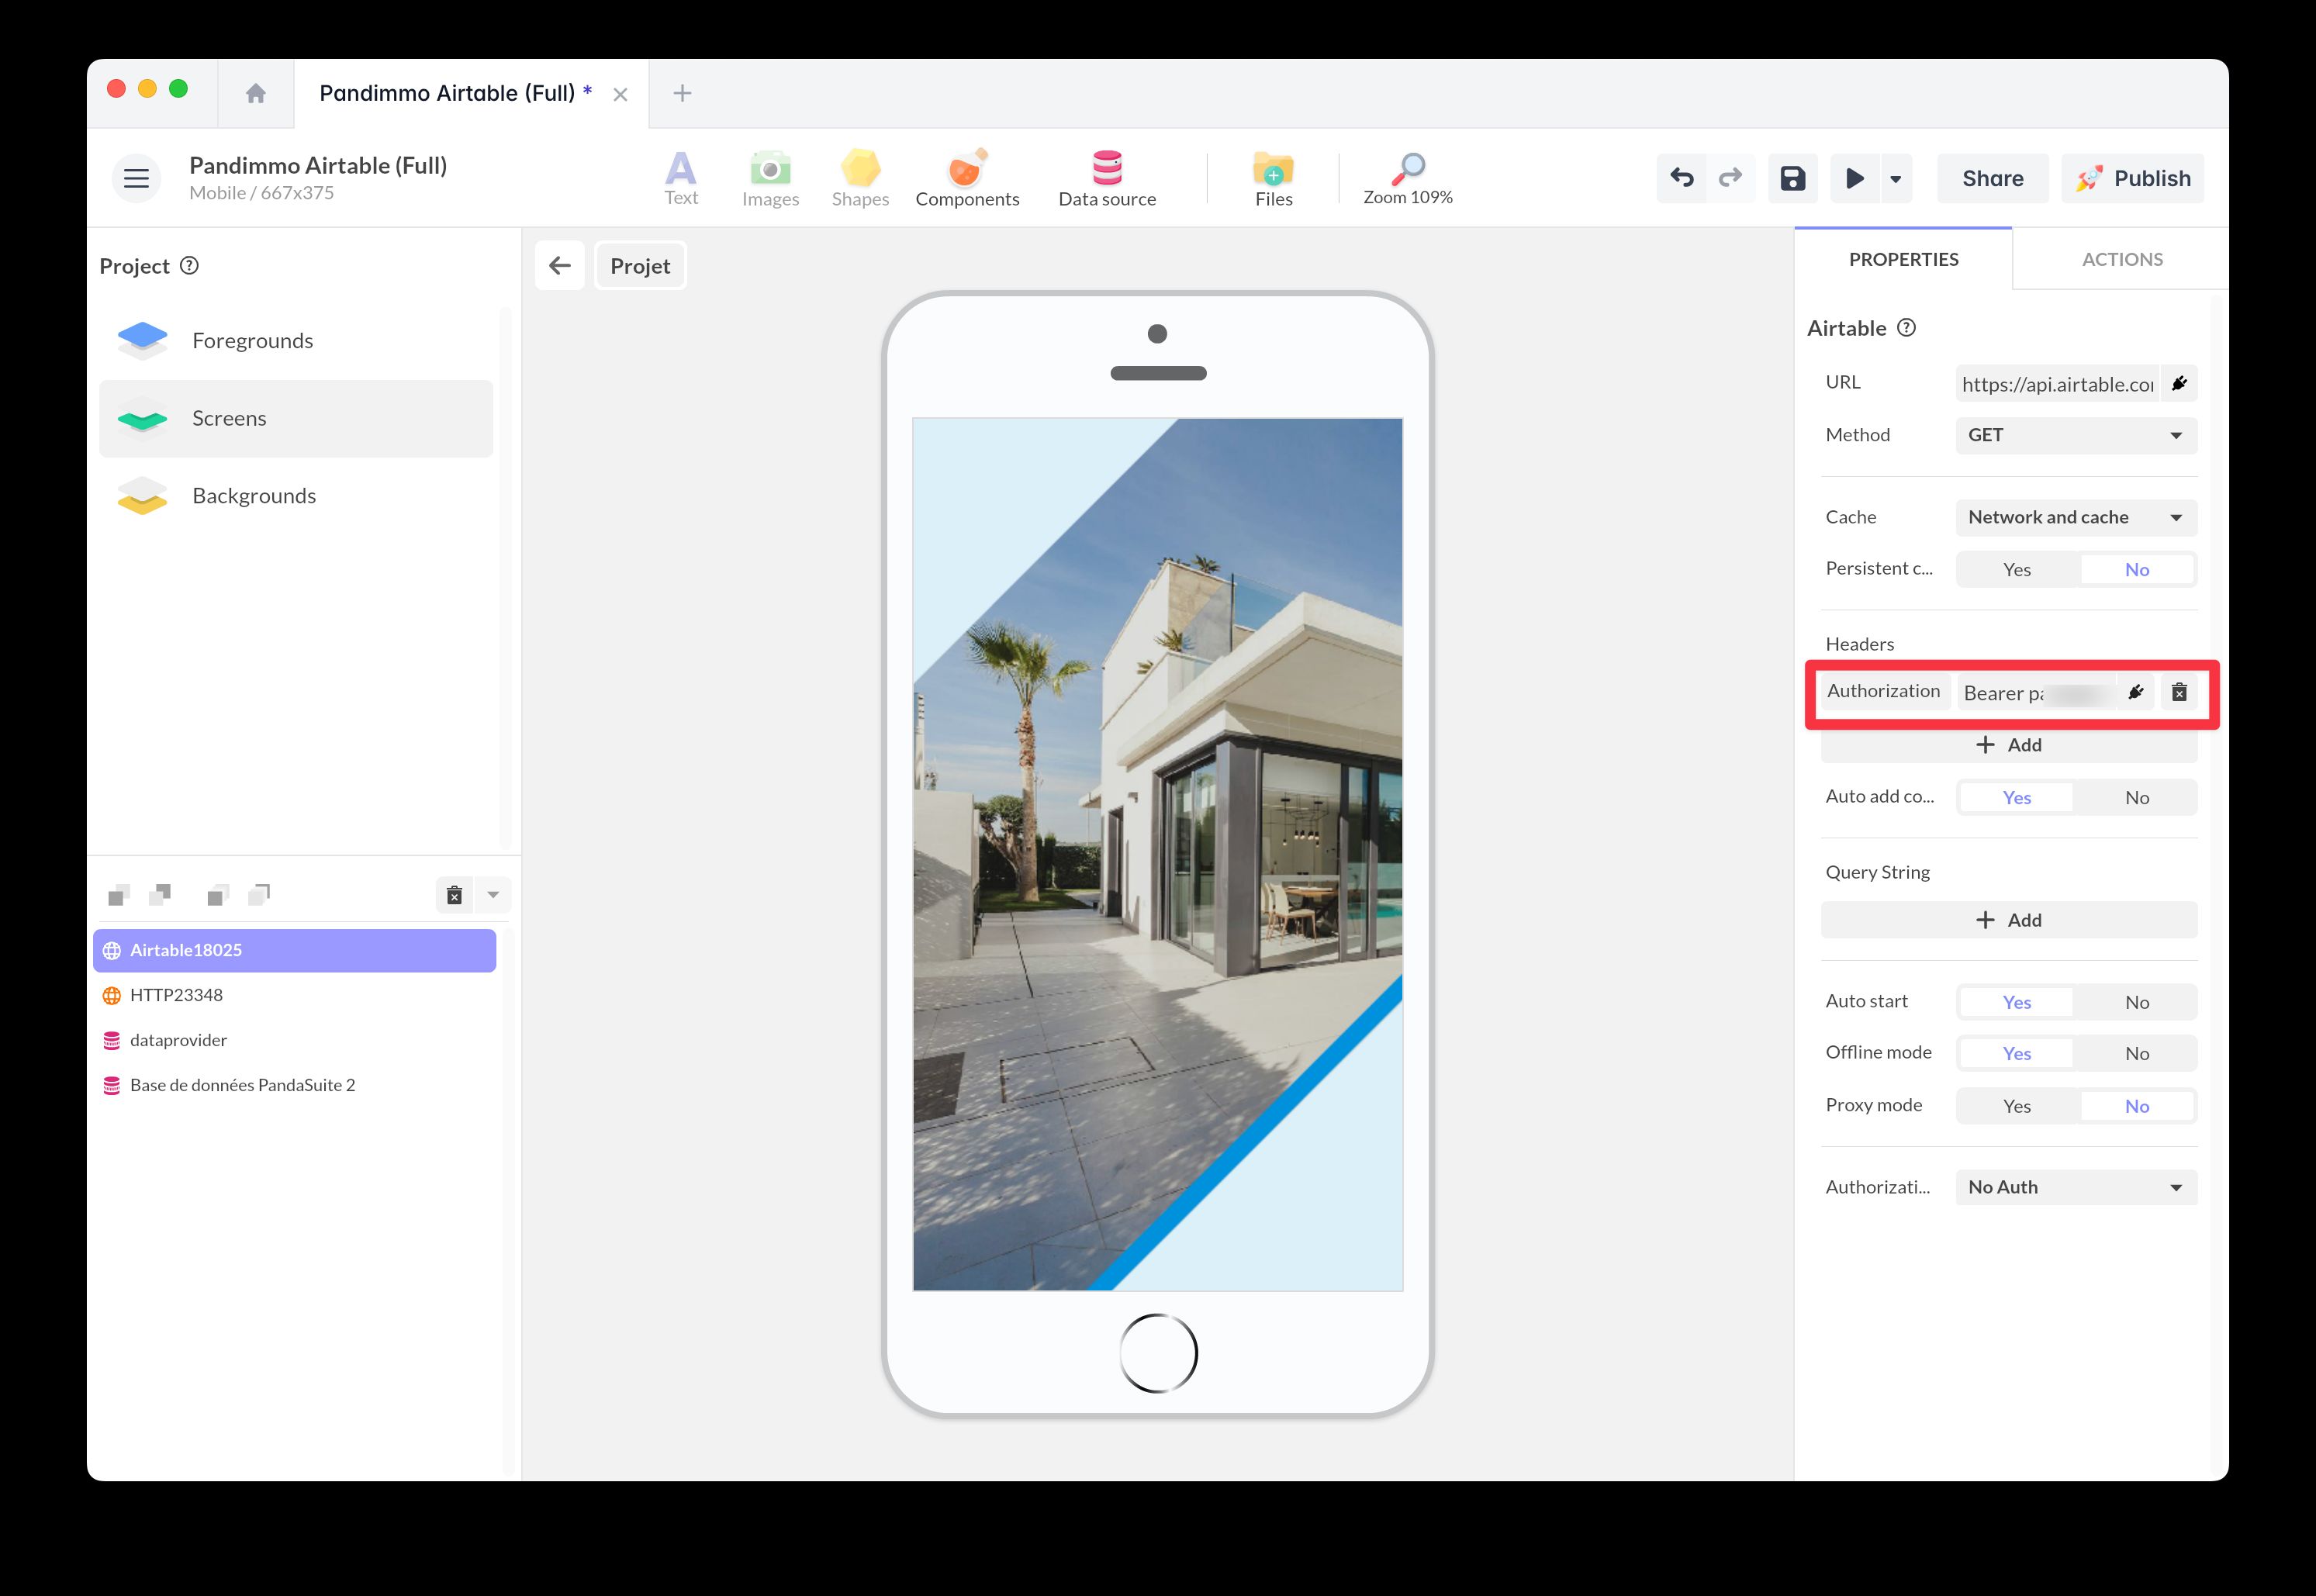
If your token is READ only:
- In the Header field, click + Add.
- Add Authorization as the key and Bearer TOKEN as the value, replacing TOKEN with your personal token.
If your token is WRITE, it should not be exposed to users:
- In the Authorization field, select API Key.
- In Value, enter the TOKEN: Proxy mode will activate automatically, securing the token by using PandaSuite’s servers as a reverse proxy.

Method
To retrieve data, select the GET method. To send data, select POST.
Cache management
Caching allows efficient reuse of previously retrieved API data, even when offline.
Choose from the following options:
- No cache: The app makes a network request without reading the cache.
- Cache first: The app first checks the cache before making a network request.
- Network and cache: The app returns cached content but also makes a request to update it, ensuring a fast response.
The Persistent cache option keeps the cache even after the app is closed.
Use cases
Display Airtable data in your application
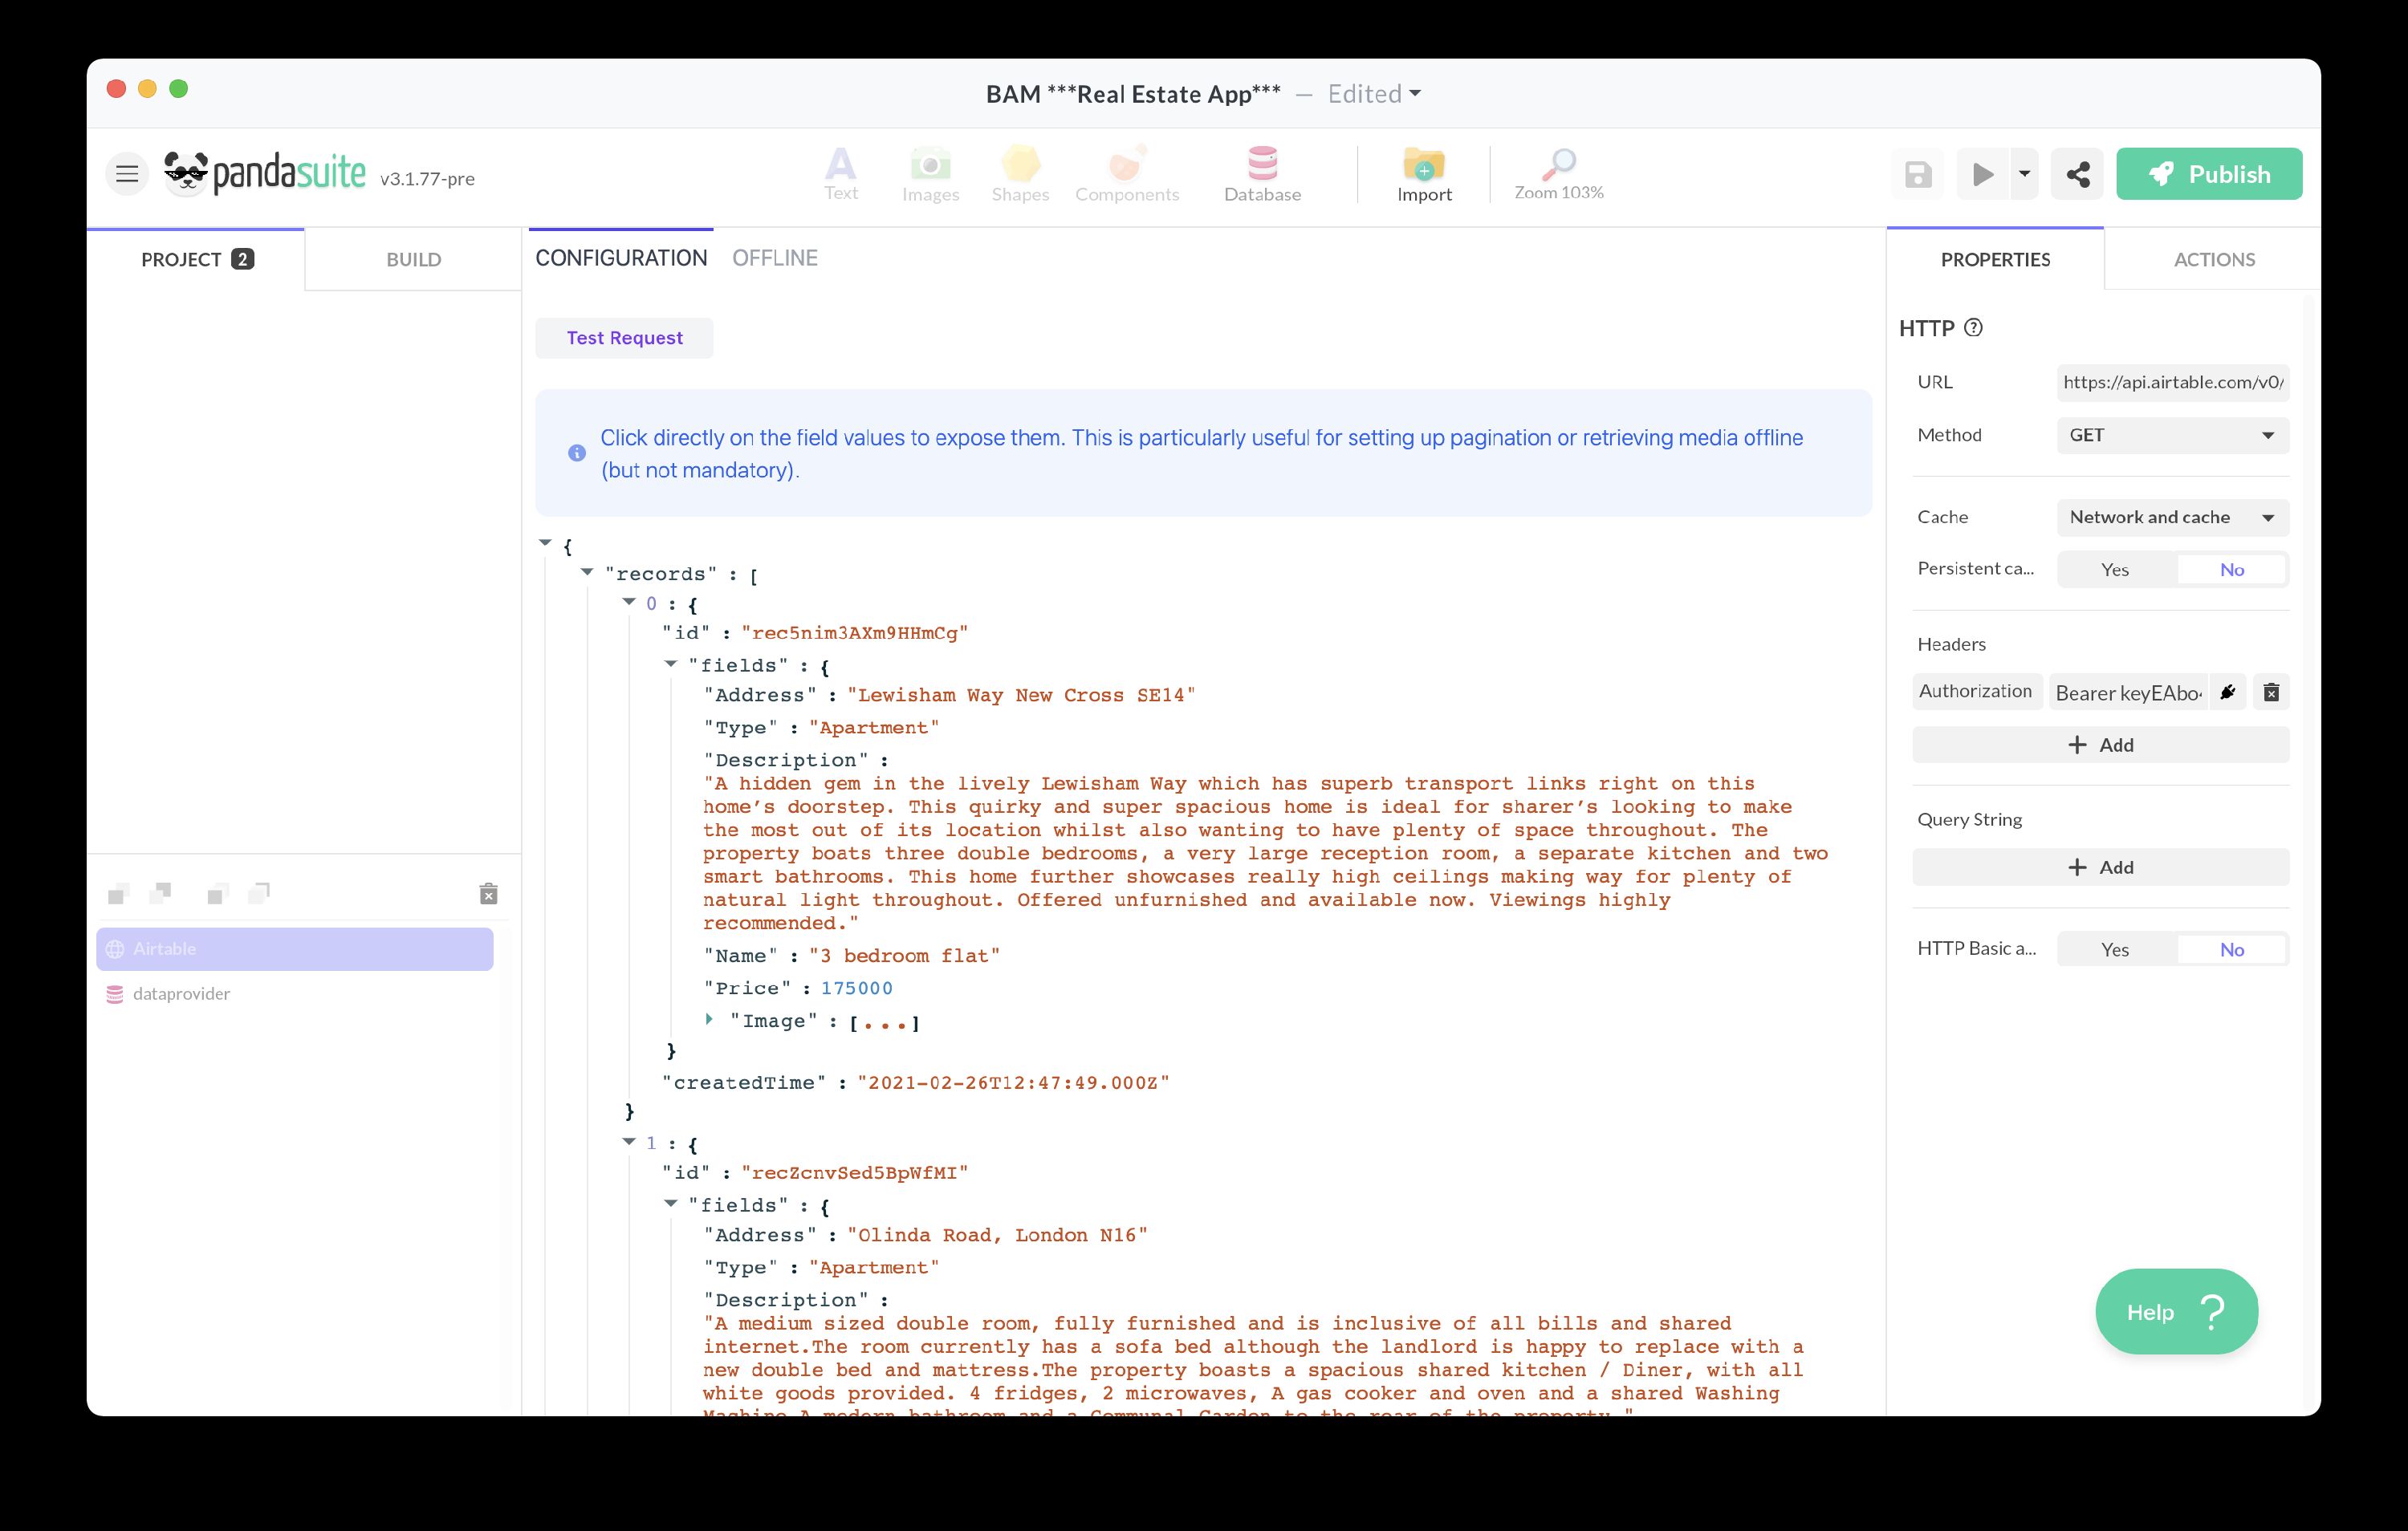
Test the request
Double-click on the HTTP component.
Click Test Request to send a request.
Ensure that data is displayed correctly.
If raw data appears, the API is correctly configured. PandaSuite Studio will then allow you to display this data using the Data Binding explorer.
Display data dynamically with data binding
Add a Collection component to display the data dynamically.
Bind the data source to your HTTP request.
Customize field displays based on your layout using data binding.
💡 Use variables to dynamically filter data and enable real-time search.